There are two main tasks to creating a case-bound book, and at this point you should have finished the first step, creating the textblock. Now it’s time to construct the cover. Once you’ve finished that you can put the two together to complete your book.
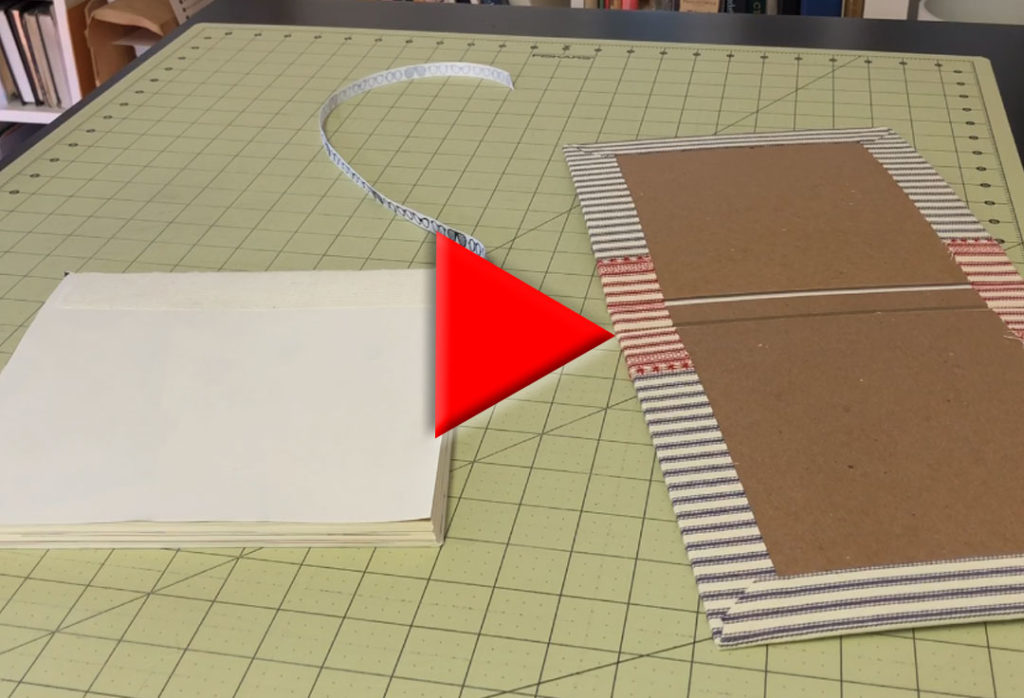
First you need to gather some materials. You’ll need paper or bookcloth, bookboard or chipboard, and PVA glue and a brush. If you want to create your own bookcloth you can watch the video posted here.
You need to carefully measure and cut the bookboards, taking measurements from your textblock. You’ll need the front and back board, as well as a piece for the spine.
Set up your bookcloth or paper so that you can line up the bookboard correctly. I use a straight edge, weighted down so it won’t move, along the top edge where I want the bookboard to go. Be sure you measure enough bookcloth to give yourself at least a one-inch margin all the way around the boards. I usually give myself more than that and then trim the cloth after I’ve glued the boards down.
Start with the spine and figure out where you want the spine placed on the bookcloth. In some cases, depending on the design on your bookcloth, this alignment may not need to be very accurate. In the case of the cloth I’ve created here, the placement matters.
Spread PVA glue on one side of the spine and position it on the bookcloth. I put this under weight temporarily while I spread glue on the next piece.
You want to leave a space between the spine and the covers – about a quarter of an inch. I’ve created a spacer out of two pieces of bookboard glued together to give me the correct spacing easily and quickly. You can see how using the spacer and having the straight edge weighted down both help to make the placement of the board a simple matter.
You can press this down with your hands, or use a brayer to make sure it’s being pressed completely down. Once again I weight this down temporarily while I work on the other side. Glue the other side down and press it down firmly.
Turn the board and cloth over and run a bone folder down the gutters created by the spacer. This will help give you the typical look that all hardbound books have, with that depression running down both sides of the spine.
Place the cover under a heavy weight and let it dry for a while. It doesn’t need to be thoroughly dry before the next steps, but weighting it down for a bit helps to make sure everything is firmly glued down.
Next, trim the bookcloth so you have a one-inch margin on every side. Then trim the corners at a 45 degree angle. This will allow you to fold the margins over without creating too much bulk in the corners.
Don’t trim them right up to the edge of the board, though. If you do that you won’t be able to completely cover the corner of the board and it will poke out, ruining the look of your cover. Trim them about a quarter of an inch away from the corner.
Get out your PVA glue again and start gluing one of the sides. You don’t have to be particularly neat about applying the glue – just be careful not to get it on the good side of the cloth. Make sure you get glue right up to the corners. Press down the first side using the ball of your hand to press it around the edge of the board. Press this firmly down with your fingers or a bone folder. Do the same with the opposing side.
Push the little corners in to cover the corner of the bookboard. You can do this with your fingers or with a bone folder. You want to make these corners as smooth as possible.
Finish gluing all four sides, paying special attention to the corners, and smoothing the flaps down with a bone folder, making sure they are firmly glued down. Also run your bone folder along the gutters on the inside, making sure those are glued down.
Once again weight this down and let everything dry.
Now you’re ready to join the signatures and the cover.
Place a piece of scrap paper underneath the front endpaper to act as a glue barrier. Brush PVA glue on the back of the endpaper, starting with the area under the mull. Cover that with glue and then press the mull down, adding more glue on top of the mull and gluing the rest of the endpaper.
Remove the barrier paper and place the textblock on the cover with the glue side up. This gives you the opportunity to take your time and position everything exactly. Position the textblock perfectly and precisely on the back cover. Fold the front cover up and over, aligning it with the back cover, being very careful not to shift the position of the textblock as you do this.
Press this down firmly. You can also turn it over at this point and press the endpaper down with a bone folder.
Turn the book over and repeat this process on the other side. Make sure as you fold the cover up and over that you are aligning it with the other cover. This will ensure that the endpapers aren’t crooked and that the covers will open all the way.
At this point you can open the covers and burnish down the endpapers, if necessary. Use a barrier paper to do this so you don’t damage the endpapers. They’ll be a little damp from the glue and susceptible to damage.
You’ll want to weight the book down at this point and let it dry thoroughly. Before you do that place a piece of waxed paper between each cover to act as a moisture barrier for the rest of the book as the endpapers dry.
I also add a piece of blotter paper next to the endpaper to speed up the absorption of moisture, although this isn’t really necessary. You don’t want to skip the waxed paper, though, or you risk distorting some of the pages of the book as they absorb moisture.
Place all of this under a heavy weight. If you don’t have a book press you can use books and weights for this part. Let this dry over night.
That’s it. That’s how to make a hardcover book!


