

Piano Hinge Binding
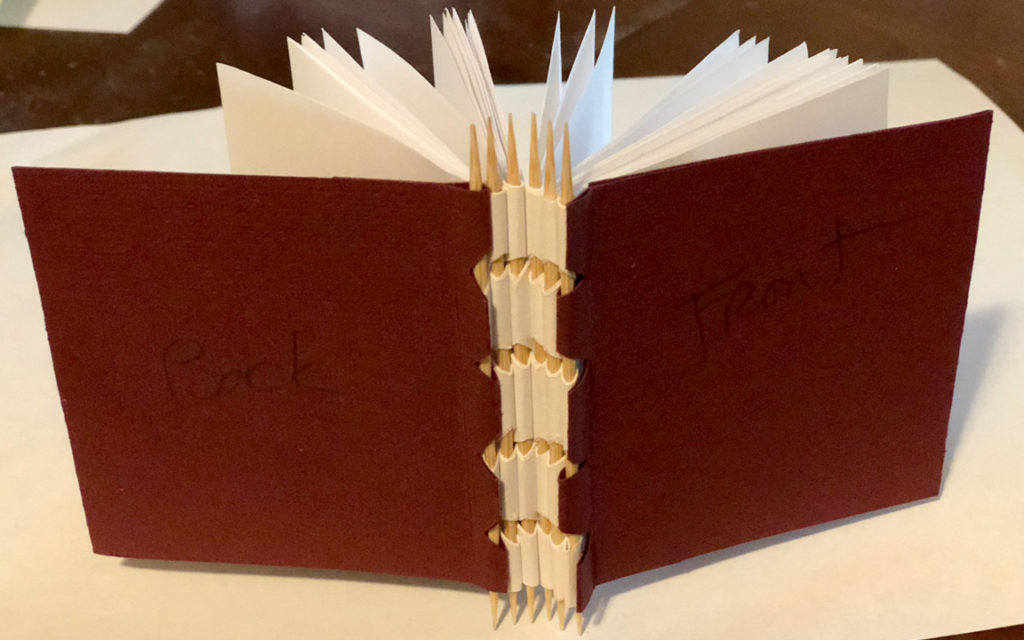
The Piano Hinge Binding is so named because the way the spine is woven together resembles the hinge on a piano lid. It’s a very fun and unique binding, very simple to create, and allows for a lot of creative variations.
The traditional materials for the binding are bamboo skewers that can be found at any grocery store. You can get them in many different lengths and thicknesses. But, you can also brainstorm lots of different possible replacements for the skewers, like pencils, or crayons or knitting needles. Almost any long, thin, stiff object works. Use something with a point on it, as that helps make the construction a little easier.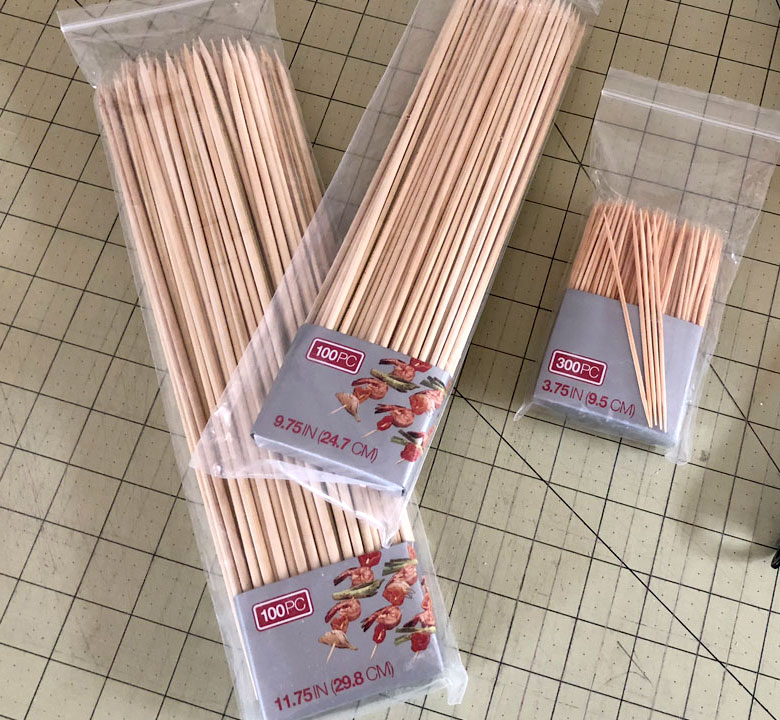
If you wanted something very organic you could even find a bunch of mostly straight sticks and whittle a point on one end.
You can paint the skewers for an added decorative effect, weave yarn or thread around them and add beads or other embellishments.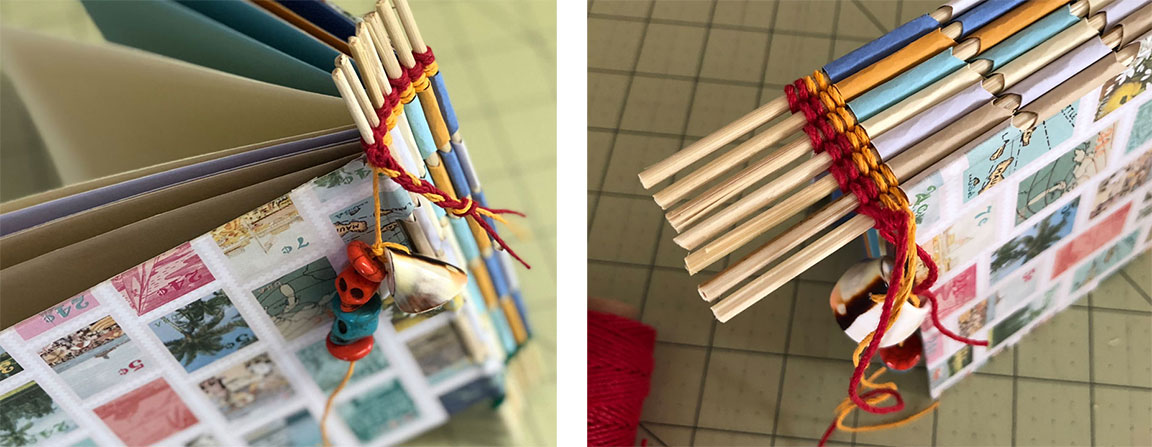
First, Get the Dimensions
The first thing you need to do is figure out the dimensions of your book and then cut the paper for your signatures. For a book that is 5 x 5 inches you’ll want paper that is 5 x 10 ½ inches. The extra half inch is for the spine. If you’re creating a smaller book using smaller skewers, the amount you allow for the spine will be smaller.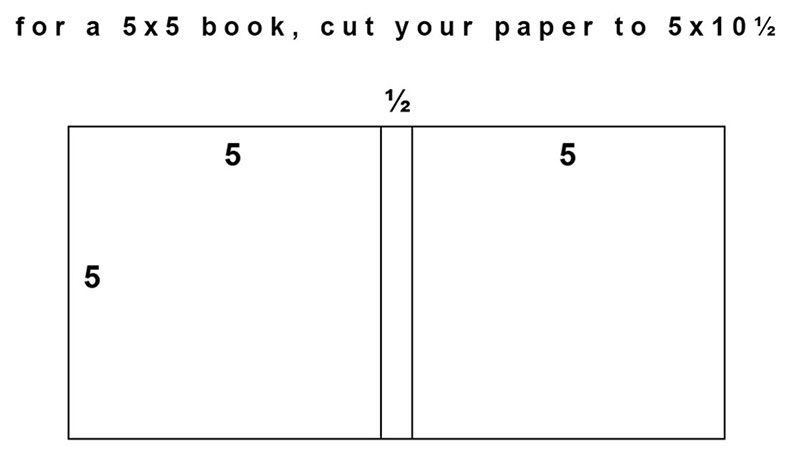
Also, whether your signatures are just single pieces of paper (technically referred to as folios) or made up of multiple sheets of paper will depend on the weight of the paper.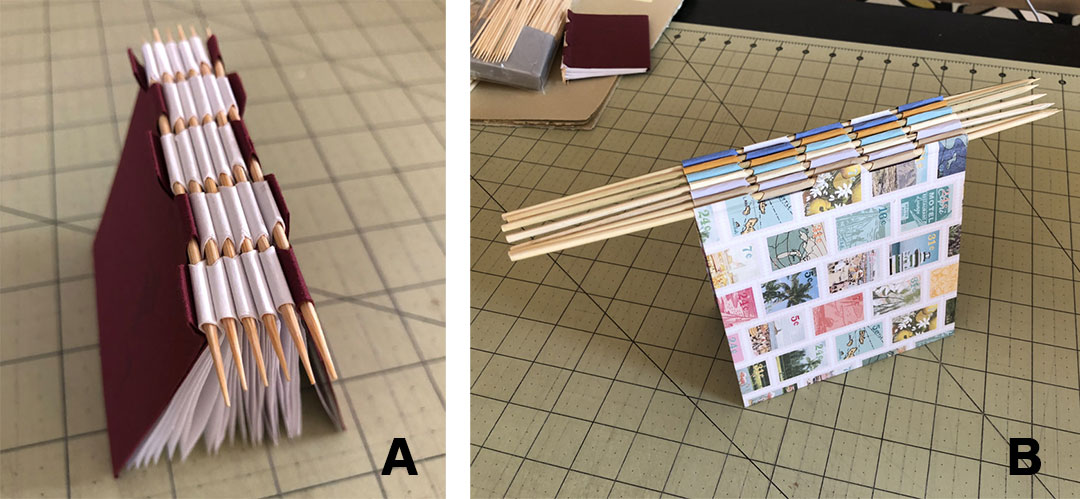
With the smaller book (example A) the pages are bond paper, so you could use three or four pages for each signature. In the case of the larger book (example B), the pages are heavy card stock, so a single piece is appropriate.
Once you have your paper cut, don’t fold it in half. Instead, wrap it around one of the skewers and crease the paper on the outer edge of the skewer.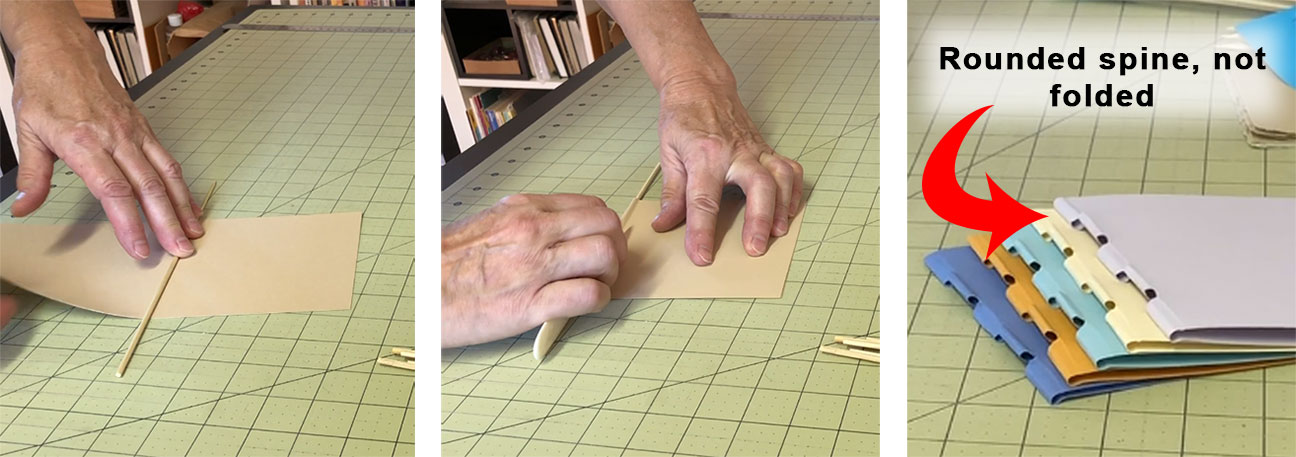
This keeps the spine of your book more rounded rather than having paper along the spine that is heavily creased. It just looks nicer and is more appropriate to this method.
Use a bone folder or your finger to crease the paper. Be careful about using the point of the bone folder or your fingernail because you are likely to cut through the paper if you apply too much pressure. The edge of the bone folder should be sufficient to give you a reasonable crease. I usually do this on both sides so the paper is evenly creased.
Use a Template to Mark the Holes
Next you’ll want to mark the spine with a template that you made ahead of time. You can make as many cuts as you want along the spine and they can be an even or odd number.
In this example I made a mark every inch, resulting in four cuts. You can cut triangles in your template if you want all of your cuts to be exactly precise. I tend to free-wheel these cuts.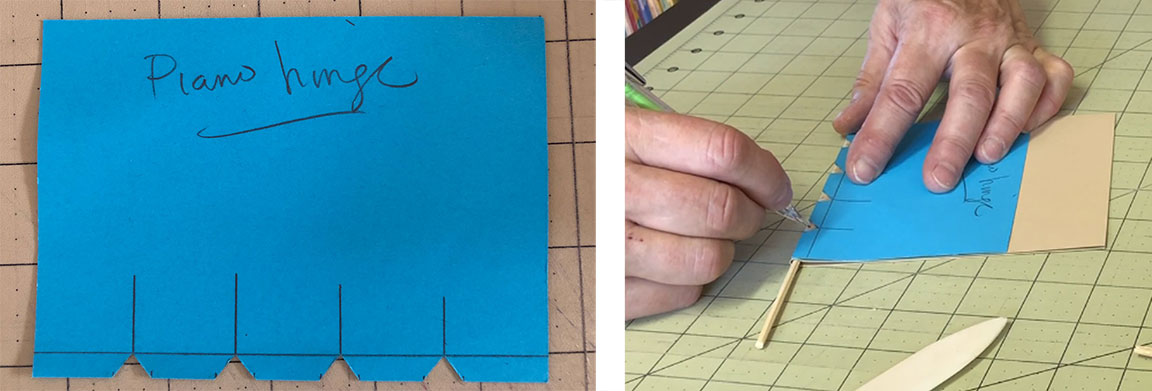
If you do make specific triangles for the template be sure to test the size on some extra paper that is similar to what you’ll be using so that you know the holes won’t be too large or small before you commit to cutting all of your paper.
So, I have made a tick mark at every place where I want to cut a triangle. By the way, you don’t have to cut triangles, you could just make a straight cut at each of these marks. Then, when you went to construct the book it would look even more like a piano hinge because you wouldn’t see the skewers through the cuts. I like seeing the skewers so I make triangular cuts.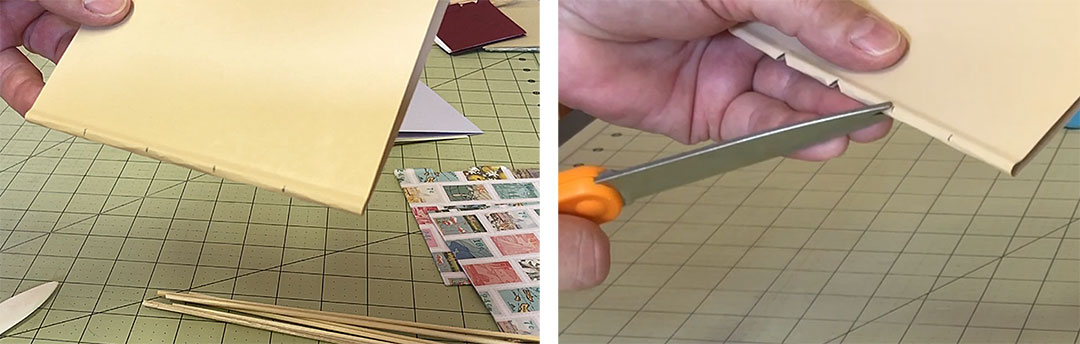
I also like the skewers to be fairly tight. So, I don’t cut triangles right up to the crease I’ve made against the edge of the skewer, but a little bit in from that. Do a few test runs with the paper you want to use. This will help you decide exactly how big these cuts need to be.
Get the Tabs Correctly Aligned
Once you have made the cuts in all of your signatures, you’ll want to get the tabs that have been created headed in the right direction. Press all of the odd tabs one way, and the even tabs the other way. 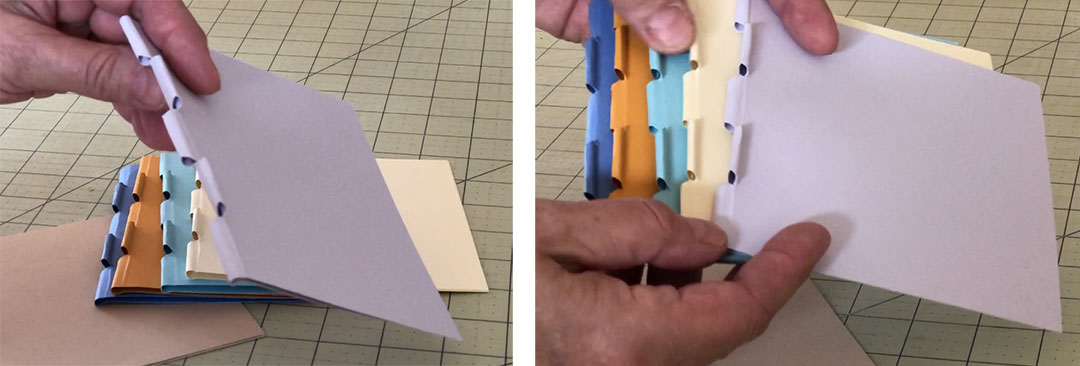
You don’t want to make hard folds on these tabs, just get them pushed in the right direction. Do this with all of the signatures and make sure to keep them all oriented the same way.
Put the Pages Together using the Skewers
Take the top two signatures and run a skewer through the tabs, alternating from one signature to the other, weaving in and out of the tabs. So, in this first example I’ve started with the tan signature, then threaded into the tab of the purple signature. Then alternate tan, purple, tan. This weaves those two signatures together, and if your holes aren’t very big, the connection between the two should be reasonably firm.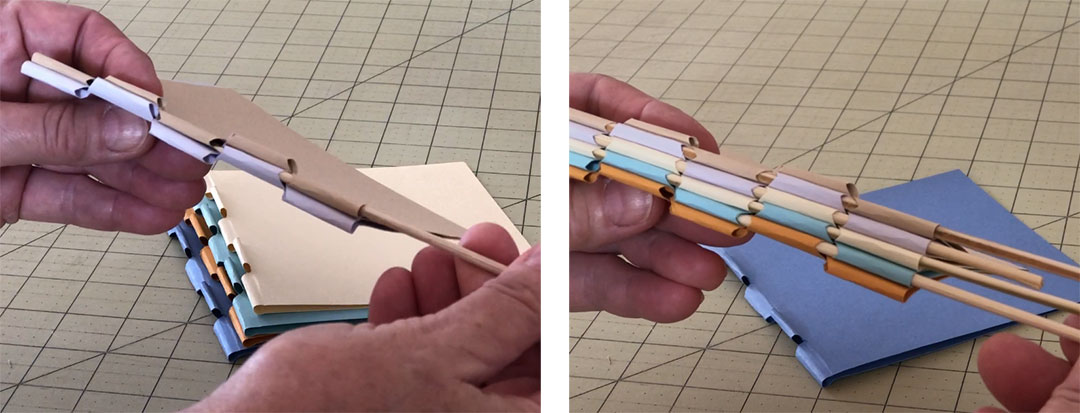
Pick up the next signature and another skewer. Line up the signature and start the skewer through the first tab of the second signature – in this case the purple signature – then through the tab of the new yellow signature. Once again weave back and forth – purple, yellow, purple.
Continue this process with the rest of the signatures. Always start in the first tab of the signature you just finished with and then weaving into the next tab of the new signature.
Once you have woven all of the signatures together you should end up with a fairly tight textblock, if the holes weren’t too big.
Add a Soft or Rigid Cover
On the front and back pages you’ll have tabs that haven’t been used. You can leave your textblock like this, if you like that look or you can make those disappear by adding a soft or hard cover. I’m adding a hard cover here, front and back, which takes care of those extraneous tabs.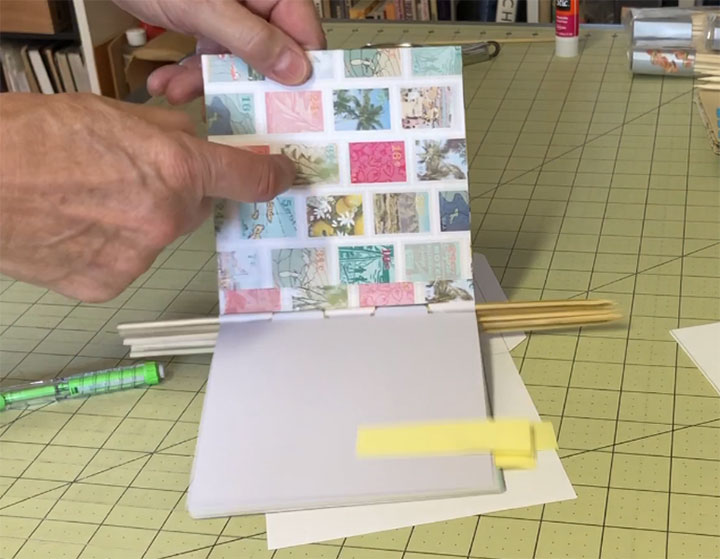
So the next few steps will show you how to make hard covers for your piano hinge book. To make a soft cover you can follow the same instructions and leave out the part where you add the bookboard.
Measuring the Cover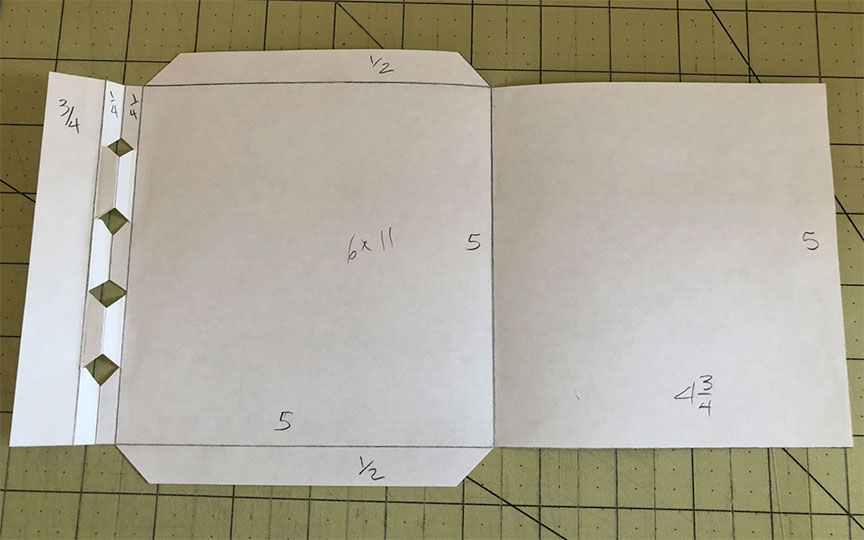
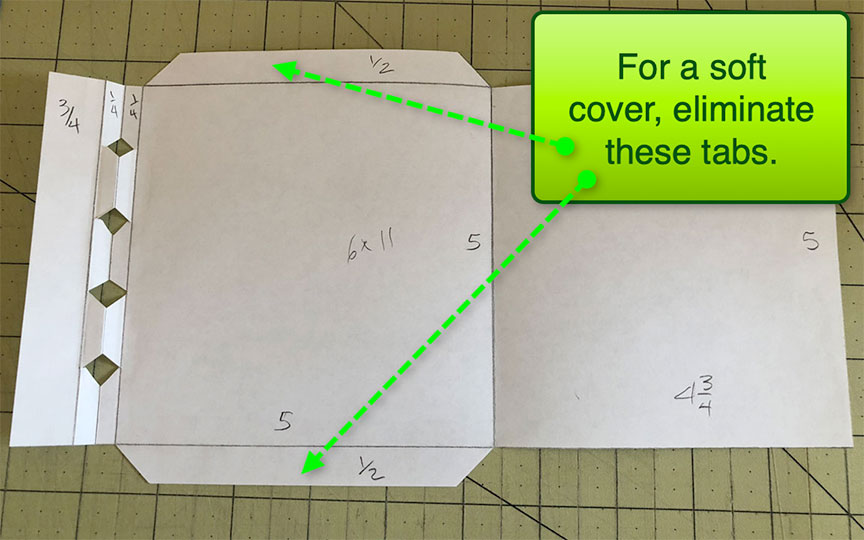
You can follow the general measurements that you see here (for a 5 x 5 book) to figure out the measurements for your cover. Obviously, if your book is not 5 x 5 you’ll have to make adjustments to these dimensions.
If you’re making a soft cover you won’t need the tabs on the top and bottom. Those are just meant to wrap around the bookboard.
I’d suggest making a mockup of your cover using cheap bond paper until you get it just right.
Once you have the basic form of the cover cut out you’ll want to score along the fold lines. This will make it easier to fold these areas.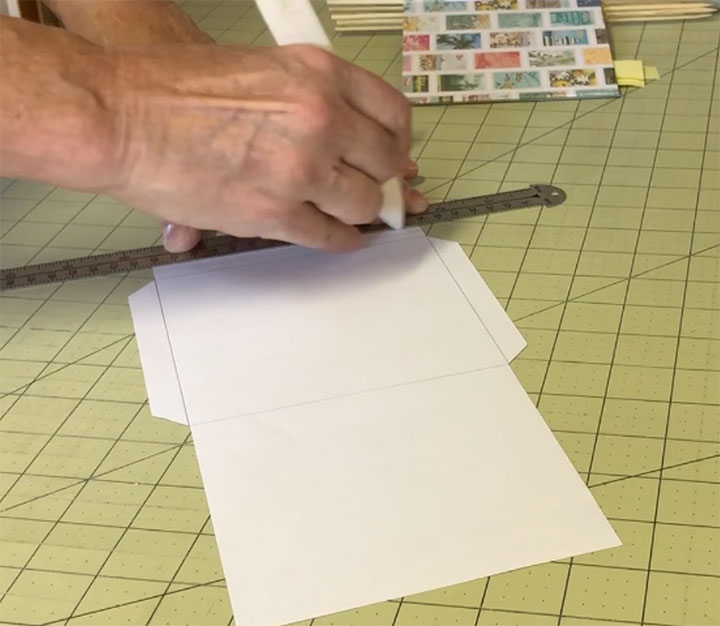
Wrap the spine section around a skewer, just as you did with the signatures. Use the same template that you used for the signatures to mark your cover for the cuts. Cut triangles at these marks, just as you did with the signatures.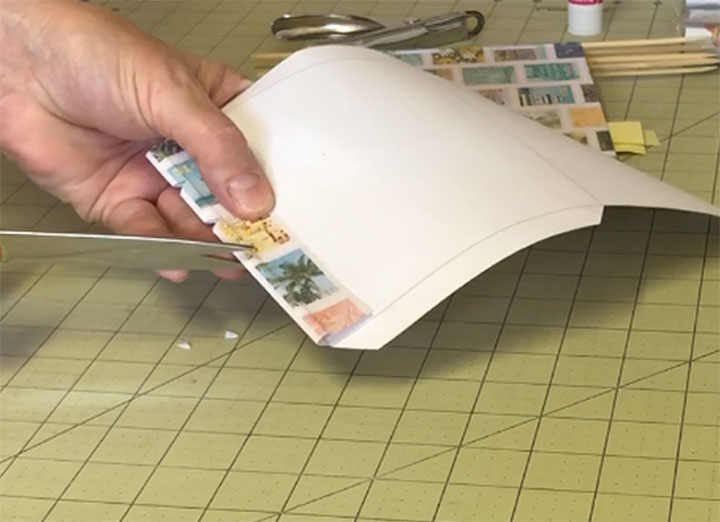
A Little Different Technique for the Cover Tabs
At this point you’ll do something a little different with some of the tabs on the cover. Remember how some of the tabs on the front and back of your signatures stick out? You’re going to get rid of those when you add the cover by folding in the corresponding tabs on the cover so they are on the inside.
Start by orienting the cover on your book the way it’s going to sit when it’s finished and identify which tabs need to be pushed inside. These will be the same as the tabs left hanging on the last signature. So, if tabs 1, 3 and 5 are loose on the signatures then you’ll want to fold tabs 1, 3 and 5 into the inside of the spine on the cover.
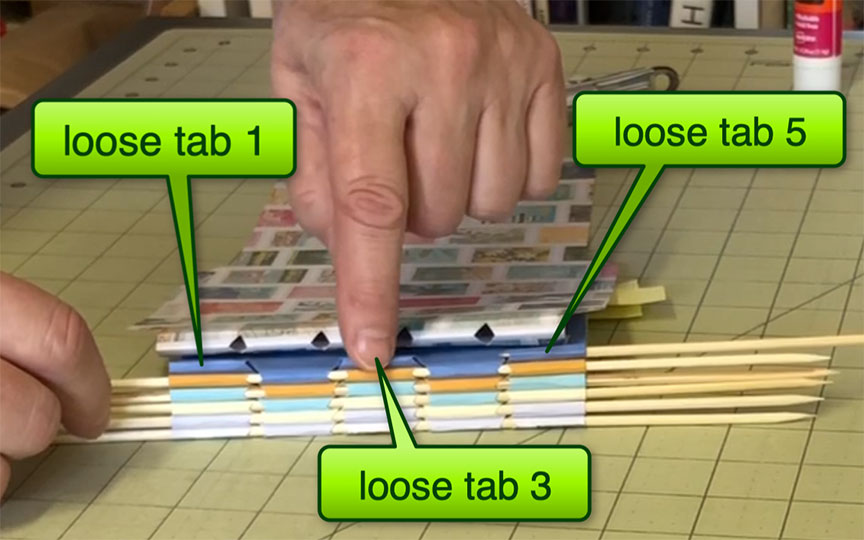 Make those folds along those tabs nice and crisp and then push those pieces to the inside. In this example, that would leave you with only 2 tabs sticking out.
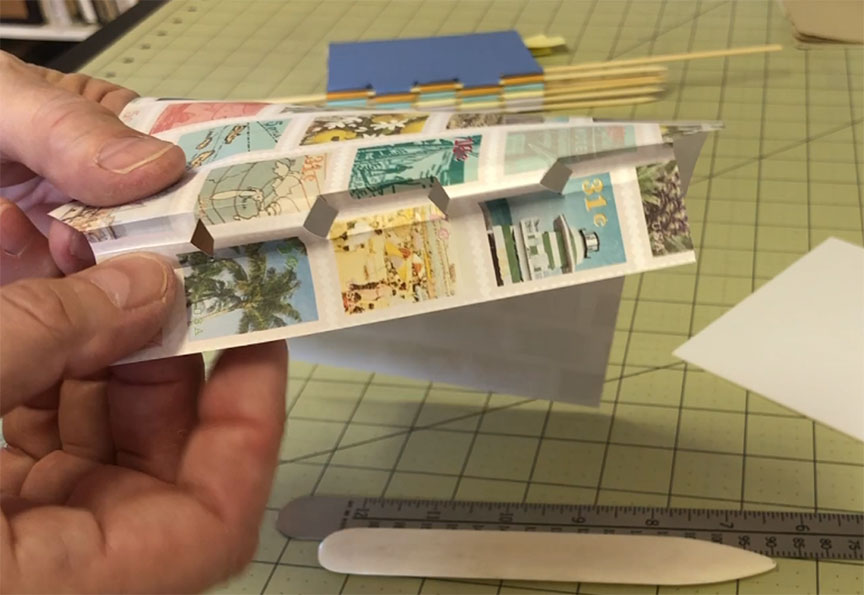
Glue the Bookboard to the Cover
Next you’ll want to glue the bookboard to your cover. You can use a glue stick or PVA glue. The glue stick I’m using is acid free, so it’s sort of the best of both worlds: quick and easy to use and PH neutral.
Spread glue over the entire backside of the portion of the cover closest to the spine. Press down the tabs that you folded inside to glue those down and then apply more glue to the top of those tabs.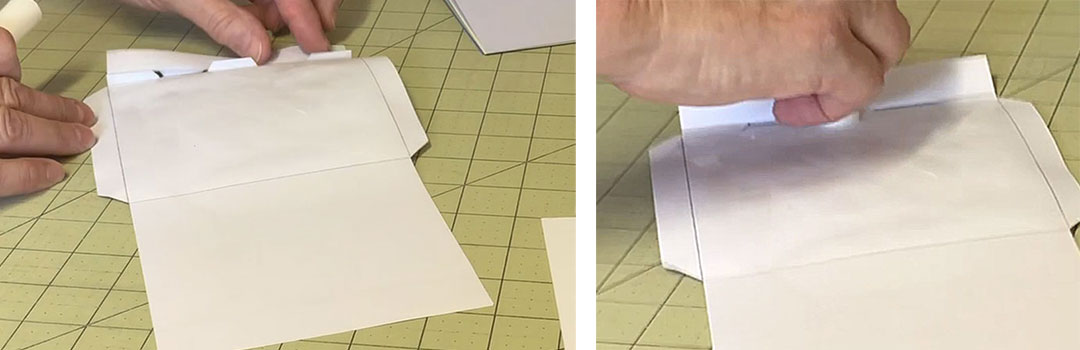
If you are making the hard cover version, also apply glue to the upper and lower tabs that will fold over the bookboard. Do this on a piece of scrap paper so you can get all of the edges.
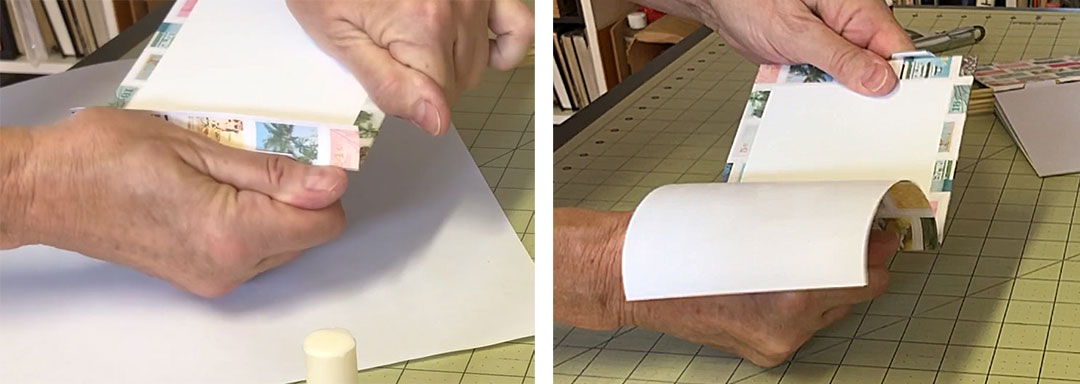
Carefully place the bookboard into position on the cover paper and wrap the upper and lower tabs over the edges of the board. Smooth all of this down with a bone folder to make sure you get good contact everywhere.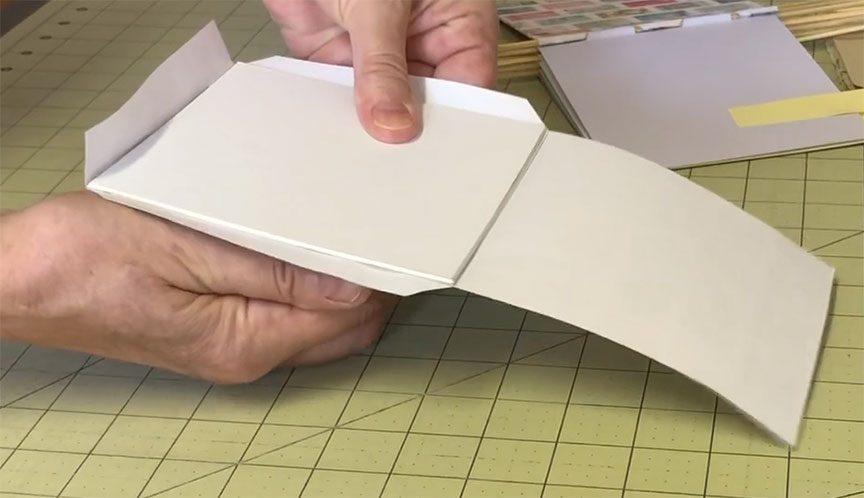
Next carefully glue down the flap that is left. Be careful not to get any glue on the tabs themselves.
 The last step for the cover is to glue down that final large flap. You might want to put the finished cover under a heavy weight for a little while to ensure that all of the parts are firmly glued down. Follow these same steps for the second cover.
Attach the Covers
Attach both covers to your signatures using skewers just as you did with the signatures.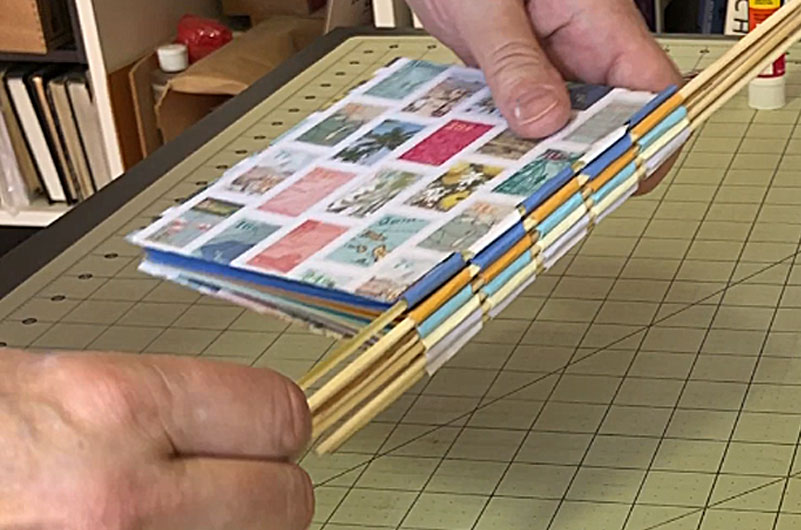
You might want to trim the skewers, either to just make them shorter or you might want to trim the sharp points off. I kind of like the sharp points, but some people don’t. You can try to trim these with sharp scissors or a blade, but those techniques often result in squashed ends. The perfect tool for this is a dog or cat nail trimmer. It cuts easily and keeps the sticks nice and round.
Final Steps
As a final step you might want to add thread to the head and tail of the spine. This is particularly useful if your skewers are a bit loose and you don’t want them to fall out. Just weave the thread back and forth between the skewers, ending where you started and tie the thread into a knot.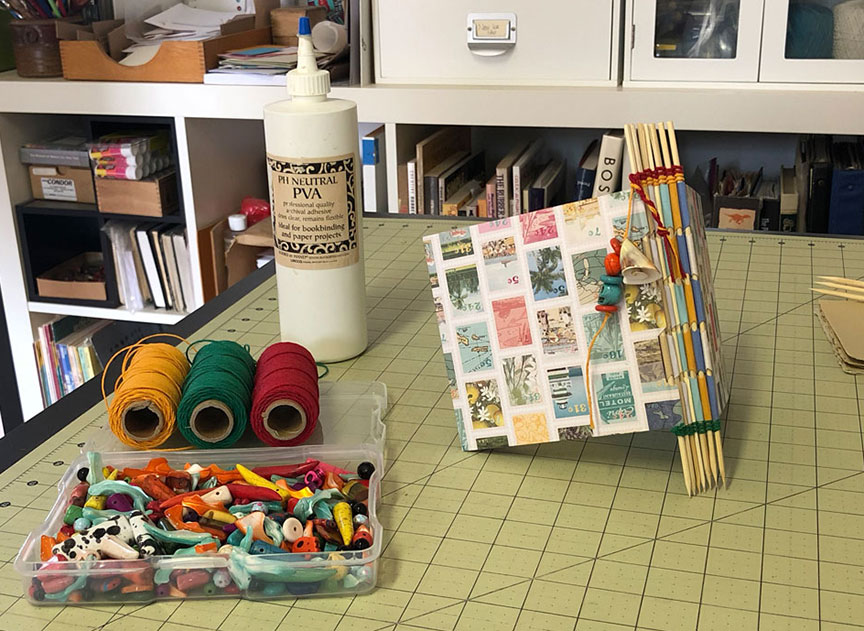
Cut the thread ends short or leave them long and add beads or other embellishments. You can use different colored thread and, if you do have loose skewers, you can add a bead of glue along the edge of the thread and skewers to help hold everything in place.
I prefer not to have to do this because I like the option of adding or moving pages in my book. Keeping the skewers taut but unglued allows me to do this. However, if the skewer holes were a little too big and the skewers are at risk of falling out, it’s a reasonable solution.
So there you have the piano hinge binding – how to make a really cool book with kitchen skewers!

