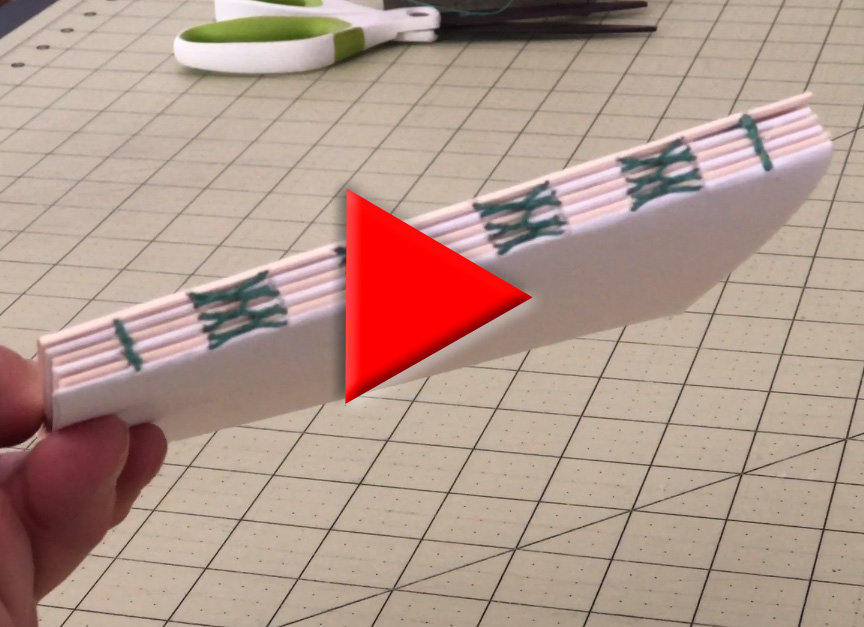
Basic French Link Stitch
This stitch can be used as a decorative stitch on a book with an exposed spine or as a way to sew your signatures together if you are going to do a case binding, although there’s no real advantage to doing the extra bit of work for this stitch just to make it invisible in a case bound book. Using it on an open, exposed spine makes the most sense.
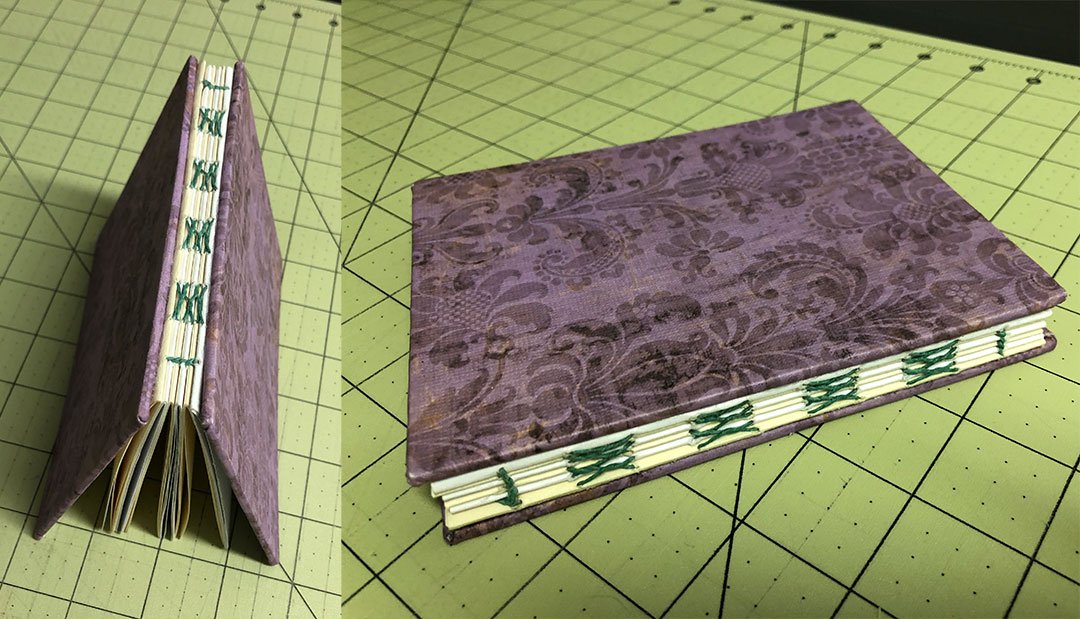
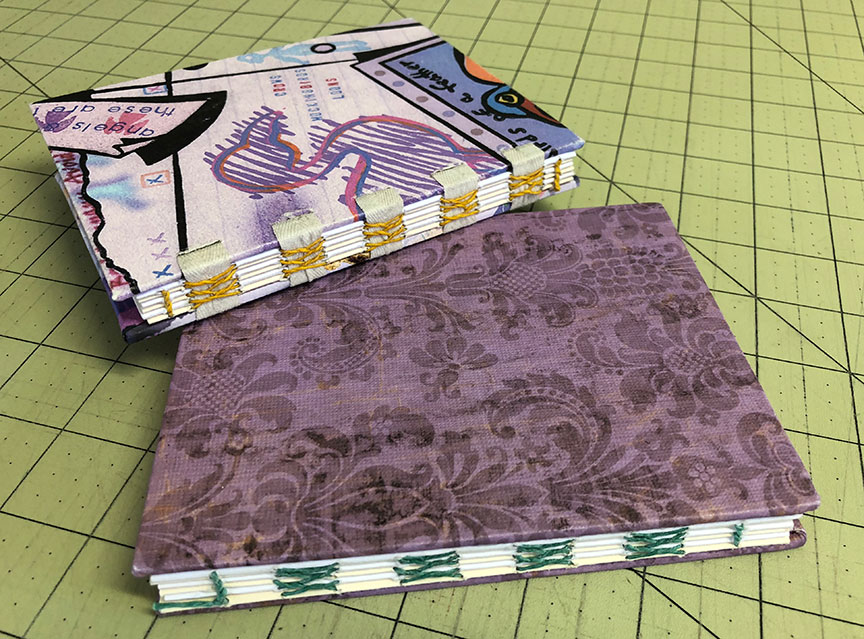
Basic French Link Stitch with Glued-on Covers
Adding Covers
The following video shows the stitch in its simplest form, without covers, but covers can be added after the fact by gluing boards to the first and last pages, as shown in the image above.
There are also other interesting ways of adding covers that require incorporating them into the initial construction and sewing them to the signatures (below is one example). 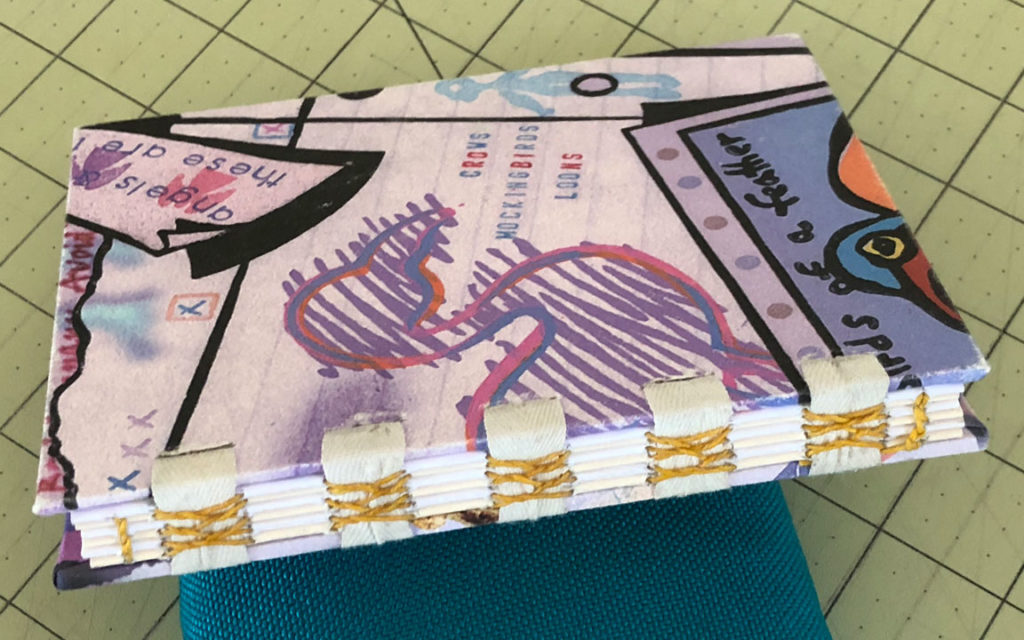
I’ll show one of those techniques in a separate video (see it here: French Link with Tape Cover)
Click to Watch the French Link Stitch Video Tutorial
But, the basic French Link stitch will be just like what I demonstrate here.
First, Prepare Your Signatures
First, of course, you need to prepare the signatures. This stitch works with an even or odd number of signatures. Depending on the weight of your paper you will want 3 or 4 pieces of paper for each signature. The paper I’m using here is cardstock, which is fairly stiff, so I’m using 3 pieces. Cut and fold everything and gather the signatures together.
Prepare a Template to Mark the Holes
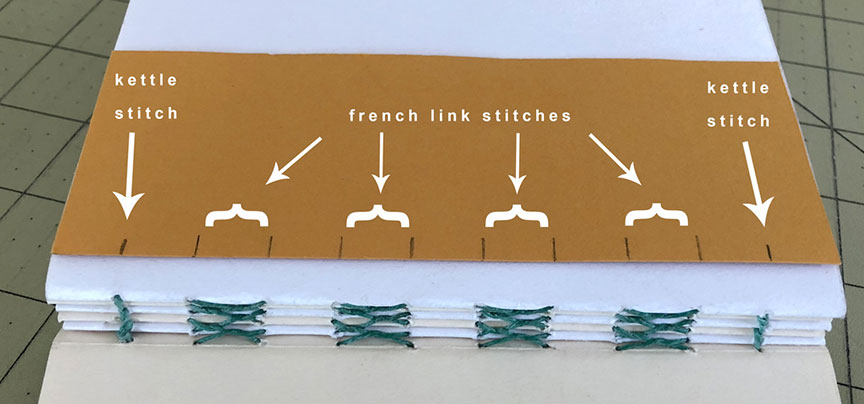
Next you’ll want to mark and pre-punch the sewing holes. I always create a marking template on a scrap piece of paper for this step. For this stitch you’ll want an even number of holes.
Figure out how many linking stitches you’ll want and then add one more hole at each end for the kettle stitches. The linking stitches by themselves tend to make for a very loose binding, so the kettle stitches will help keep the book block together.
Use the Template to Mark the Signatures
Jog the signatures together and place the template on top. Place a heavy weight on top of the stack to keep everything from moving around. You can buy inexpensive diver’s weights in a variety of different weights to use for your bookbinding tasks. I also have a heavy metal paperweight that I use.
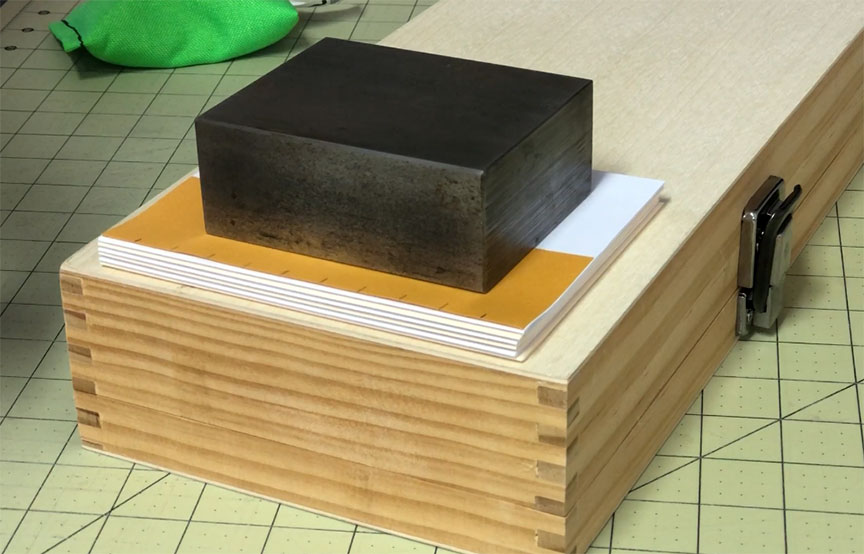
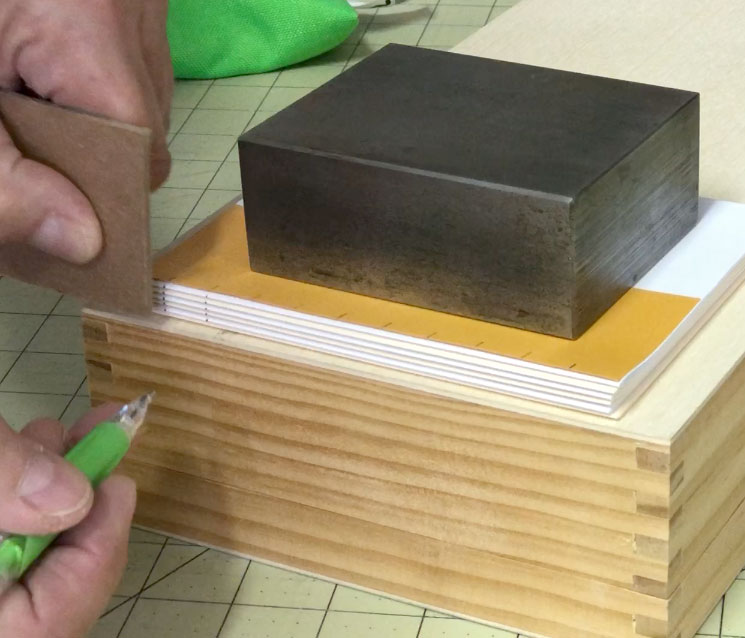
Using the template as a guide, use a straight edge to mark the edges of each signature. I just use the edge of a straight piece of scrap bookboard. Make sure each signature gets a tick mark.
Make Sure to Note the Orientation
Once you’ve marked the edges you want to be careful to maintain the orientation of the signatures. If you get them turned around your signatures won’t line up correctly.
If you are prone to turning things around and upside down while working you might want to mark the orientation of each one with a post-it note. Or, just make an extra mark on one side of the stack. Just make sure you don’t poke holes through this particular tick mark. 🙂
Pre-punch the Holes You’ll Sew Through
Next you need to pre-punch the signatures. I have a couple of pieces of foam that I’ve glued together to punch into. This isn’t necessary, it just makes it a little easier to punch the holes.You can also use the inside of an old phone book to cradle the signatures as you punch them. You’d need to mark them from the inside if you choose this method.
You can use an awl or a needle to punch the holes. If you’re using a needle, run the eye of the needle into a cork to act as a handle. This will make it more comfortable to use as a hole punch. Again, be sure to maintain the orientation of the signatures after you punch each one.
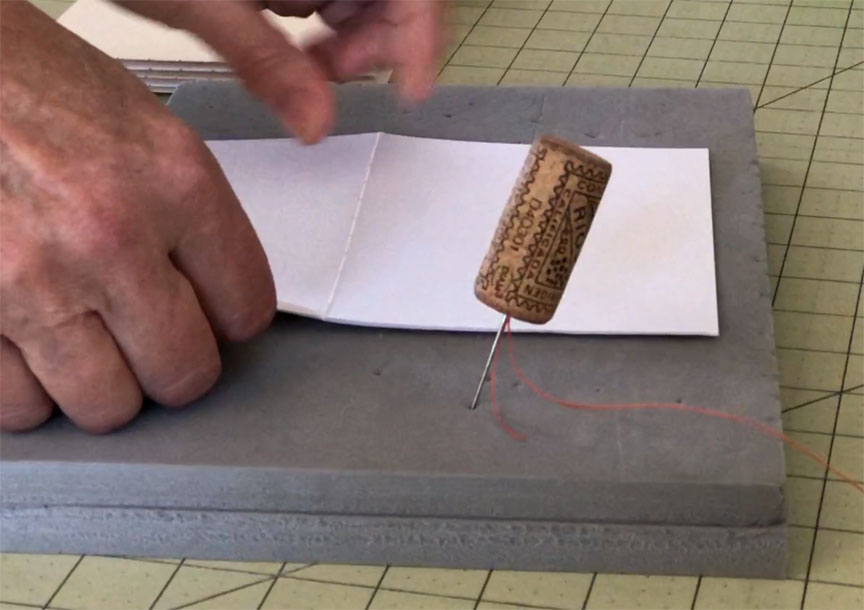
Begin the Sewing
Once you have them all punched you’ll want to start sewing. A general rule of thumb for how much thread you’ll need is one length per signature plus extra for the beginning and ending tails. I’m always a little generous in this regard because I hate getting to the end only to find that I don’t have quite enough thread, forcing me to add a piece to finish off the binding, although that is possible. Here’s a quick video on adding another piece of thread, if necessary.
 Start sewing the first signature from the outside, and make sure you leave a generous amount of thread as a tail. You’ll need this later. Sew in and out of each pre-punched hole, ending up outside of the spine of the first signature. When tightening the stitches, pull parallel to the pages. If you pull up and out you risk tearing the paper.
Add the Second Signature
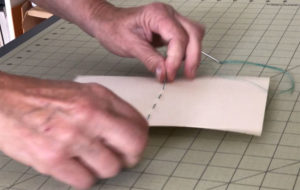
Sew in to the next signature, making sure that you keep the correct orientation of each signature, and sew out through the next hole. Now comes the first link stitch. Simply loop through the stitch in the signature below.
The obvious way to do this is to simply push the point of your needle underneath that stitch.
However, I don’t like to do this because it’s very easy to pierce the thread of that stitch with your needle and not even know it. The linking stitch is self-adjusting — once you sew in through the next hole, it will center itself on the stitch it is looped around. But, if you accidentally sew into the thread itself you will end up with a problem that you might not notice until it is too late to fix it.
So, instead of using the point of the need I turn the needle around and lead with the eye of the needle. This way there is never a risk of accidentally piercing part of the thread I am looping around. You can certainly choose to use the point of the needle, just be aware and careful not to grab what you don’t intend to grab.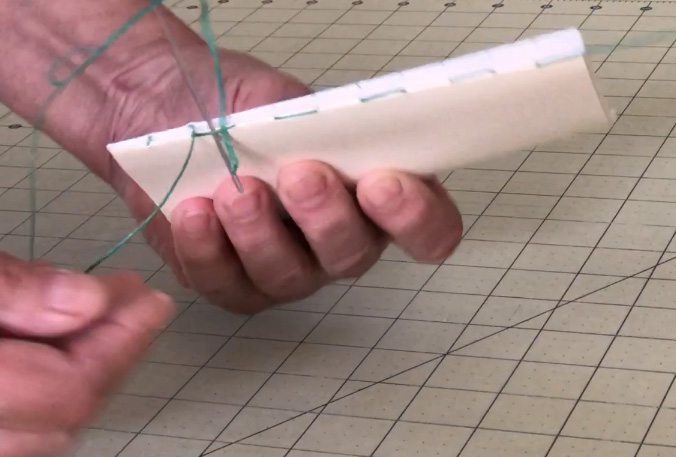
Sew back into the next hole in the second signature and you have made the first linking stitch. Keep your stitches taught but not overly tight. If you make them too tight your books will not lie flat. Repeat this process until you get to the end of the signatures. Your last stitch should end up on the outside of the second signature.
Now you’ll want to tie off the loose end. There are two ways to do this. One is to simply tie a double knot. This is the simplest way but if you are creating a book with an exposed spine, the knot will show. The following instructions show you a way to hide the knot inside.
First, grab signature number 3, being sure to maintain the correct orientation, loop the long thread around the original thread tail (fig. 1) and then sew in through the first hole of signature 3 (fig. 2).
Next, thread a needle onto that tail (fig. 3) and sew back in through the same hole that it is coming out of (fig. 4). The thread you just wrapped around it will keep it from popping back inside.
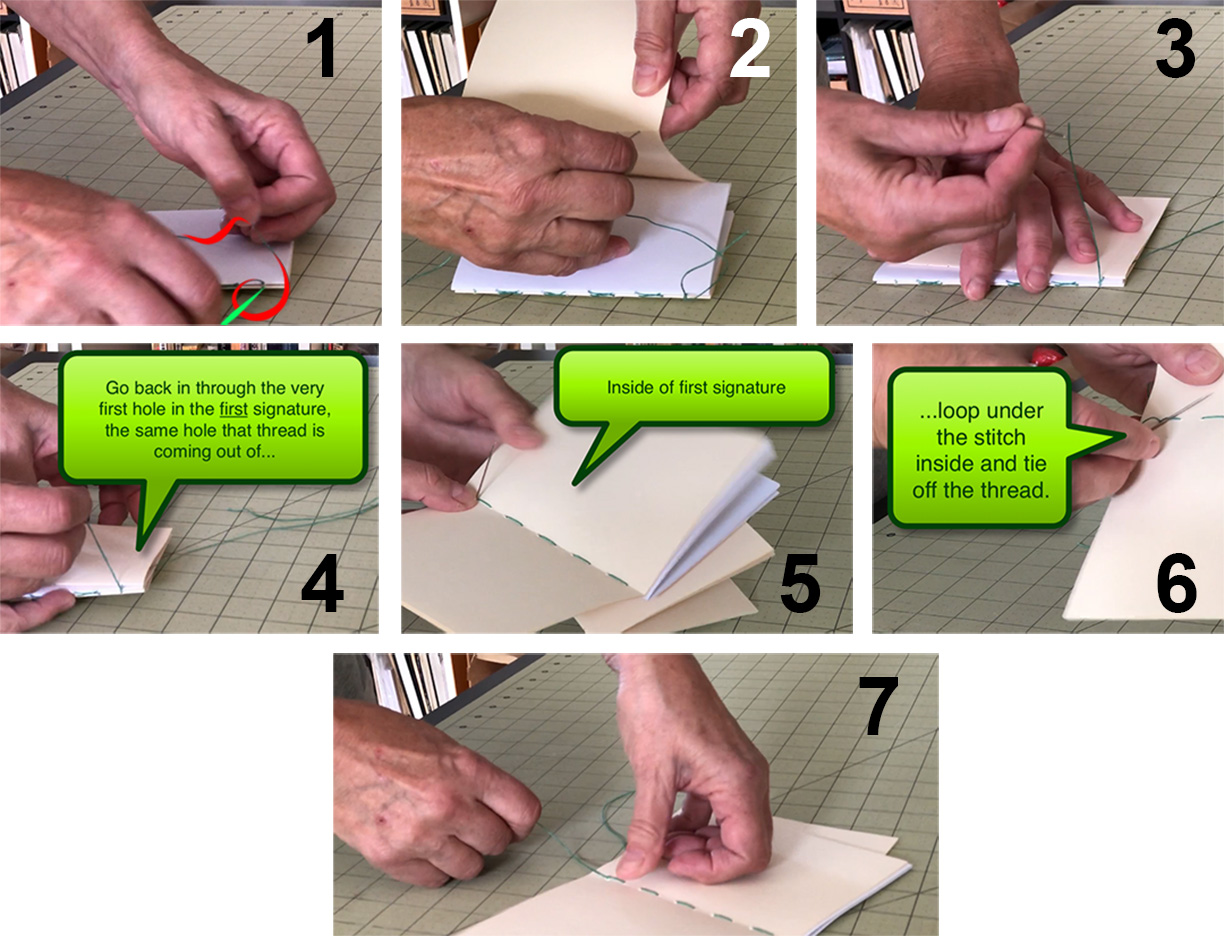
Once inside the signature (fig. 5), loop under that stitch (fig. 6) and tie off the thread with a simple knot (fig. 7). You can see now why you want to leave a long tail here when you first start sewing. If it’s much shorter than this it would be pretty hard to manage. Trim the thread.
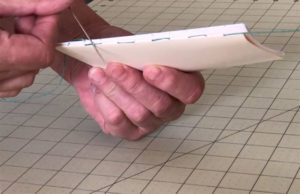
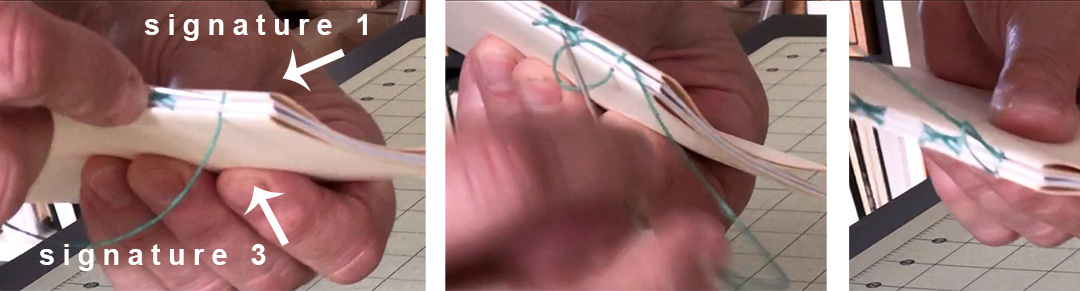
Now you’re back to attaching signature number 3. Sew out through the second hole. The next linking stitch loops under the stitch in the second signature only. Be careful not to catch any of the stitch that belongs to the first signature.
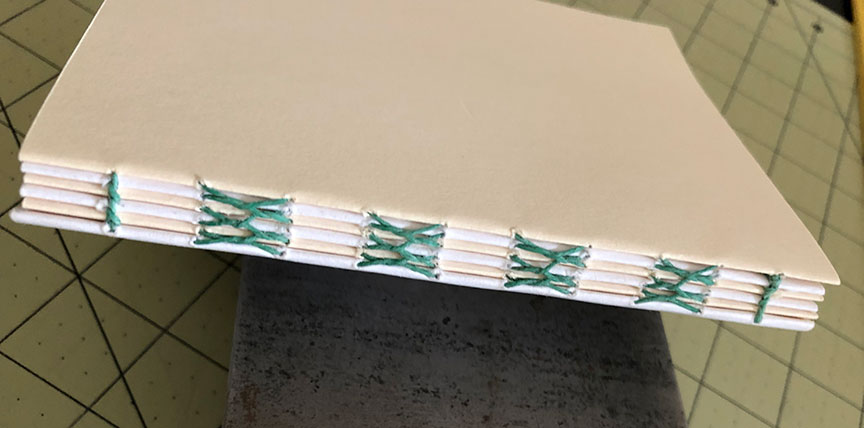
Here’s a close-up look at what you will have done up to this point (you’ve only done three signatures so far – fig 1). The first stitch in the first signature is just flat and straight across (fig 2). You link the thread from the second signature under this stitch (fig 3) and when you tighten the thread the first stitch pulls up a little (fig 4). By the way, this is what I mean when I say the stitches are self-adjusting, and this is why you don’t want to accidentally sew through any of the threads.
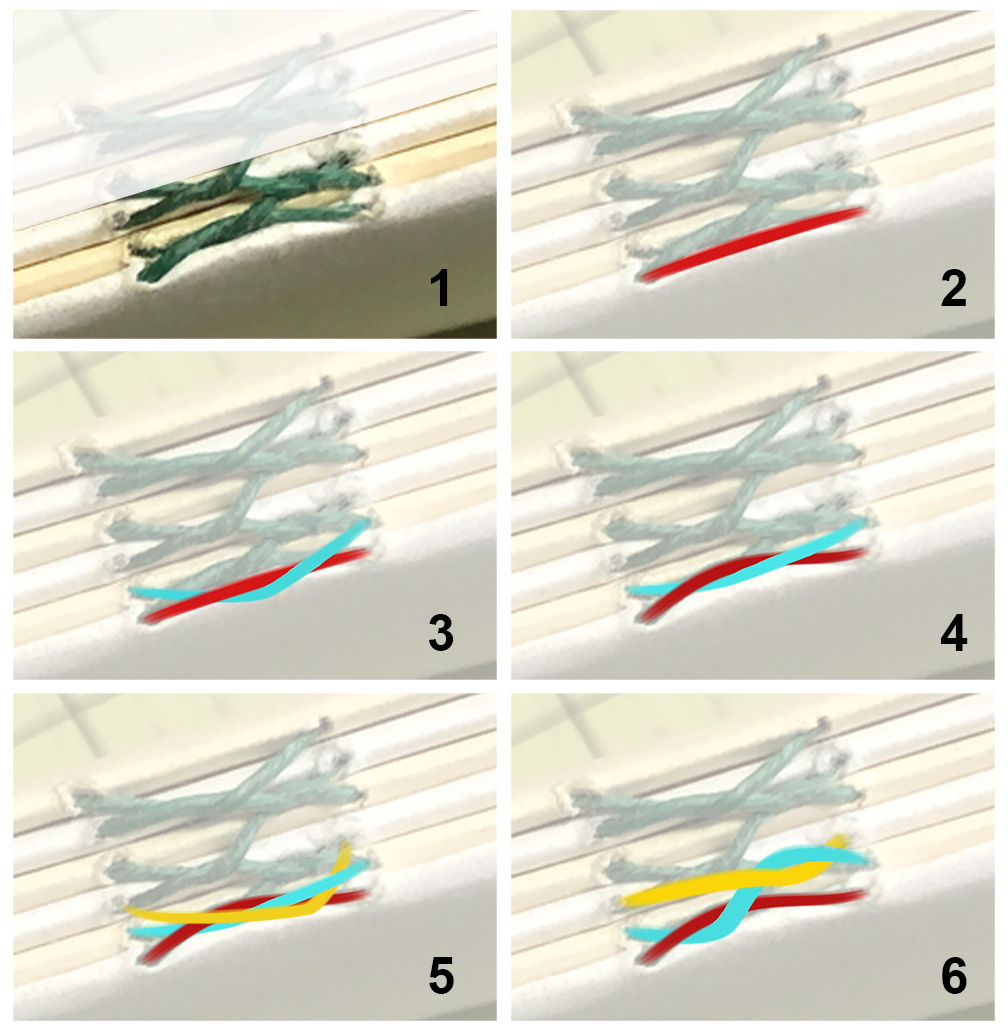
The thread from the third signature links through just the thread from the second signature (fig 5). When you tighten this stitch this pulls the second link up (fig 6), creating the interesting pattern that is the French Link Stitch. Remember, don’t over-tighten your stitches or your book will want to spring open and won’t lie flat.
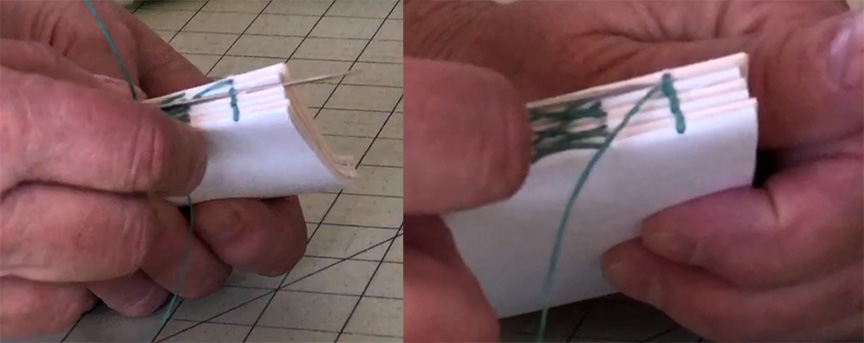
Continue this pattern of sewing through the link in the signature directly below the signature you’re currently in. Once you get to the end of the third signature you will need to anchor that end of the book with a kettle stitch. This keeps the book from being too loose.
Create the kettle stitch by passing the needle under the stitch in the first holes that join signatures 1 and 2 and then back through the loop that is formed.
 Tighten this knot, add the next signature and repeat this entire process with the remaining signatures, looping under the previous stitch to create the linking stitch and ending every signature with the anchoring kettle stitch.
The last thing you will do once you have all of the signatures sewn together is finish it off with a double kettle stitch. Start by sewing in between the stitch in the previous two signatures. Then go back into the loop that’s formed, just as you did on the other signatures. Tighten this down and then make one more kettle stitch between the last two signatures. Tighten this one down and trim your thread.
You’re done with the book block. Now you can add some covers if you want by simply gluing them to the first and last pages of the book (see video instructions for creating simple covers here) or, if you want something that looks a bit more professional and fun, watch the video that shows a technique for adding covers as part of the construction process.