Click to Watch the Video Tutorial
Caterpillar Bookbinding Stitch – Part 2
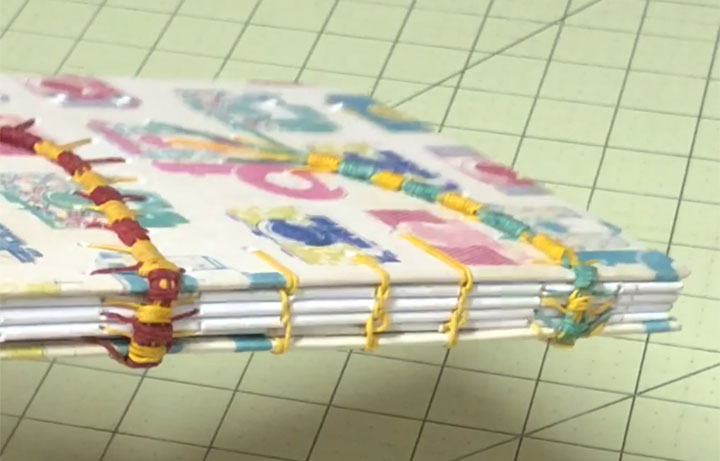
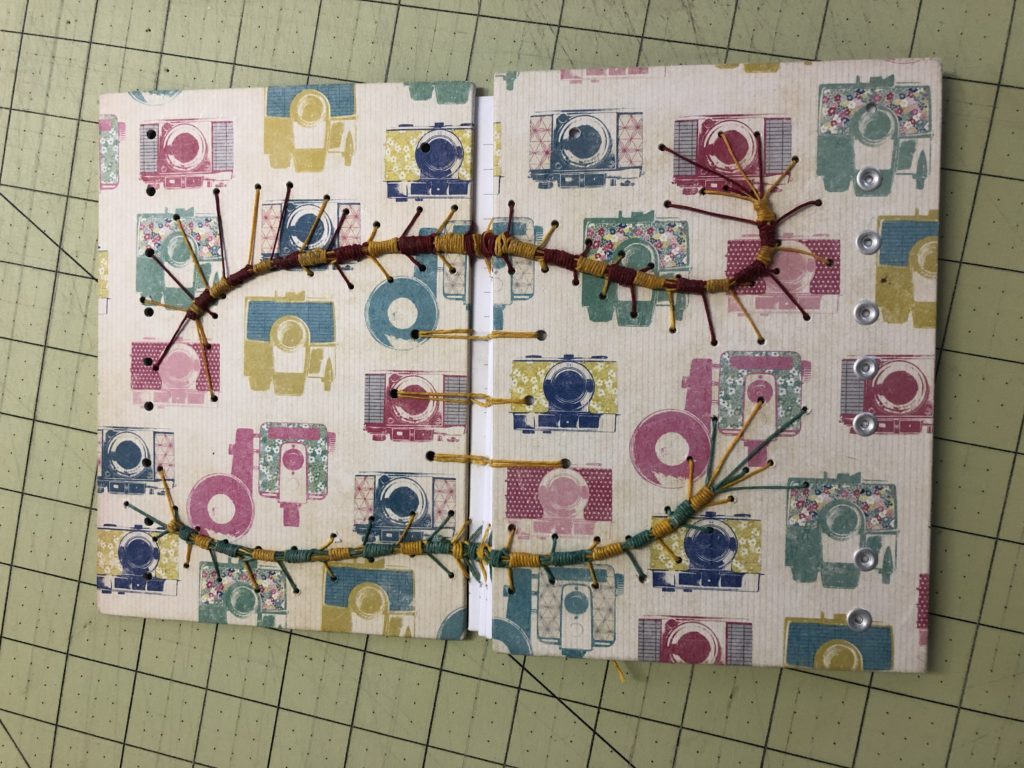
Part 2 of the Caterpillar Bookbinding Stitch will you show you the specifics of using this stitch as part of your book, either as a decorative element, as with my example of the cased-in book example above or as part of the binding, as seen in this open-spine example below. If you missed Part 1 you can see it here.
General Tips
Here are a couple of general tips that apply to all of these applications. First, I like to protect the cover I’m working on with tissue or tracing paper. I sew over this and then tear the paper away once I’m done.
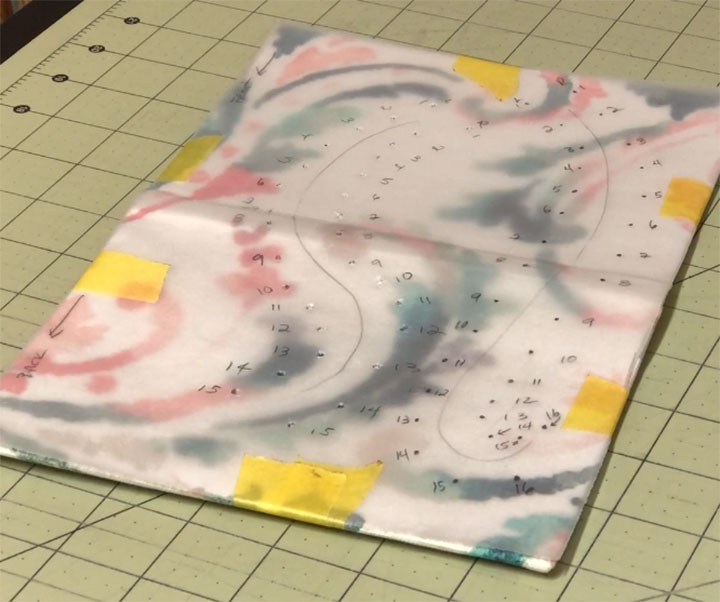 This is beneficial in several ways: First, I can draw a pattern that suits the cover material that I’ve chosen. Secondly, I can number the sides and the holes, which really helps keep things from getting confusing while I’m sewing. Lastly, I always use waxed thread for this, and the wax can be a little greasy or messy with this process. The paper helps keep the cover clean while I work. I use a gentle painter’s tape to tape it down – the kind that isn’t supposed to pull the paint off your walls (like Frog tape that you can buy at Home Depot).
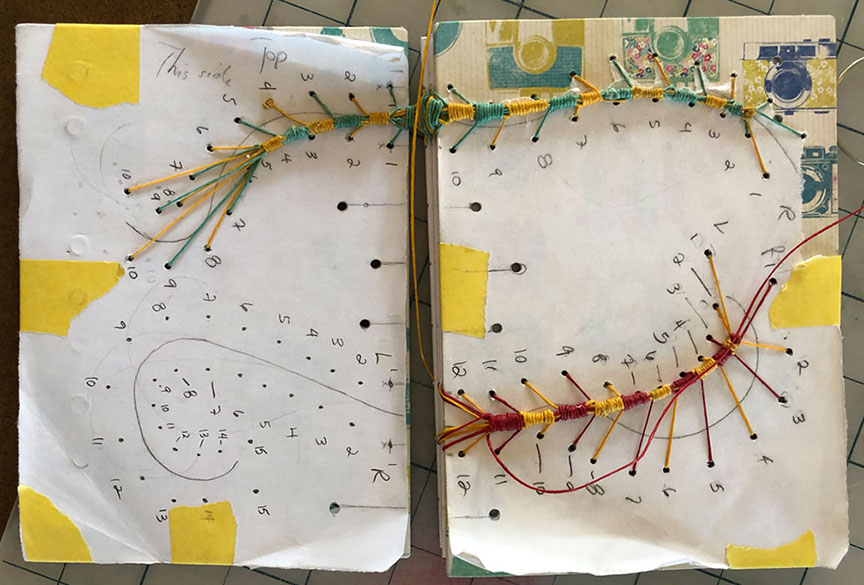
Hiding the Back of the Stitch
Also, something that I mentioned at the beginning of the Part 1 instructions was a technique for hiding the backside of the stitch if you don’t want that to show. The way to do that adds a little up-front preparation but is simple enough to accomplish.
First you’ll want to have your pattern figured out and your holes punched. You’ll also want to trim the little cardboard mountains off so you don’t have those little bumps showing up under your endpapers. I show one method for doing that in Part 1 of the Caterpillar Stitch.
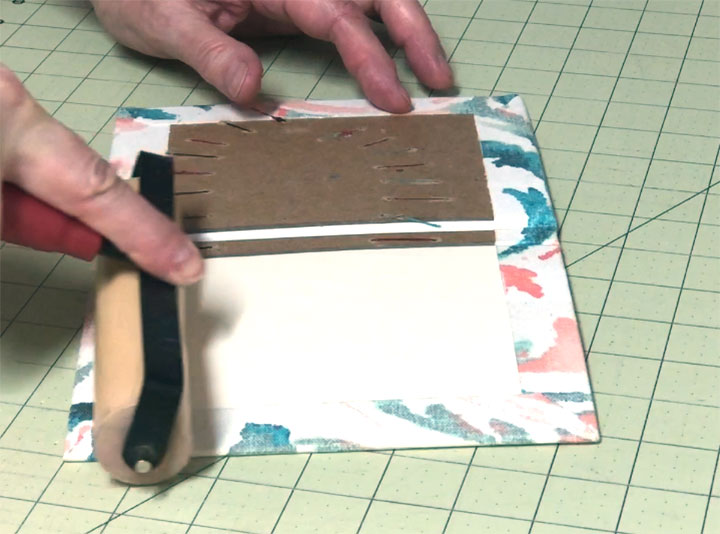
Then, once you have the holes punched you know where the thread is going, so you can cut shallow grooves between the holes to allow the thread to lie in.
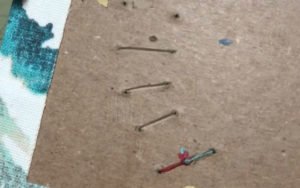 Mark these with a pencil and then cut them just deep enough for the thread to nestle in. Make V-shaped cuts to make it easy to extract the excess cardboard, and test the depth of your thread in the cuts as you go.
Caterpillar Stitch for a Cased-In Book
I won’t go into the details of constructing the book cover or the textblock in these instructions, but if you need help learning how to create the parts of a cased-in book, watch the videos here: Part 1-Make the Textblock, Part 2-Make the Cover and Attach the Textblock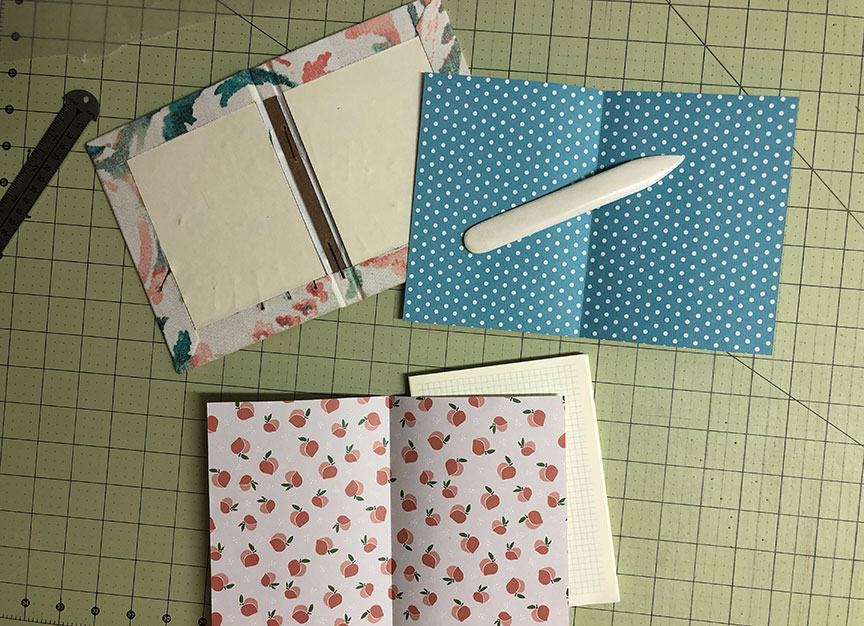
Specific to wrapping the caterpillar around a case-bound book, you’ll probably want a pair of holes in the spine where the caterpillar will be crossing that area.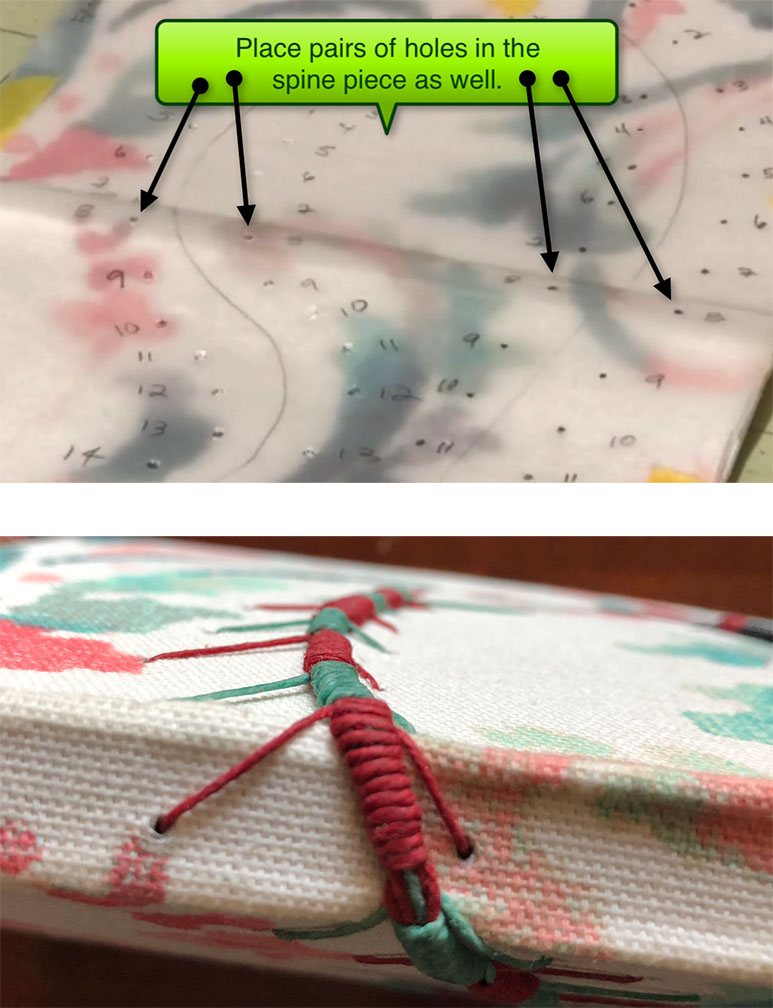
Follow the directions in Caterpillar Bookbinding Stitch Part 1 for creating the head of the caterpillar and for wrapping the body parts. Be very careful that you aren’t pulling the threads too tight where they cross the spine. And keep in mind that packing those threads will make them even tighter, so make sure you keep them a little looser as they cross the spine. If they end up being too tight after being wrapped your book won’t stay closed.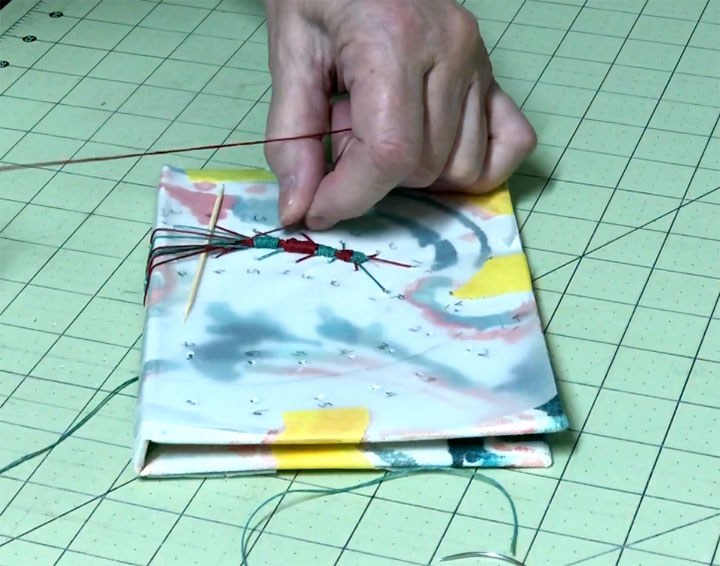
It is easier to wrap those particular body segments where the threads cross the spine with the book cover open, but if you do that you’ll probably unintentionally wrap them too tightly, so resist the urge to do that and wrap them with the cover closed.
Once you finish sewing your caterpillars, remove the tracing paper, press down the threads on the inside with a bone folder so they lie flat in the grooves that you’ve cut for them and then attach your textblock.
 I added one extra step here, which was to add a piece of cardstock to the inside of each cover to act as an extra barrier to the threads first, before I attached the textblock. This isn’t necessary and you could skip this step – but I like the little bit of extra padding it puts between the textblock and the inside threads.
So, those are the main details of adding this stitch to a case-bound book.
Caterpillar Stitch as Part of the Binding
 The following instructions will show you how to incorporate the Caterpillar Binding Stitch into the binding itself. As mentioned earlier, you will probably want to combine this with another stitch, like a Coptic stitch, in order to give the binding a little more stability. (See a tutorial on the Coptic Stitch here.) But, you can also use just the caterpillar stitch if you don’t mind if the binding is a little loose.
If you need to see how to prepare your signatures, watch just the first couple of minutes of the video here: Sewing a Textblock. Watch to about 3:30 in the timecode.
Begin the caterpillar stitch as you normally would for any application. You can allow the backside of the stitch to show on the inside of the cover or prepare your boards as shown above with the case-bound example, cutting grooves to hide the threads. (Remember, if you want to hide the backside of the threads you have to do this before you apply the endpapers.)
Once you have used up all of the holes on the board you will use the holes in the signatures just as if they were holes in the board, going in through one hole and out through the other hole in the signature. 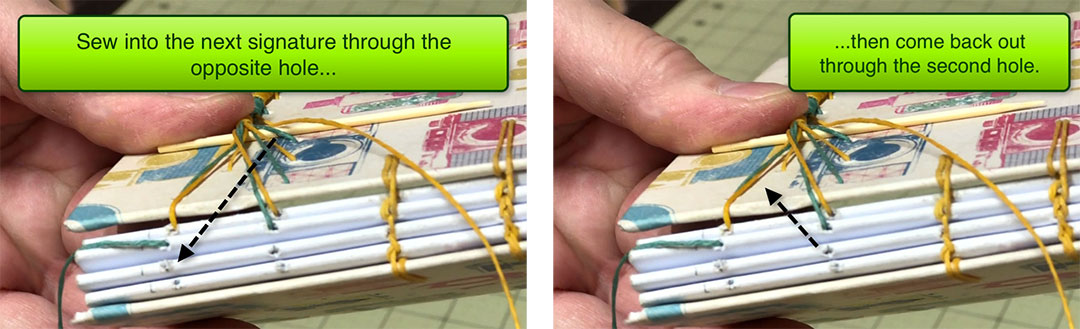
This creates that same ladder effect on the backside, only this time it will happen inside each signature.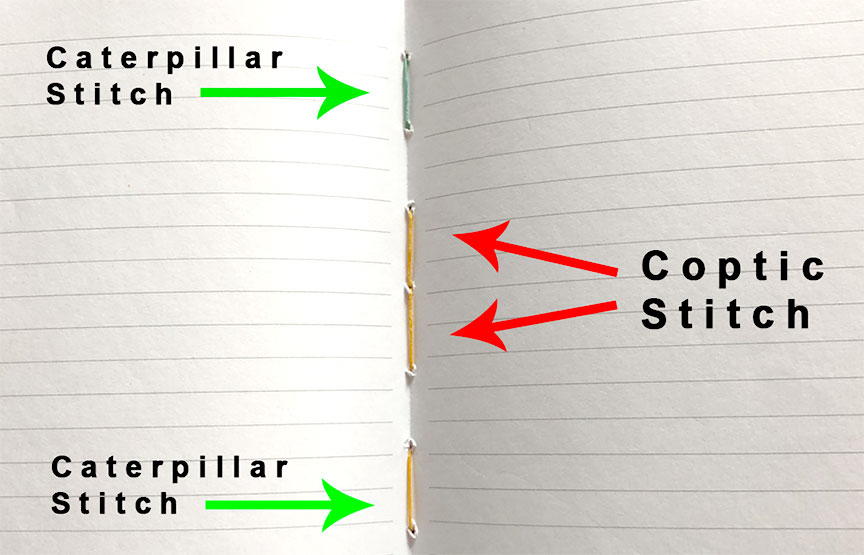
The main thing you want to pay attention to as you sew into and across the spine is to make sure that you don’t pull your threads too tight. Keep the threads loose as they cross the signatures and remember that you will be wrapping (packing) these threads, which tightens them up.
Finish off the Book
Once you start treating the holes in the signatures the same way you do the holes in the bookboard then you will understand that the process is exactly the same. Really, the only difference is that you keep the legs of those stitches surrounding the spine looser than normal. You will tighten these up once you start packing them.
Use the same techniques as shown before, using tissue paper to mark your holes, if necessary, and using toothpicks to mark the next section of body to wrap. Continue the process of wrapping body segments and sewing in and out of the next set of holes, whether those are in the signatures or the bookboard. Finish it off as shown in the first video, by wrapping any final body segments and then running the needles up through the center of those and trimming the threads.