At this point you should have the outside of the portfolio case covered and you’re ready to cover the inside. It’s probably best if the paper you use to cover the inside is one single piece of paper, but that’s just a guideline, not a rule.
This video will also show you how to add a piece of elastic to use as a closure. You can skip this feature, but you should think about adding a clasp of some kind to keep your portfolio closed.
Before I add the elastic I’m going to cut the liner for the inside. It doesn’t matter if you do it now or later, I just think it’s a little easier to trace the portfolio without the elastic getting in the way.
The best way to get the correct size and shape for this paper is to trace the portfolio now that you have all of the bookboard attached to each other. Trace the entire outside perimeter. You’ll trim some of this a bit more once you have the general shape drawn.
You want the edges where you see these arrows to remain the full height and width of the portfolio. The reason for this is because you’ll be pushing some of that paper down into the gutters, so you need the excess on all of those sides.
On all of the rest of the edges you’ll want to trim off one-quarter of an inch.
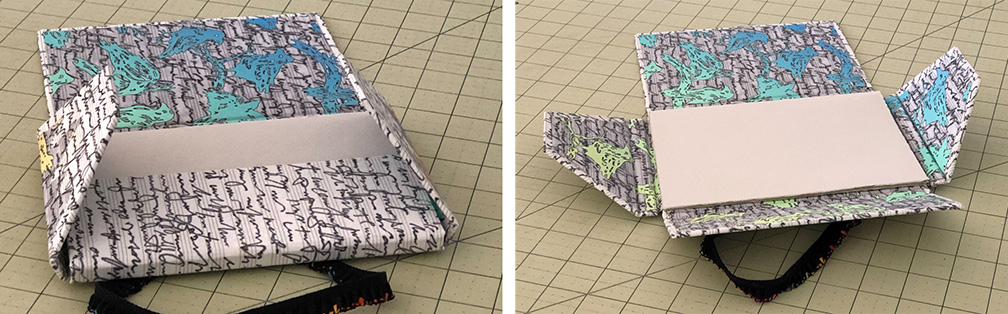
If you’re going to add the elastic you need to do that now, before you glue the liner paper down, because the paper will cover up the attachment points for the elastic. Here’s a preview of where you’re headed with the elastic attachment: You’ll cut two shallow graves on the inside for the elastic to nestle in and then this will all get covered and hidden by the inside paper.
You can use any plain packaged elastic that you would find in the notions area of a sewing or craft store, or you can use something a little more decorative. I’m using elastic that has a colorful little ruffle along side.
So, first you need to measure out your elastic. Fold the case closed and then wrap the elastic around it to get a general idea of how much you’ll need. Be generous with the initial estimate as you will be trimming this later.
Next, figure out where you want to cut the entry points for the elastic. About an inch from the edge of the short fold is a reasonable placement. The position from top to bottom can be pretty random and doesn’t even have to be symmetrical.
Once you’ve figured out where you want to cut the openings for the elastic, open up the portfolio and mark these measurements on the inside.
Measure the width of your elastic. You’ll be cutting slots into the bookboard the same width as your elastic. You’ll also want to cut grooves, or graves, in the bookboard for the ends of the elastic to hide in, so be careful about the measurement of the initial slots where the elastic will come through, as well as the width of the elastic. How long the graves are is pretty arbitrary, but about an inch will give a good anchor point for each end of the elastic.
Cut two slots, as indicated here, all the way through the bookboard and bookcloth. These slots are where you will pull the elastic through. Be careful when cutting the slots that go all the way through. Try to cut them as neatly as possible since they will show after everything is put together and don’t make them any wider than necessary.
Then, cut along the other lines, but not all the way through – just enough so that you can peel away some layers of the bookboard. This is where using bookboard will help, as opposed to using chipboard, because bookboard is made in layers.
Use an X-acto knife or scalpel to peel away layers of bookboard until you have a grave deep enough for the elastic to lie in without creating a bump in the liner once you glue it in. Don’t make these so deep, though, that you end up making a hollow area there. Take out a layer at a time and test it with the elastic until it’s perfect.
Once the graves are just right you’ll need to thread the elastic in through the slots you’ve cut. Do this from the outside of the portfolio. You’ll want something narrow to help you push the elastic through. I’m using some strange little tool from a medical kit that is just right for this job, but you could also use the blunt side of a scalpel or X-acto blade. You don’t want to use anything too sharp or you will cut through the elastic. It also really helps to have a pair of tweezers handy to help pull the elastic through the other side.
Adjust the elastic so that the end fits into the grave and everything is sitting smoothly. Glue this first end in and let it dry a bit. I’m using Thick PVA glue for this, but if all you have is regular PVA glue, that will work. Just give it a little longer to dry. You’ll be stretching this elastic a little as you finish the other end and adjust the fit, and you don’t want the first end to come loose while you’re doing this. Press down firmly and weight it down.
Next, you’ll need to figure out where to trim the other end to get the right fit. You want the elastic to be taut, but not overly tight. If it’s too tight it will be hard to get on and off and it will also tend to loose its elasticity pretty quickly.
You can wrap it around the closed portfolio, but you can’t work on it this way because you need access to the inside. So, open it up and temporarily lace it inside the flaps to work on this final step. Push the elastic through to the inside, just as you did with the first end, pulling it through with your tweezers, if necessary. I got lucky on this end and didn’t need them.
Now you will need to adjust the tension and trim the second end of the elastic. You want to pull it tight, but don’t overstretch the elastic. Once you have the tension just right, trim the end so that it fits into the second grave. Glue this end down and place a weight on it while it dries.
Once that end is fully dry you can move the elastic band to the outside of the flap, where it belongs.
The last step is to apply the inside liner paper. You don’t want to glue this down all at once because you need to press it down into the gutters as you go. So, start by applying glue to just the center bookboard and all of the gutters. You can use regular PVA glue for this – you don’t need to use the thick stuff.
Align the liner paper and press down the center area. If you align all of the outer edges of the paper more-or-less with the outer edges of the portfolio flaps you should have it correctly aligned. There should be about a quarter inch margin around the other edges.
Once you’ve pressed down the center section start working your way around and press the paper down into the first gutters. Once you are sure those are firmly pressed in place, start on one of the flaps, applying glue to the board as well as the second gutter. Don’t take the glue all the way out to the edge of the portfolio – remember that you have a quarter inch margin where there is no paper.
Once you have most of the board covered, you can finish it off by applying glue to the edges of the paper, but before you do that, press the paper down into that second gutter. Once again, I will often use two bone folders to do this, with one in each gutter, so I’m not accidentally pulling the paper out of one as I’m pressing it down into the other one. If you don’t have two bone folders you can always use a scrap piece of bookboard instead. It should fit down into the gutters perfectly.
You might find that your paper is a little too long at the final edge and will need trimming. I place a piece of scrap bookboard in between the paper and the portfolio to trim on. The board is thick enough that I don’t have to worry about cutting through and it will keep any excess glue off of the exposed margin. Press all of this down firmly with a bone folder.
Follow this same procedure for the remaining three sides. If you prefer to avoid any potential mess with the glue, you can also press the paper down into the gutters and trim the end before you start to apply the glue. I sort of prefer to glue and then cut as that doesn’t leave much room for error, but it will work either way.
Once you’ve glued all four flaps put it under a heavy weight and allow it to dry thoroughly.
And that’s it – that’s how to make a nifty little portfolio for your artwork.