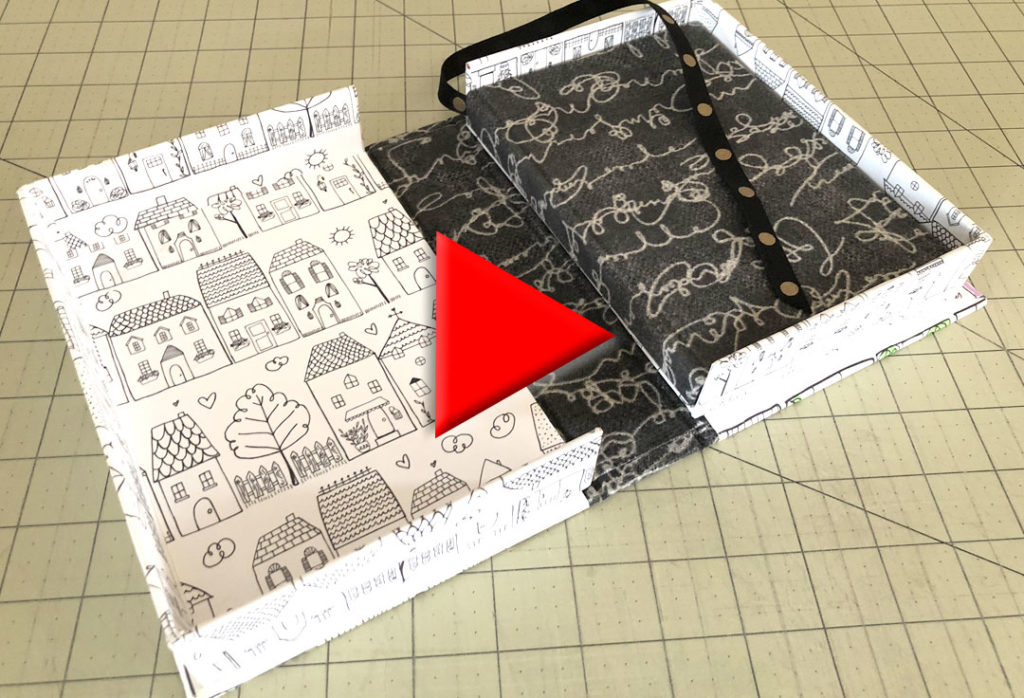
Click to Watch the Clamshell Box Video Tutorial
Clamshell Box – Part 1
This neat little folding clamshell box (also known as a drop spine box) makes a great container for a special book or set of books. It’s also perfect as a portfolio box, holding separate images, such as drawings, prints or photographs. I like the fact that one side of the clamshell box is completely exposed once you open it up. This makes it very easy to get items in and out.
Download and fill out the worksheets
Probably the most time-consuming part of the construction of this box is the preparation. You’ll want to be very precise with the measurements of the bookboard, the paper and the bookcloth that you use.
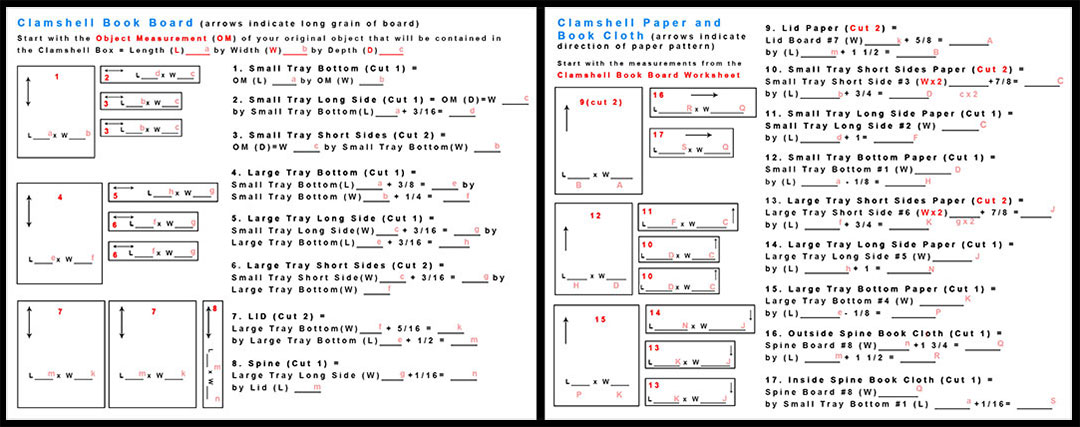
Download these worksheets from the link below for perfect results
I’ve created 2 worksheets to help you work through the measurements of every piece that you will need to cut. These are available using either Imperial measurements (inches) or Metric measurements (millimeters).
If you are using the Imperial worksheets you just need to understand some very basic fractional arithmetic to be able to complete these worksheets. If you don’t take the time to figure out the precise dimensions of each piece of the box, the construction will fail. So, it’s worth the time you put in to complete these worksheets accurately.
Both versions of the worksheets are available for download here so you can print them out and create a perfect box for any size object you want.
Video help with the worksheets, if you need it
My hope is that these worksheets are self-explanatory, but if you want more detailed help with them you can watch my video here showing how to fill them out. I want to emphasize again that it’s important that your measurements are correct in order for the box to turn out perfectly.
Gather Your Materials
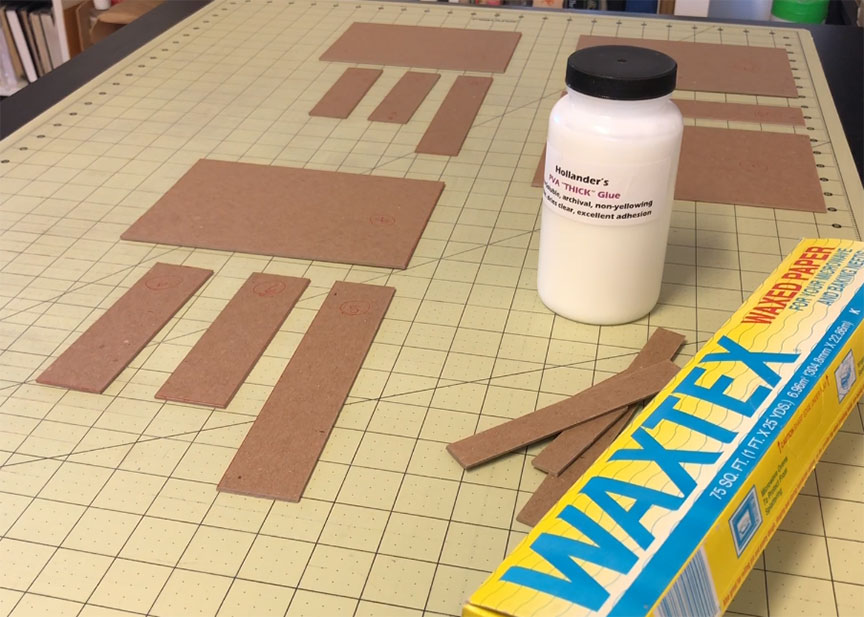
Once you have all of your pieces cut you’ll want to gather a few simple supplies – some waxed paper, and some PVA Thick Glue that you can get from any bookmaking supply house. The thick glue is particularly helpful when gluing the book board together as it holds the vertical panels in place. You can try thinner glue but you might find that a bit frustrating as it won’t hold as well initially. You’ll have to spend more time just standing there holding two pieces of board together. But, it will still work, so if that’s all you have, use it! Also, you’ll want a few scrap pieces of book board.
Start Gluing One of the Trays
Start with the top or bottom tray section and the appropriate side pieces. I’m starting here with the smaller tray – numbers 4, 5 and 6 – but the process is the same for both the large and the small tray sections.
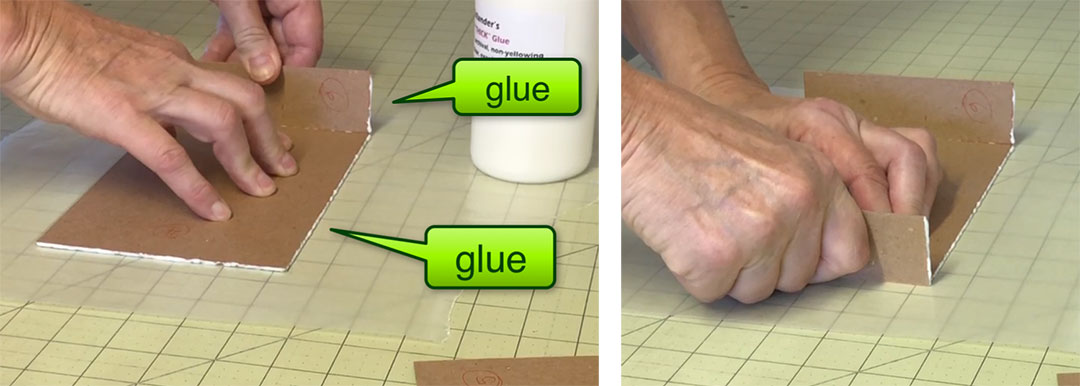
So, beginning with the Tray Bottom dab the thick glue along one long edge and both short edges. You want just the right amount of glue, which will be a bead that stands out a bit, but is not globbed on. Not enough glue and the pieces won’t firmly stick together. Too much glue and it gets very messy.
Add the Tray Sides
Place this board on a piece of waxed paper. Pick up one of the short sides – in this case piece number 6 – and apply glue to one of the short ends. Then attach this to one of the short sides of the tray bottom that you previously applied glue to, making sure that the short side you applied glue to is facing the same direction as the glue on the tray base.
Press firmly to make sure it is adhered and staying in place. This is where the thick glue is very helpful – you don’t have to hold it for very long for it to hold its position.
Attach both short sides in this manner.
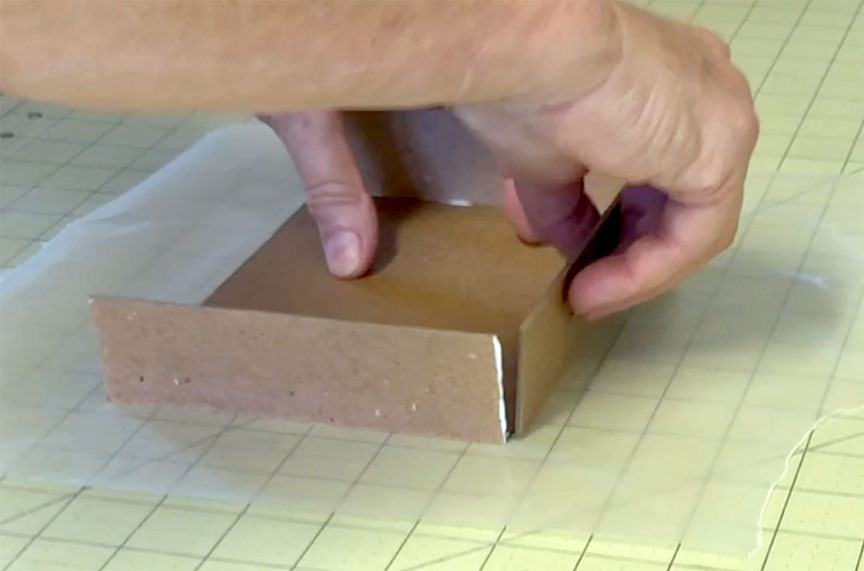
Next apply the long side, pressing firmly to make sure you are getting a solid connection between all of the pieces. I take my time at this point to get all of the sides lined up correctly with the base, making sure the sides are perpendicular to the bottom piece and aligned correctly with each other.
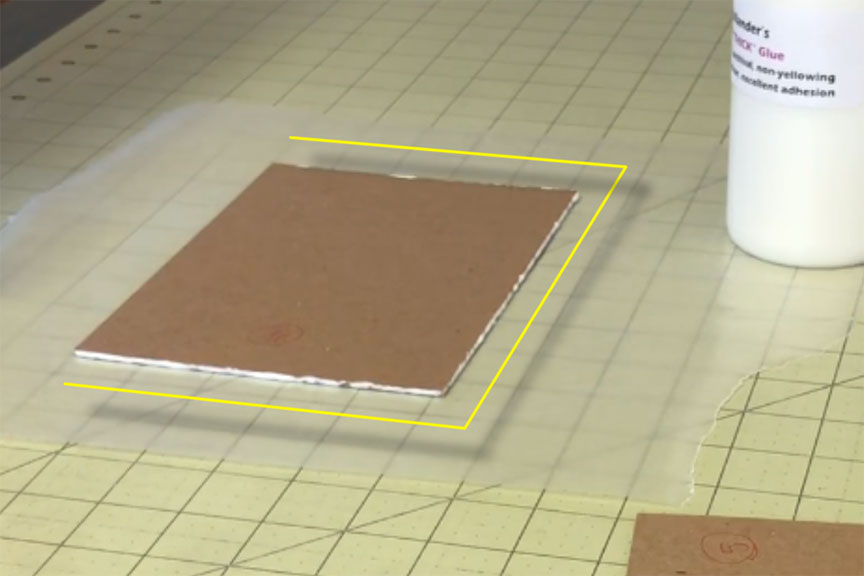
Once all of the sides are attached and feel reasonably firm, take the entire piece off of the waxed paper. It’s probably stuck a little and you don’t want it to dry attached to the paper. Smooth down any glue on the outside that has seeped out.
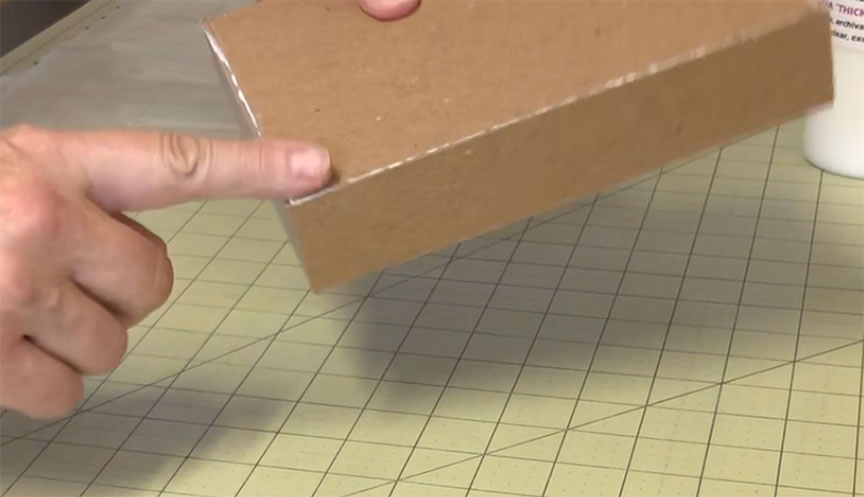
Clean Up the Seams
Replace the waxed paper with a clean piece and use the corner of a scrap piece of book board to clean up or smooth out the glue that seeps between the seams of the board on the inside. The goal here is to not allow it to dry in a chunky or beaded-up state.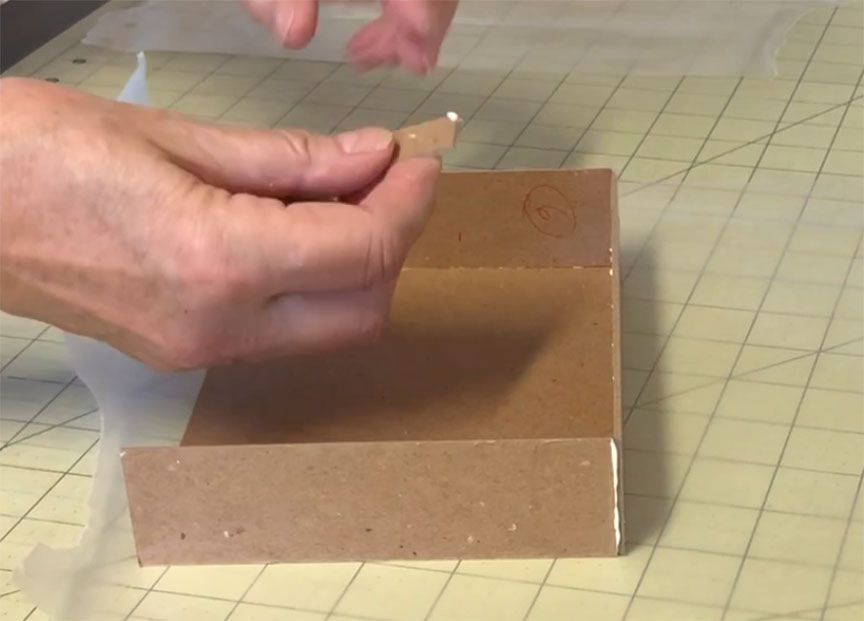
Once you’ve cleaned up all the seams go back to each part and make sure it is firmly attached in the correct orientation. Take your time to adjust the panels, as this will impact the success of the overall box.
Once you’re sure everything is cleaned up, aligned and firmly glued, remove it from the waxed paper and set that piece aside to dry.
Follow these exact same procedures and complete the second tray.
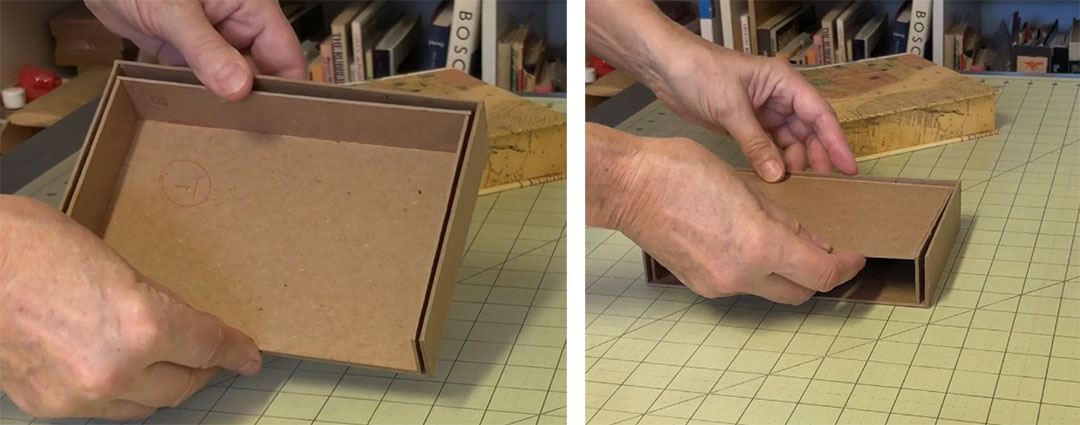
Test the Fit
Once you have both trays completed make sure they fit together correctly. There should about 1/8th of an inch of space on each of the three enclosed sides to allow for covering the trays with paper, which will add a bit to the thickness of the sides.
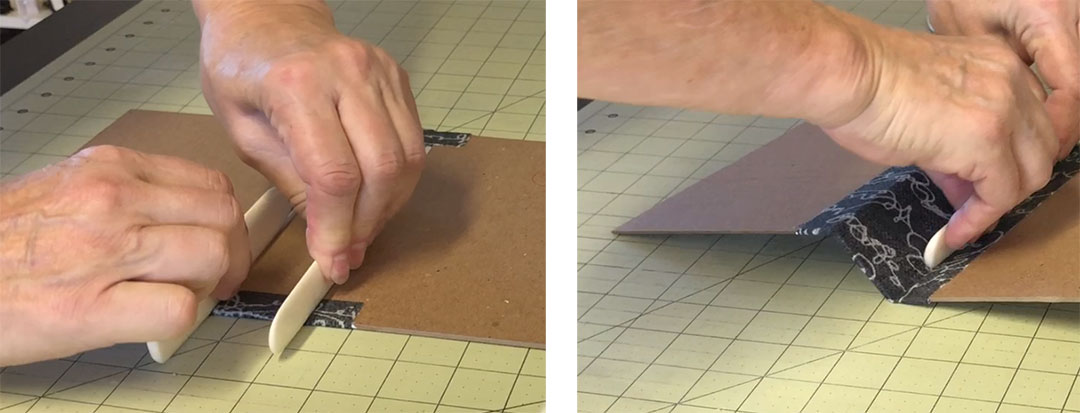
 The next step is to create the lid for both trays. Before you start on this step you might want to create a spacer to place between the board pieces and the spine.
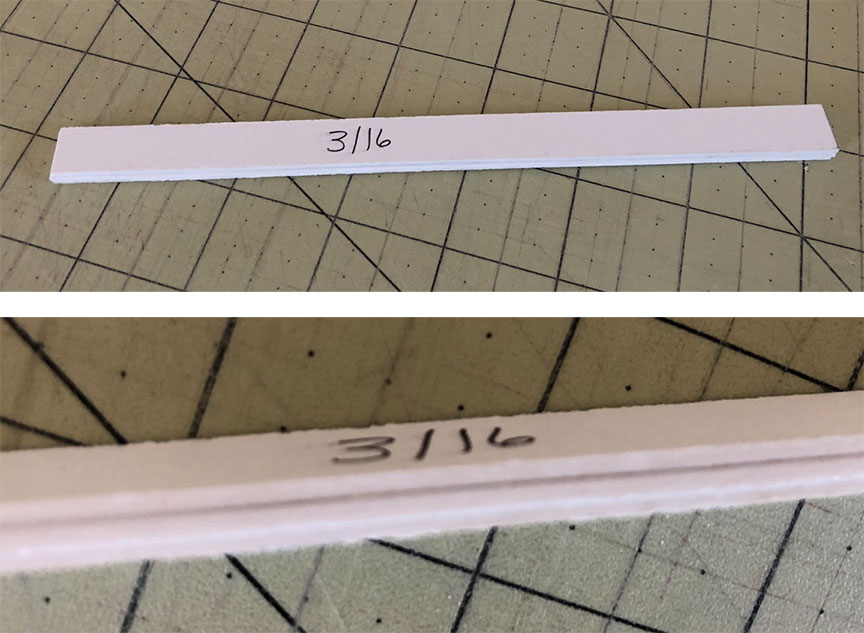
You don’t have to do this, but it makes this part of the process a little easier. It’s easy to make a spacer out of a few pieces of bookboard or matte board glued together to achieve the correct spacing
Now Make the Lids
Start with the number 8 piece of book board, the spine, and the number 16 piece of bookcloth. (Take a look at the diagrams on the worksheets for the reference numbers). Apply regular PVA glue to one side of the spine and center it on the wrong side of the bookcloth. Make sure the two pieces are firmly adhered to each other.
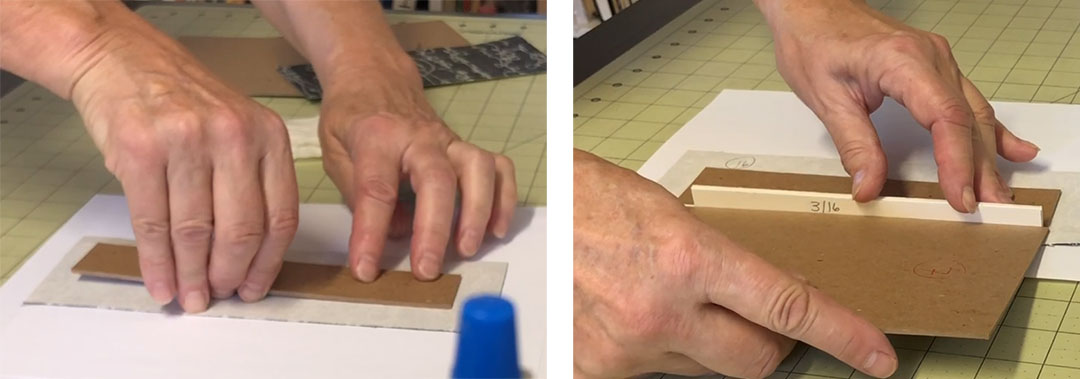
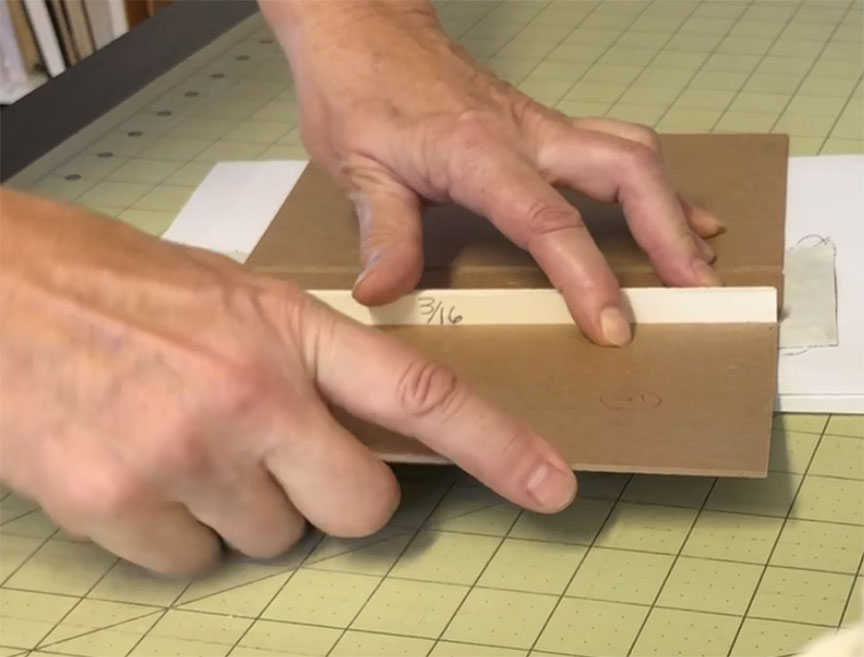
Next you’ll attach the lid pieces to the spine. Place the spine on a scrap piece of paper and apply glue to one side of the exposed bookcloth. Remove the piece from the scrap paper and place it on a clean sheet. Insert the 3/16th inch spacer next to the spine board and align one of the lids to the glued bookcloth. Once you have the board in place remove the spacer so it doesn’t get permanently glued down. Follow this same process for the other lid.
Glue the Head and Tail Flaps
Next, glue the head and tail flaps down. Be sure to use a clean piece of scrap paper for this.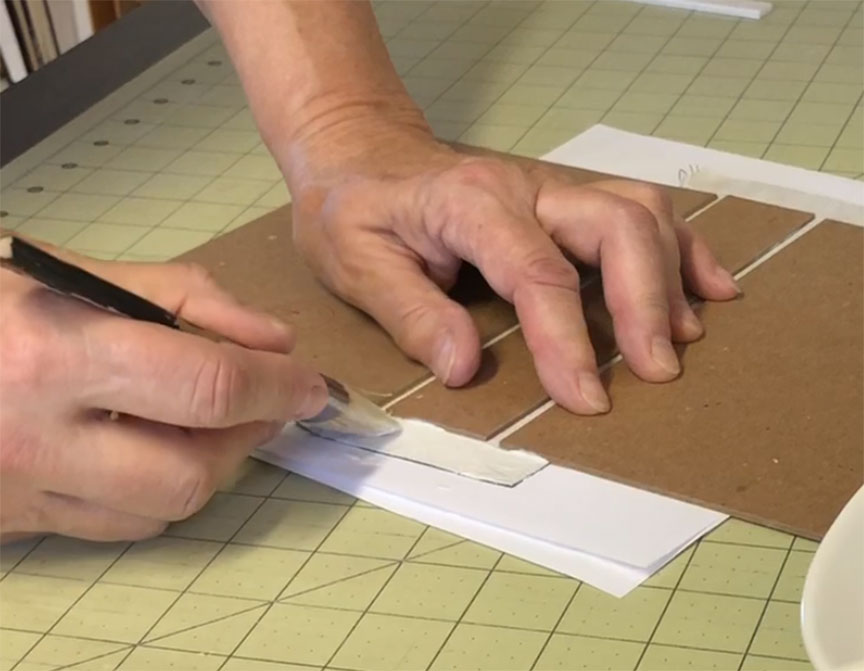
Press these flaps in place and use a bone folder to press the cloth down in the gutters.
I use two bone folders to do this. If you just use one, it pulls the cloth up out of the other gutter. Alternatively you can fold the lid up to take the stress off of one gutter as you press down the other. Turn the cover over and run the bone folder down both gutters. Your goal here is to make sure both gutters get glued down.
Next, apply glue to the inner hinge piece – the bookcloth marked number 17. Carefully center it on the inside of the lids you just constructed. Press this down firmly. Once again, I like to run a bone folder into the gutters to make sure those are glued down to the other piece of bookcloth on the other side. I usually place a heavy weight on this piece while I get the next step ready.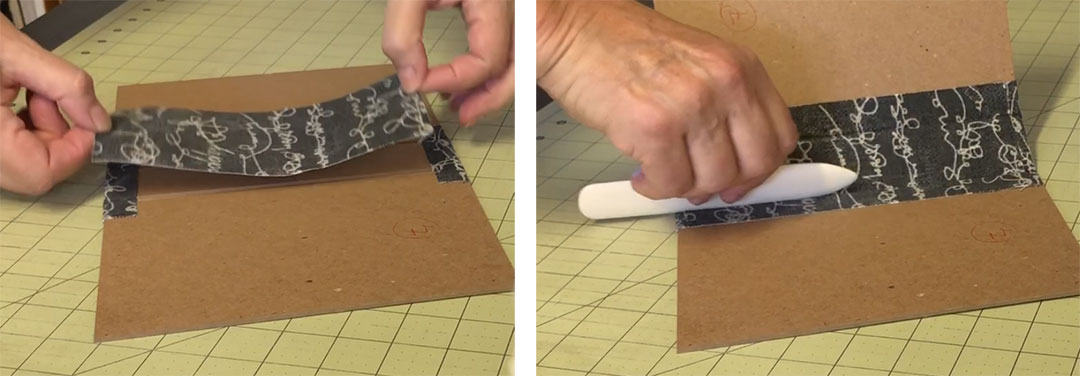
Cover the Lids
The last step for the lid is to attach the paper to both sides. Place one of the cover papers upside down on a piece of scrap paper, making note of its orientation, if it has a directional pattern. Apply glue to the entire paper, making sure you get the edges. Don’t get too generous with the glue along the edges, though. You don’t want it squeezing out. Use regular PVA glue for this step, not the thick glue.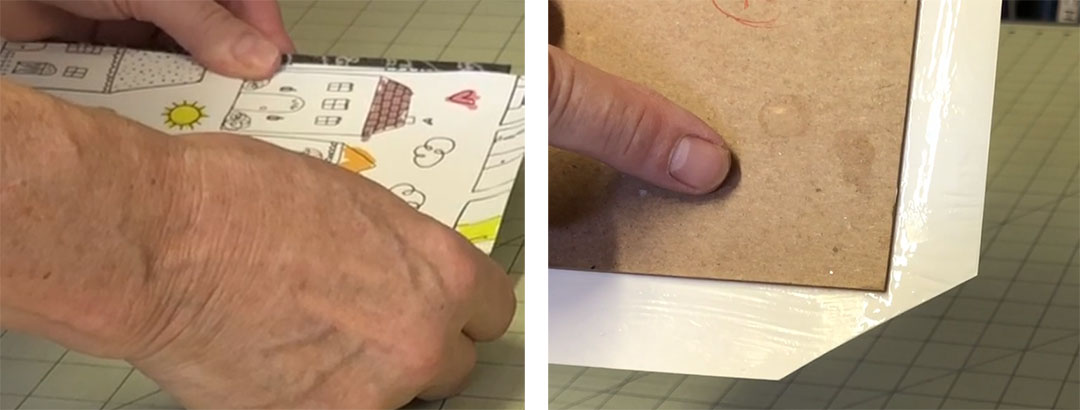
Place the paper on the lid, leaving about 1/8th to ¼ of an inch of the bookcloth showing along the spine edge. Turn everything over and press firmly, making sure the paper is completely adhered to the board. Cut the corners at a 45-degree angle, leaving about 3/16ths to ¼ inch of paper at the corner of the book board. You need enough paper there to cover the corner completely. However, you don’t want too much or it will leave a bulky lump.
If you do all of this quickly enough and, depending on your environmental conditions, your glue might still be tacky. But, you also might need to refresh the glue on the margins, as I am doing here.
Fold Over the Margins and Make the Corners
Fold both short edges over the board making sure they are adhered to the board. Use a bone folder to smooth them down, and then use the bone folder to fold in the corner. This is a bit tricky but take your time and get it right. This is what will make or break the corners of your box. Wipe off any glue that gets on your bone folder while you are doing this.
Do this to both corners and then fold that flap up. Smooth everything down with the bone folder. Place under a weight to let it dry while you prepare the other side.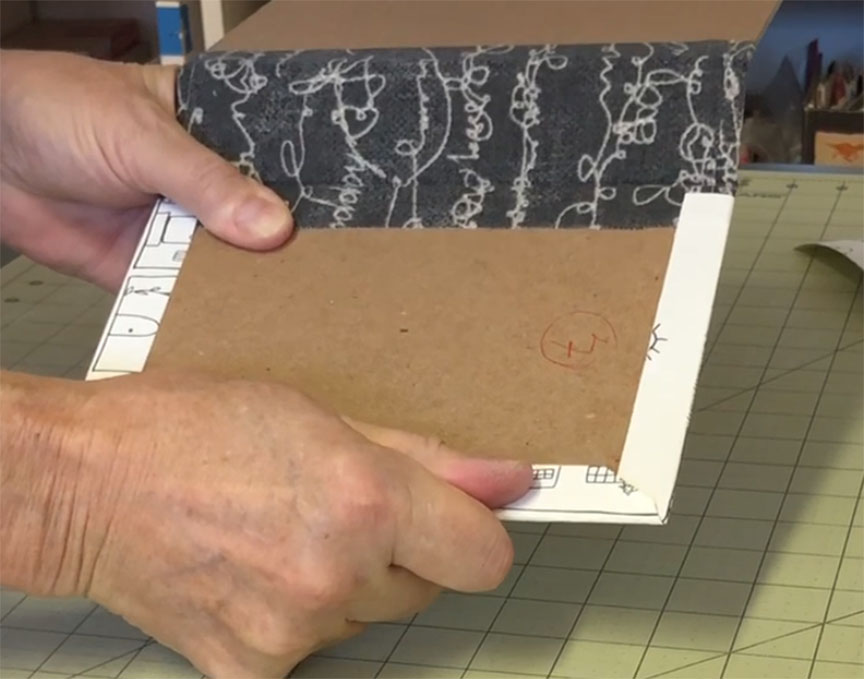
Complete the other side exactly the same way and place this under weights to dry.
Watch part 2 of this tutorial here, to see how to finish your clamshell box.