

Click to Watch the Video Tutorial
This is a continuation of the instruction for creating a traditional portfolio. You can watch that video here. But, you could also use this kind of closure for many different kinds of books.
For this clasp I am using a piece of wide ribbon and a magnetic snap. For the strap you could also use a piece of vinyl or leather. The reason for attaching these now, before you add the endpapers, is so you can hide the back side of the attachments under the end papers.
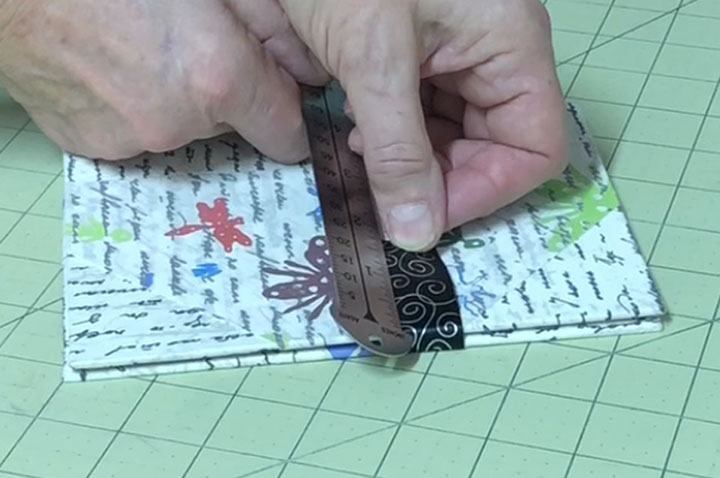
Measure out the placement of the snap on the front and the attachment of the ribbon on the back. You’ll want to be very careful and specific with these measurements.
 Start with the back first. You’ll want to measure and cut a grave where the ribbon will settle into and then get recovered. It doesn’t really matter how long this area is, but it’s important that it’s wide enough to hold the ribbon or strap.
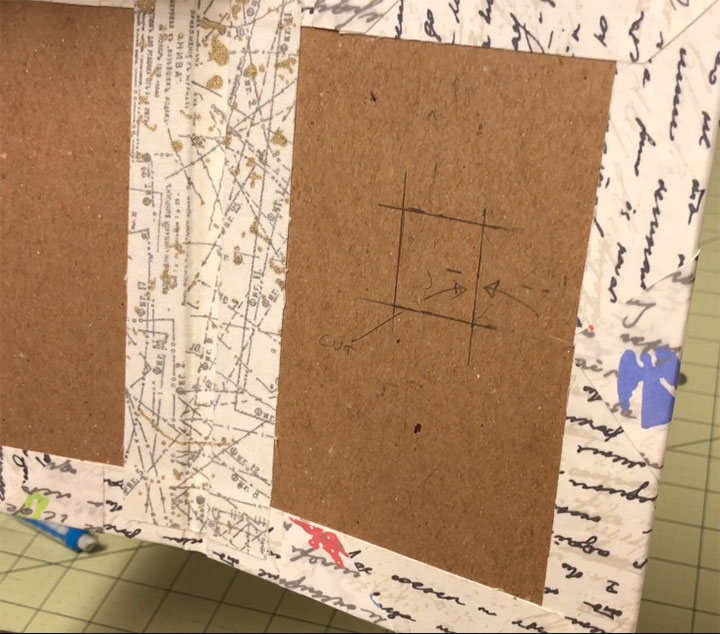
You will cut partway through the bookboard on three sides and all the way through the board and the cover on the fourth side. This is where you’ll bring the strap in from the outside.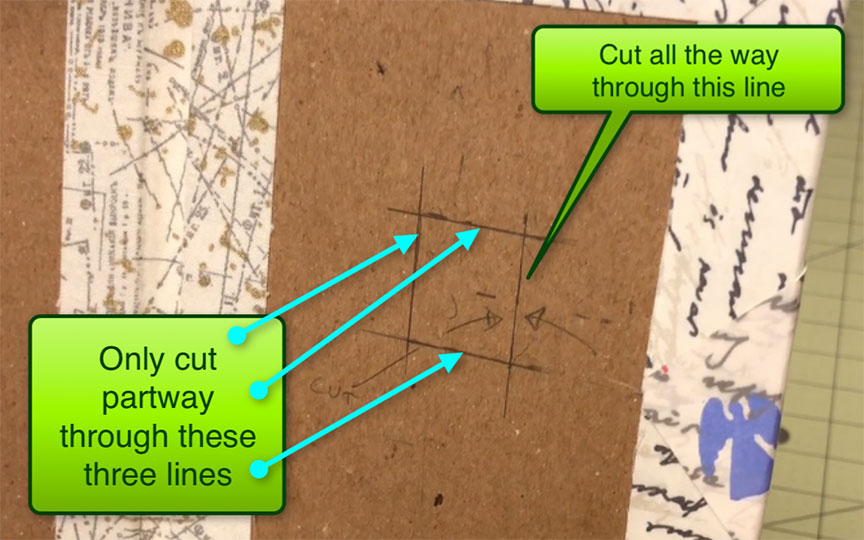
Once you have this area marked, place a line that goes across one of the borders – you’ll use this later to re-orient the piece you peel off. Now cut all four sides about halfway through the bookboard. You don’t have to cut that fourth side all the way through yet.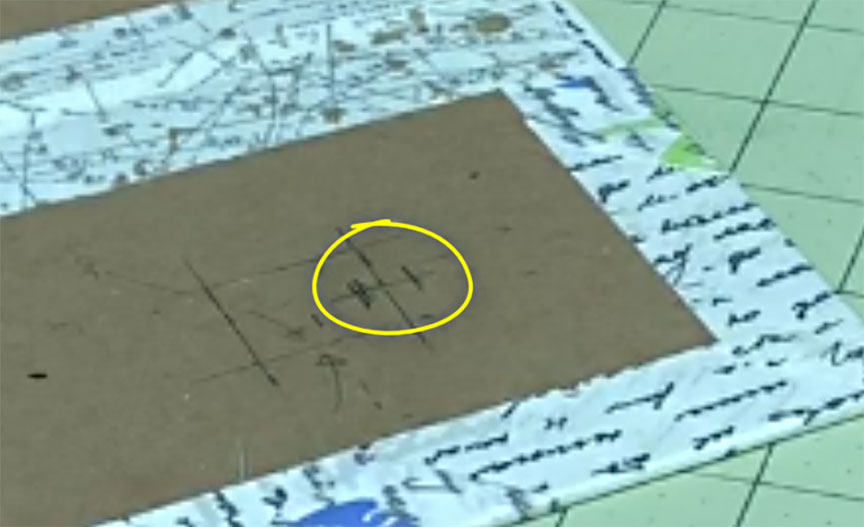
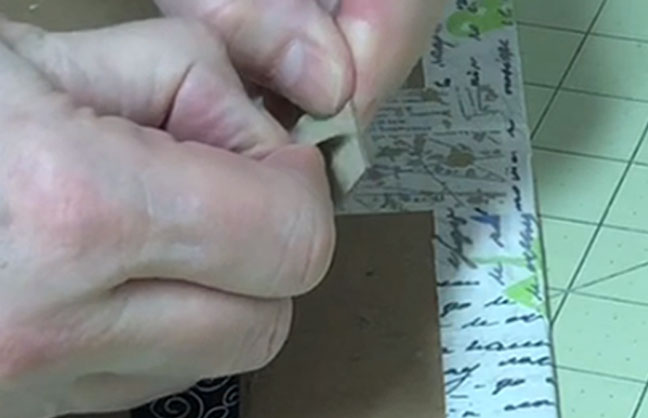
Use your X-acto knife or some other thin tool – a scalpel is perfect for this next step – to peel up a layer of the bookboard. This is one of the benefits of using real bookboard for your projects rather than chipboard or some other cheap cardboard, because bookboard is created in layers, so you can peel layers off for purposes like this.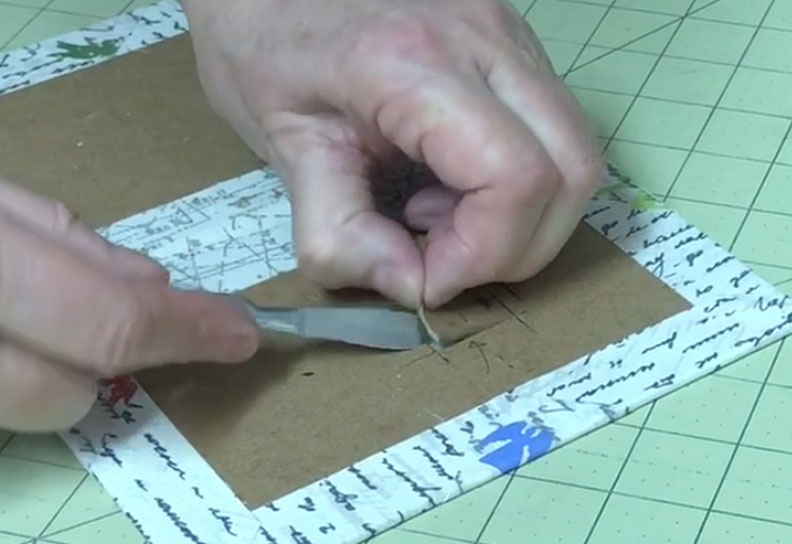
What you peel doesn’t have to come off perfectly – you can clean up the grave, make it deeper if necessary and you will probably also have to trim some of the part you peeled off before you replace it, so don’t get too persnickety (fussy) about this step. Be sure to save that piece you peel off.
 Test your strap and see how it fits into the grave. Also, see if it’s deep enough and will accommodate the piece you just took out. You will almost certainly have to peel some off of the back of the little piece of bookboard and might have to make the grave a little deeper.
The goal here is that once all of this is glued together this area will be level and smooth, and unnoticeable under the endpapers. You see now why that mark you made matters – it helps you reorient the little piece of board so you can put it back the same way it came out.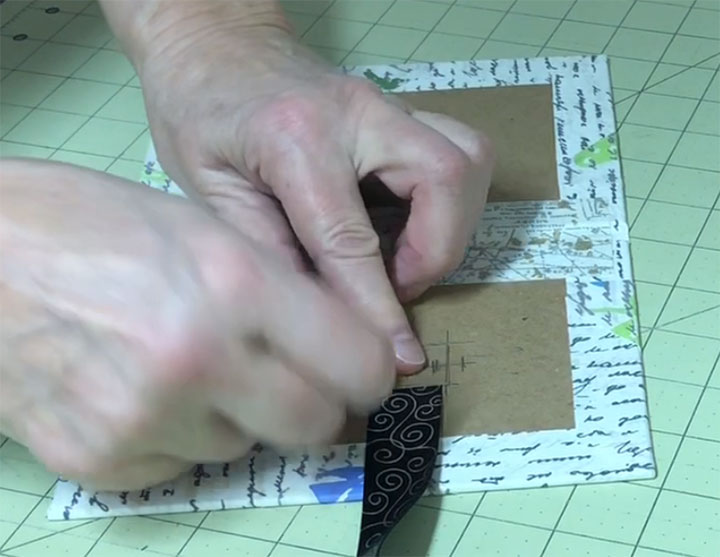
Now you’ll want to cut that fourth side all the way through. This is where the ribbon will be pulled through. You might want to widen this cut just a tiny bit by wiggling your cutting tool back and forth. Don’t get carried away though and make the opening too wide.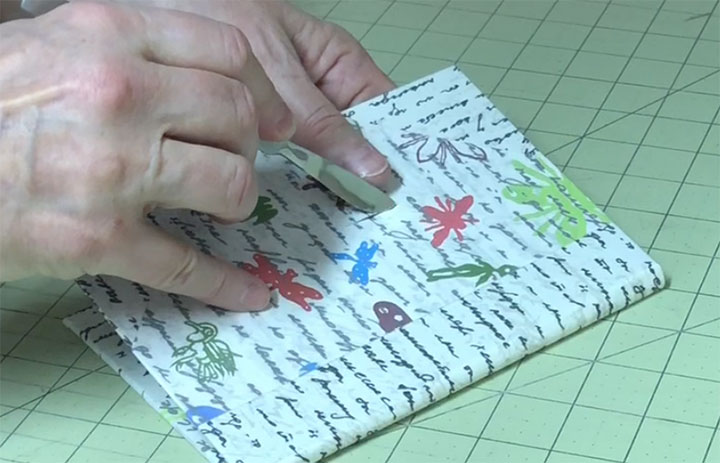
Now you can thread your ribbon through that cut. If it has a right or wrong side, make sure it’s oriented the correct way.
Once again, a scalpel is a very useful tool for this. Use the backside of the scalpel, not the sharp side, as you don’t want to cut through the ribbon. You could also use the backside of an X-acto blade or some other thin tool. 
Tweezers also help with this process because sometimes you can get just a tiny piece of the ribbon through and it helps to have something to pull it the rest of the way. Straighten the ribbon out and make sure it’s going to lie flat in the grave you cut for it.
Before you glue it in place you’ll want to get the length of the ribbon the way you want it. Keep pulling on the excess and adjusting it until you have the snap falling just where you want it.
 Once you have the placement right trim off the excess ribbon. I do this on top of a piece of scrap bookboard.
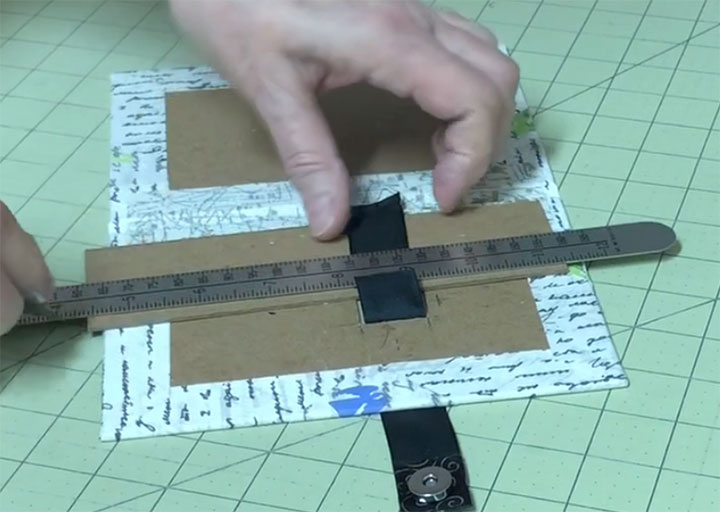
Now you can glue the ribbon into the grave and then glue the little extra piece of bookboard on top of the ribbon. Make sure your marks line up. I use extra thick PVA glue for this just because it seems to dry a little faster, but you can also use regular PVA if that’s all you’ve got.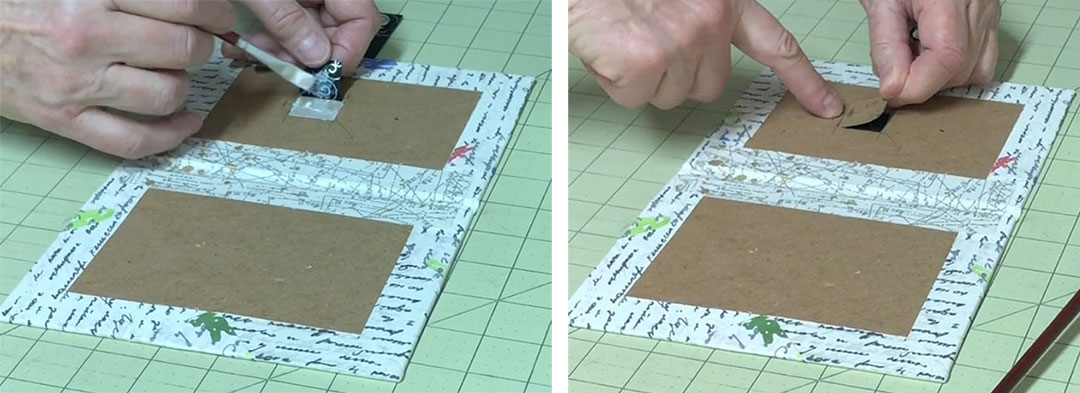
Smooth this all down with a bone folder to make sure what you’ve just done is level with the rest of the bookboard and then weight this and let it dry. Use a piece of waxed paper as a barrier.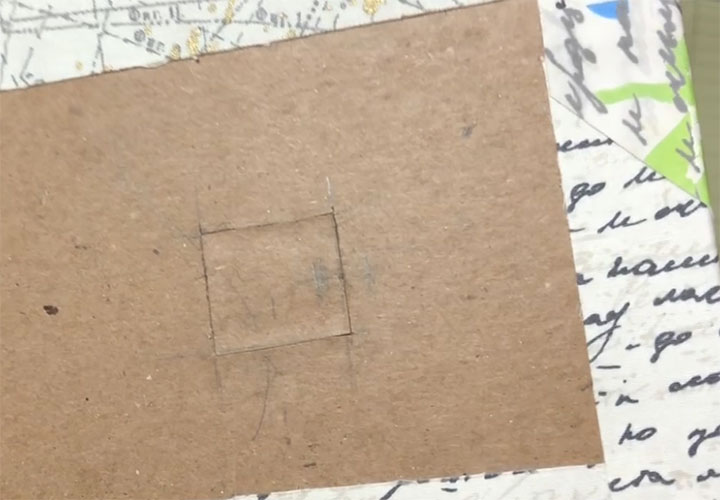
Once this area is dry I go ahead and apply the endpaper to this side. This just helps hold everything in place while I position the snap on the other side. You don’t have to do this – you can just add both endpapers once you have all parts of the clasp glued in.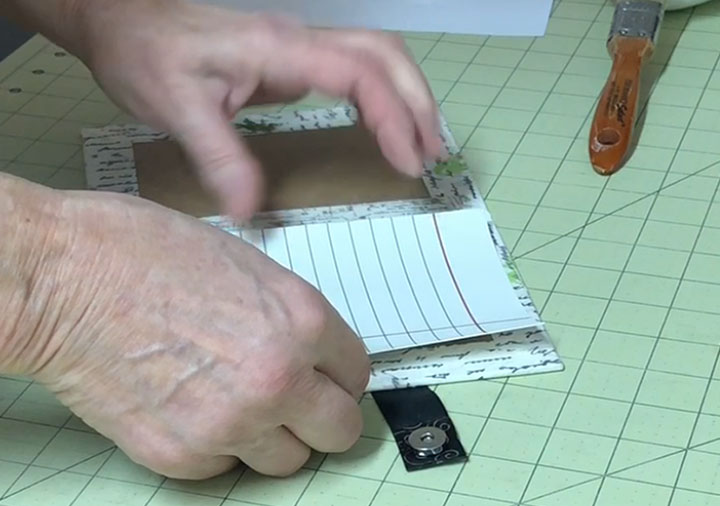
Apply PVA glue and line the paper up so you have a ¼ inch margin around each edge. Press this down firmly with a brayer or a bone folder, and place it under a weight to dry. Once again, use waxed paper between the endpaper and the weight.
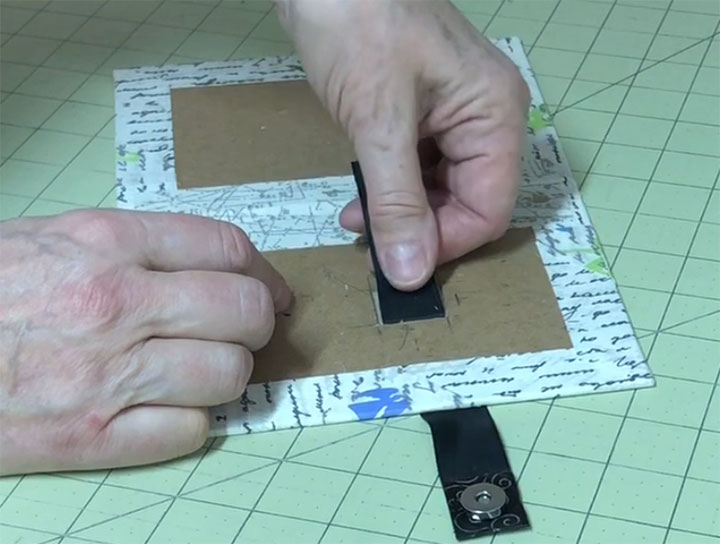
Next you’ll want to add the other part of the snap to the front of the portfolio. Measure and mark carefully where this needs to go.
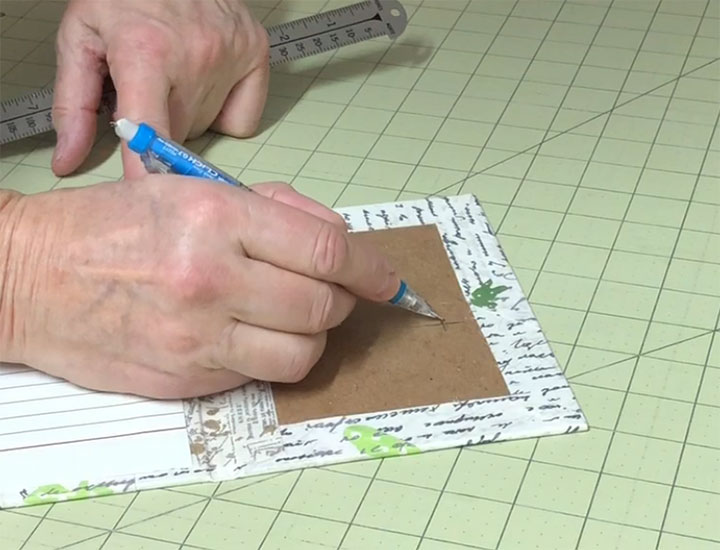
Cut the holes for the prongs all the way through the board and check your placement of the snap before you move on. If you’ve made a mistake with your measurements you have a small opportunity to fix that now, if it isn’t too far off.
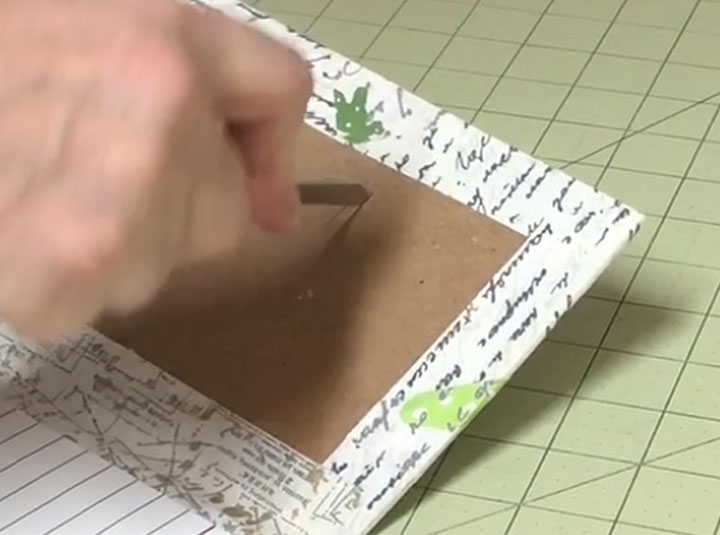 I make the final cuts from the outside to the inside, which results in these little mountains of cardboard being pushed through. I shave these off with a razor blade. You could also sand them off.
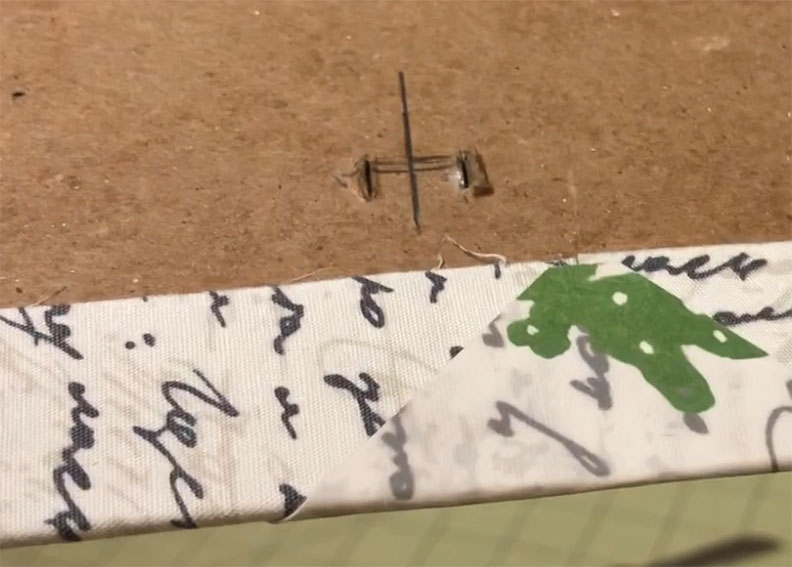
You’ll also want to bury the backing piece for this part of the snap, so you’ll need to cut another grave for it like you did with the ribbon. ![]()
Once you know the snap is fitting properly, place the backing on it and draw a circle around this piece. You can also make this a square, if that’s easier for you to cut, but I prefer not to have those little empty corners to fill once I put all the pieces back, so I suffer through cutting the circle. You’ll also want to mark and cut areas for the brads that fold over.
Remember to make some marks across the border of the circle before you start cutting so you’ll know which way the little piece goes back in.
Cut this shape out, halfway through the bookboard, just as you did with the grave for the ribbon. I try to do this all in one piece but it doesn’t always work out. No big deal if parts of the bookboard come off – you can still glue them back in. Again, a scalpel is a great tool for peeling some layers of the bookboard out, but use whatever you have. This grave might need to be a little deeper than the one for the ribbon, or you might need to shave a little extra off the piece, or both. Don’t forget to save the little piece you cut out.
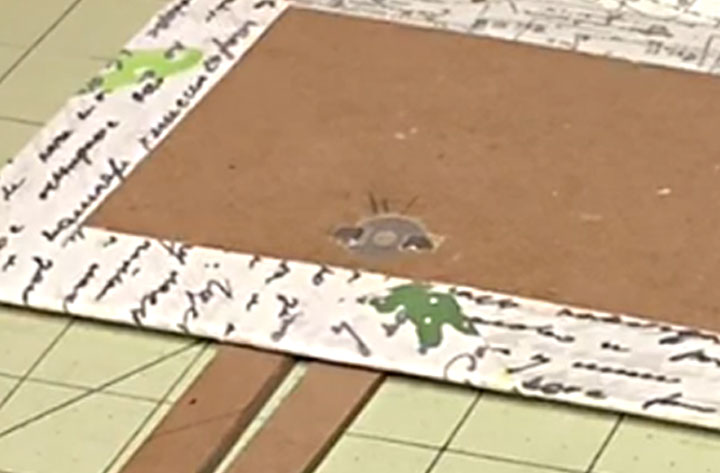 Once you have the grave at the right depth to contain the back of the snap and the covering cardboard, place the backing on the snap and fold the brads over.
Next, you’ll want to glue the excess board over this as you did with the ribbon. I’m using two strips of bookboard underneath on either side of the snap head to raise it off the table. I’m going to be putting some pressure on this as I glue it in and I don’t want to risk mashing the head of the snap.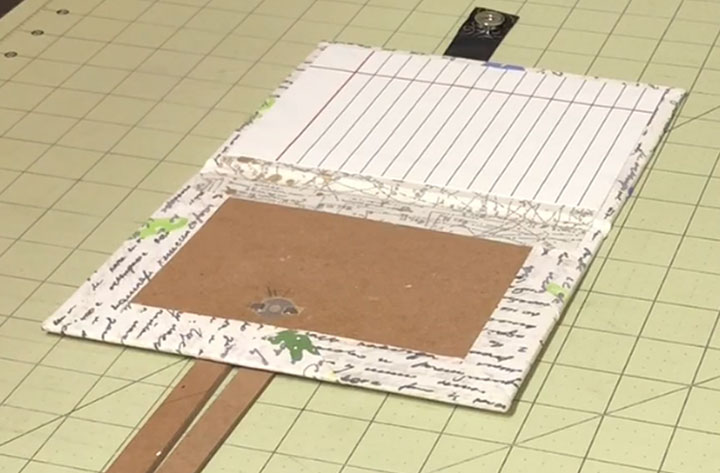
Apply glue to the back of the piece of bookboard that you removed and glue it back into place, pressing down to make sure you are getting everything level with the surrounding bookboard.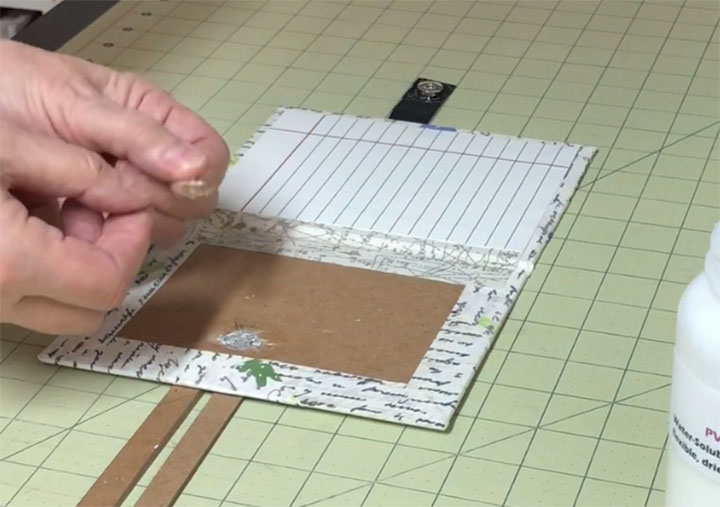
The final step is to add the last endpaper and let everything dry thoroughly.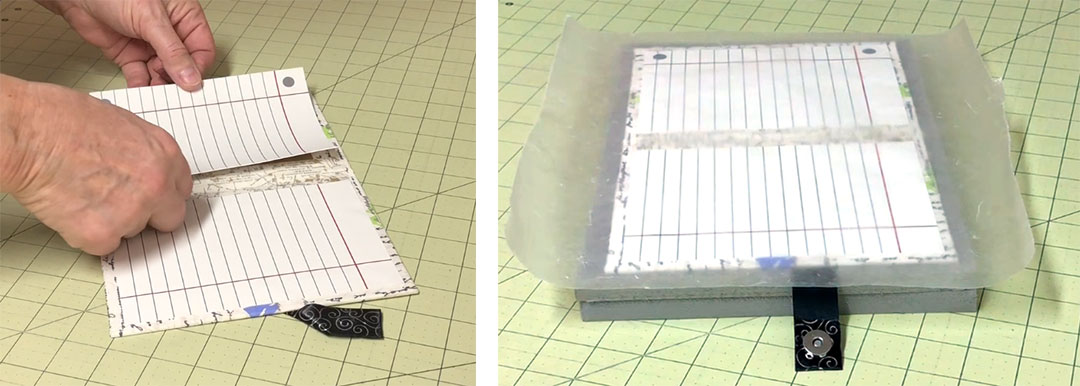
I’m putting this on top of some dense foam before I weight it down because, again, I don’t want to risk damaging the snap. The foam gives it enough support to dry nice and flat without mashing down the snap.
That’s it!

