Hardbound Explosion Box Part 1 – The Box
Click to Watch the Video Tutorial
This is part 1 of the tutorial and will show you how to create the explosion box and the lid. Part 2 will show you how to create the elements inside the explosion box and you can find that tutorial here.
Make it for a Gift
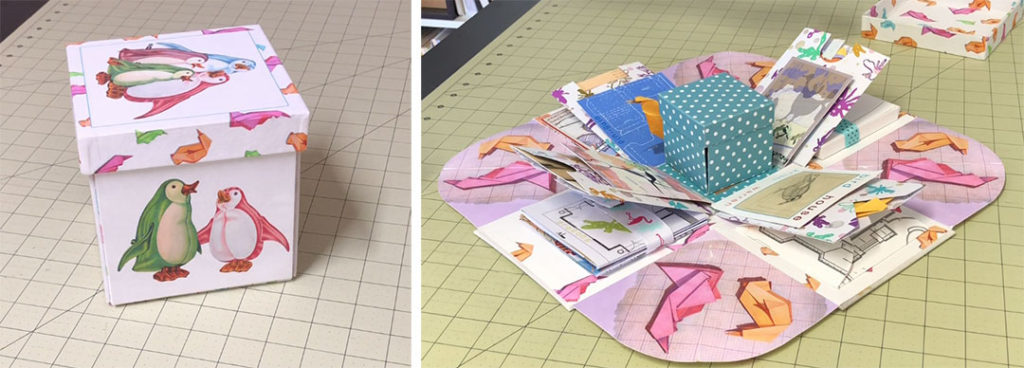
This is a tutorial for a hardbound version of the ever-popular explosion box. You see this box often as a Valentine’s Day gift, or a birthday or anniversary keepsake, containing photographs and other personal ephemera. It’s almost always made out of flimsy cardstock or some other less-than-substantial material, and I’ve often wondered why there wasn’t a more permanent, sophisticated version, so I’ve made one.
Make an Artist Book
I think this is also a great delivery method for a unique kind of artist ‘book.’ It’s not really a book and it’s not really a box, but it allows for elements of both, and if you create this hardbound version it has the look and feel of a permanent and professional object. Personally, even if I were receiving this as a memento of a relationship, I would prefer the permanence and sophistication of this hardbound version.
Start with the Worksheets
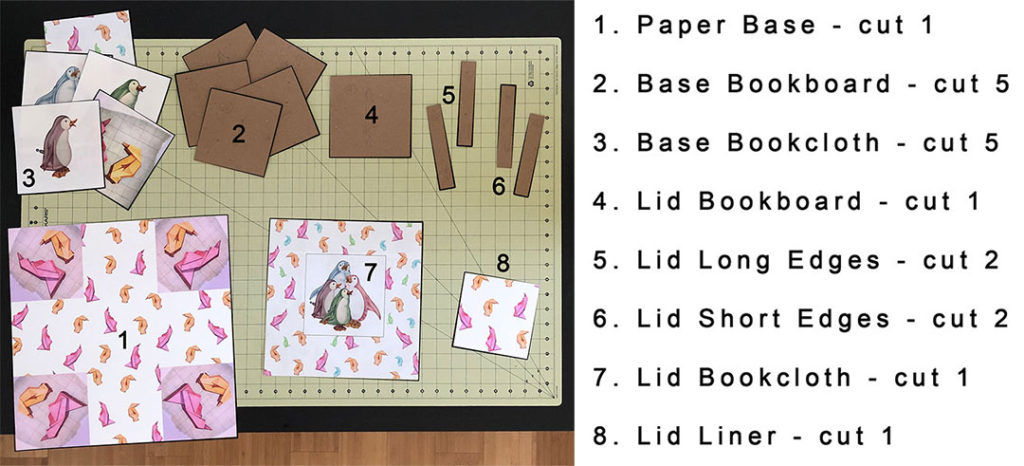
This is one of those constructions that requires very precise measurements, particularly for the lid, or the end result will fail. I’ve created a couple of worksheets that you should download here and take the time to carefully fill out before you start.
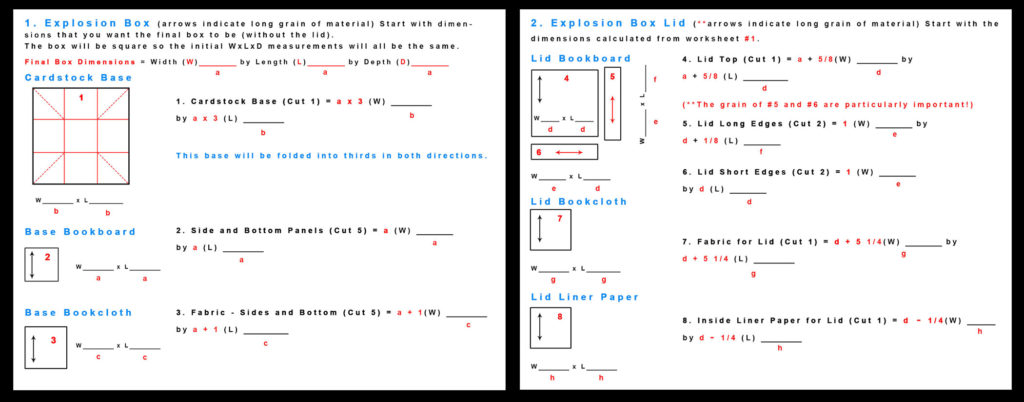 The measurements are based on bookboard that is .067 inches thick, or about 3/32nd of an inch or 2 millimeters, and using bookcloth that is of average thickness. If you’re using very thick bookcloth you’ll want to adjust your measurements accordingly as this will impact the way the lid fits.
Your measurements start with the measurements of the box that you want to make. Hopefully the worksheets are self-explanatory, but if you want detailed instructions about how to fill them out you can watch the brief video here.
Cut all Your Materials
Once you have your worksheets filled out and all of your materials cut, you can start by constructing the base of the box.

Start Construction with the Cardstock Base
The first part of the base that you start with will be cardstock or heavy paper.
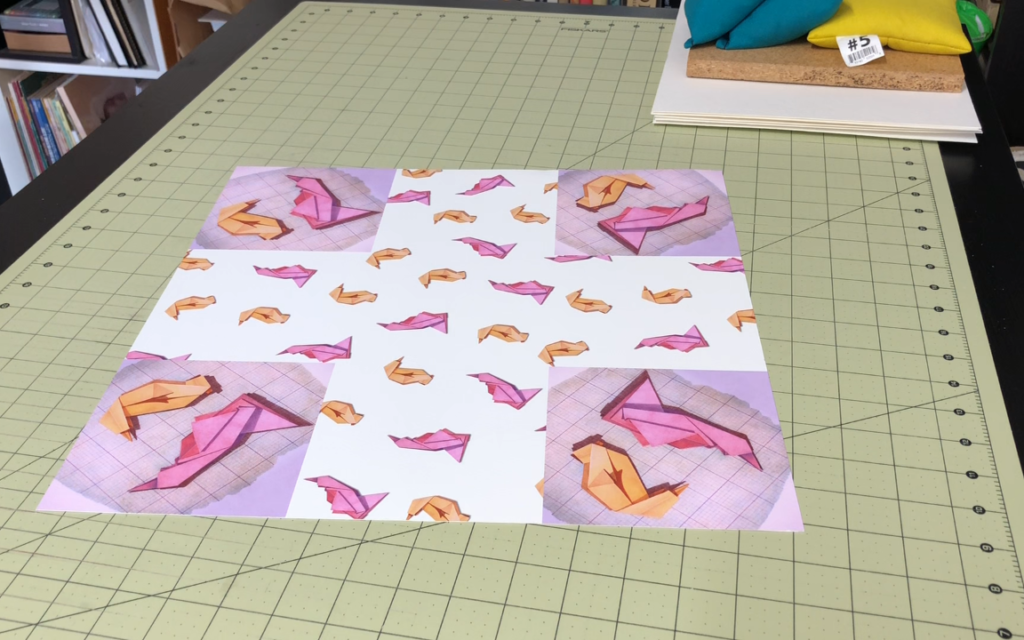 You could do this part with fabric or bookcloth but heavy paper will give you a firmer base and allow the corner hinges to function properly. Even though most of the outside will be covered with fabric-covered bookboard, the outside of the hinges will still be exposed, so if you’re using commercial cardstock find something that has an interesting print on both sides. If you’re printing your own paper, consider printing on both sides.
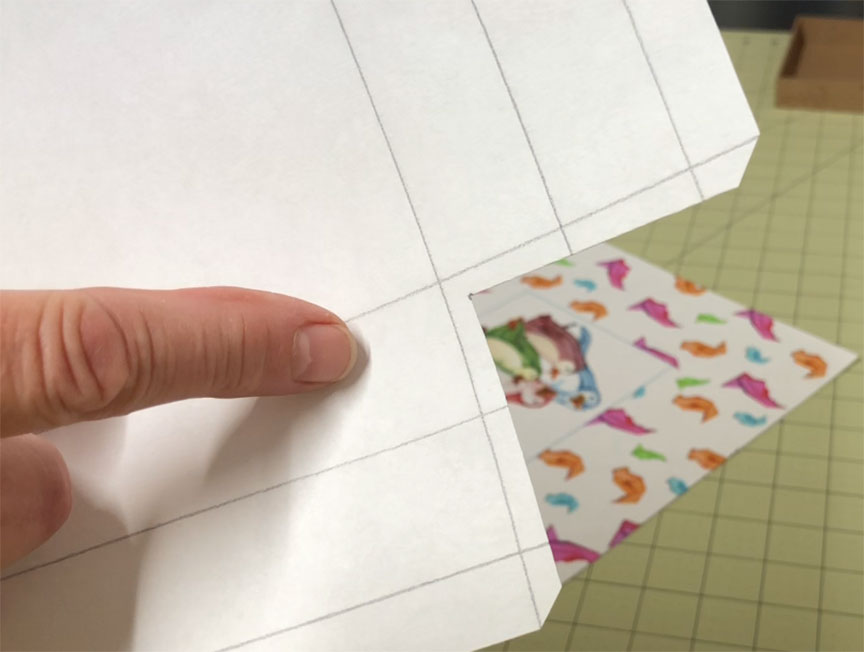
Fold the Base into Thirds
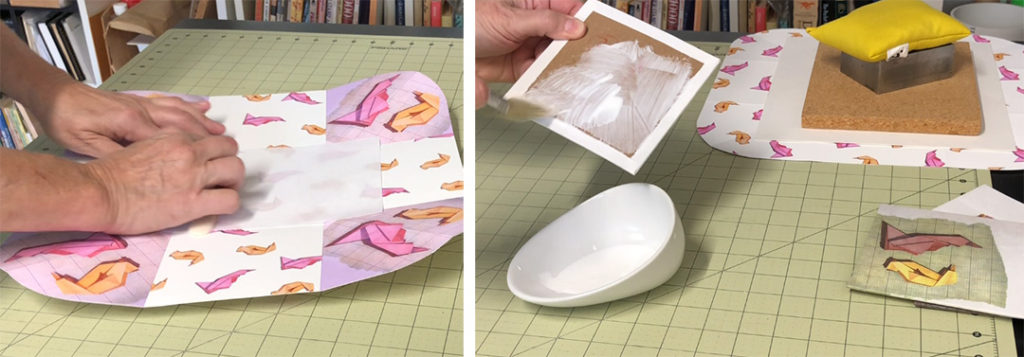
This base will be folded evenly into thirds. Score along those lines going in both directions from the inside of the base piece of paper. I use my bone folder to score the paper because I get good clean scores using it.
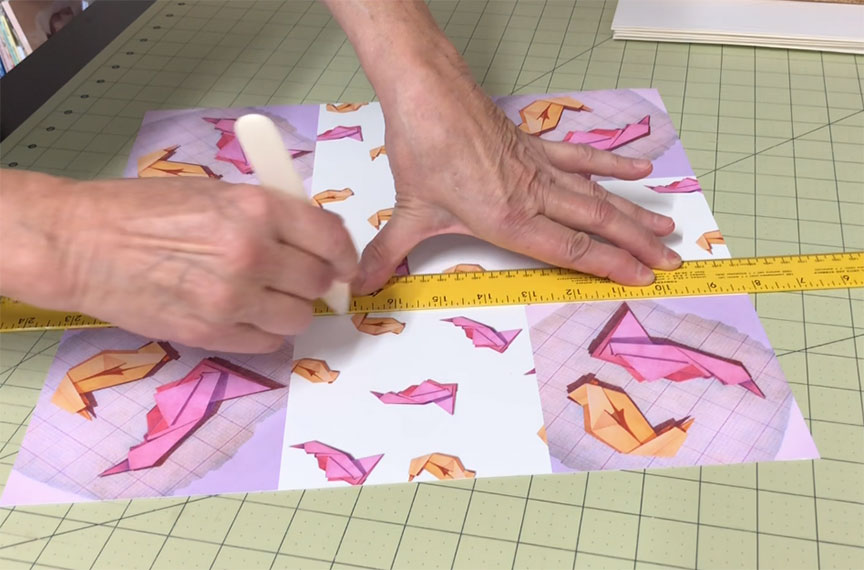 Some bone folders don’t have enough of a point on the end to be able to do this so you might have to find another tool, like a knitting needle, perhaps. Scoring the paper makes it much easier to fold, particularly with heavier paper. Fold the paper along the lines you just scored, making valley folds on the inside.
Fold and Shape the Corners
Then turn the paper over and score diagonally in each corner. Be careful not to score all the way into the center section, you only want these folds to happen in the corners. 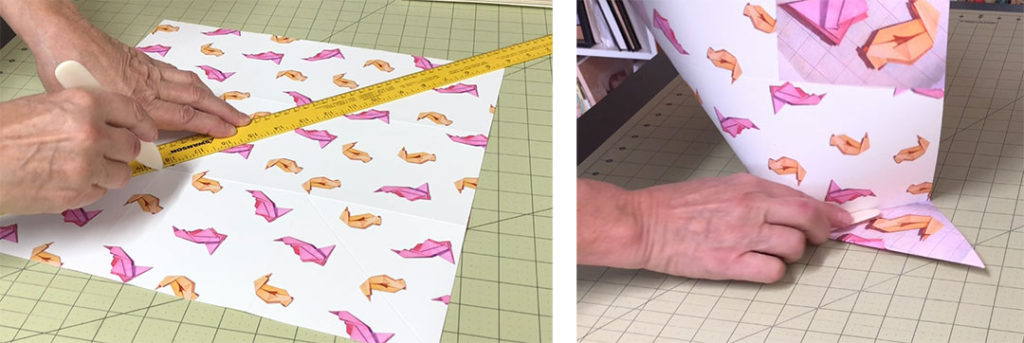
Fold the paper along these lines creating mountain folds on the inside of the base.
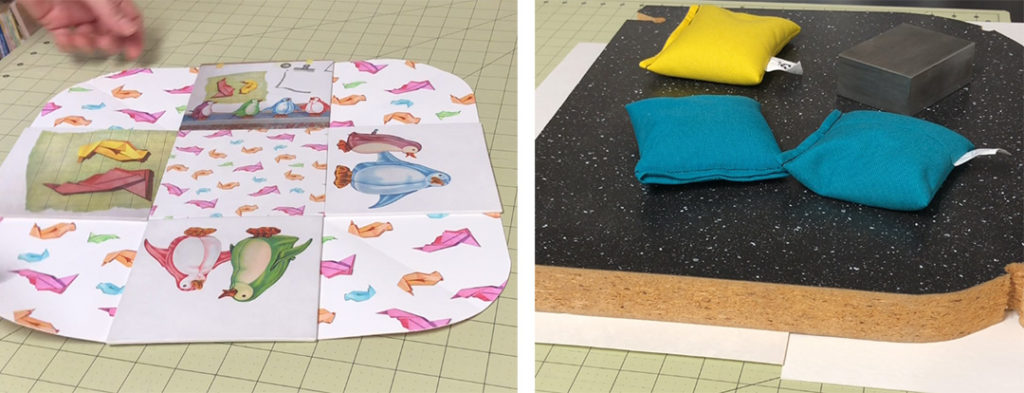
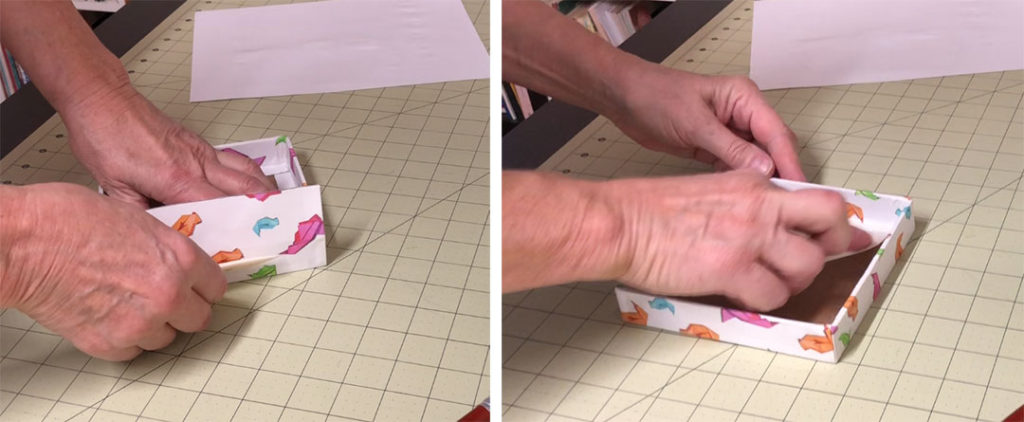
Once you have all of the folds firmly creased, place the base with the inside facing up. As you pull all of the edges together the base should naturally fold up into a box, with the corners folding to the inside. 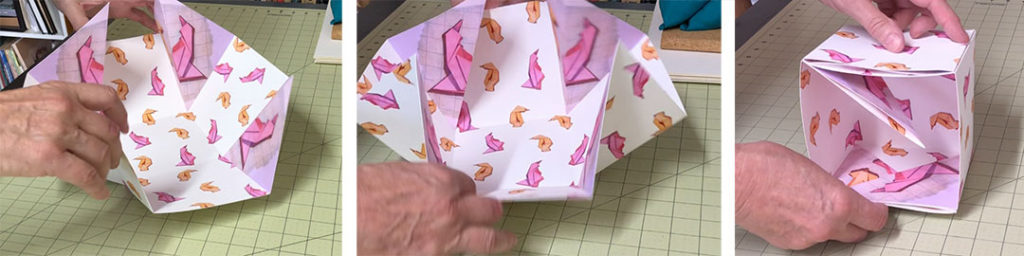
It doesn’t matter where those corners go – right or left – that will all get worked out later when you start working on the details of the inside of the box. Right now all you care about is the box itself.
You can change the shape of those corners – what I also refer to as the hinges – to make the box more interesting. Shaping the corners also helps the box fold a little easier.

Gather Your Materials to Cover the Bookboard
So, now you have the base that you’re going to glue your bookboard to, but first you want to cover the bookboard. In all of my examples the bookboard is covered with bookcloth, although you could also cover it with paper if you wanted. 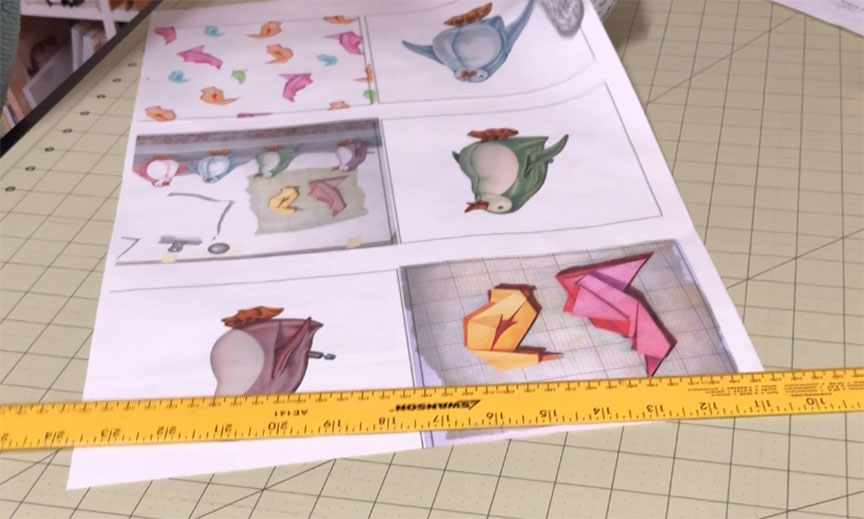
In the version you see here I’ve printed my own bookcloth with my designs using the method that you can learn in this video.
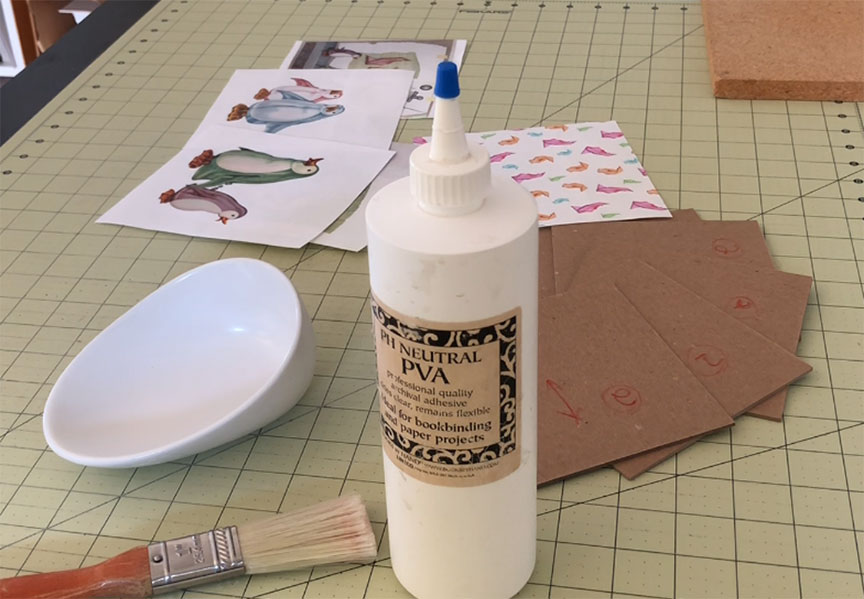 Gather the rest of your materials together. In addition to the fabric or paper you are going to cover the bookboard with, this will include the 5 bookboard pieces, PVA glue and a brush, and something to weight the bookboard down with after you cover it.
Cover the Bookboard with Bookcloth
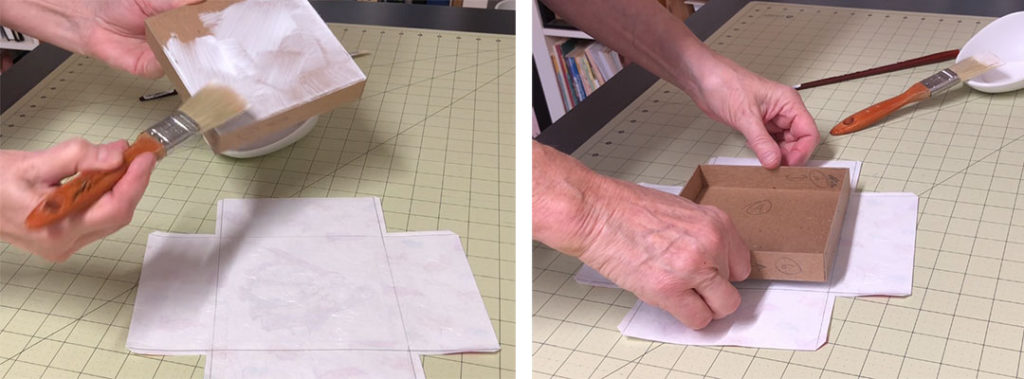
Start by applying glue to the first bookboard. Center it on one of the pieces of bookcloth you’ve cut. You could draw guides on the back of the bookcloth if you want, but I find that these pieces are small enough that it’s easy to just eyeball their placement.
Press this down firmly from the back then flip it over and press the bookcloth down from the front with a bone folder. Since the bookcloth will be a little damp from the glue it’s a good idea to use a barrier paper between the bookcloth and the bone folder. Then put this piece under weight while you work on the next piece.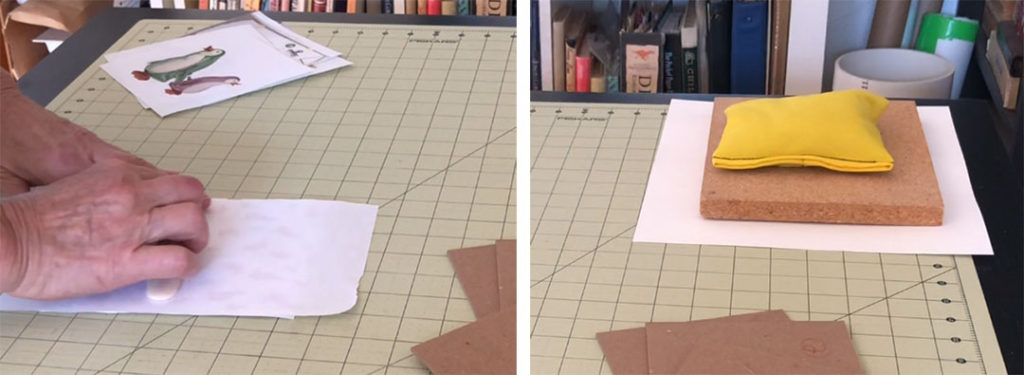
Continue this process with the remaining four pieces, placing each one under weight after you finish it.
Trim the Corners of the Bookcloth
The next step is to trim the corners of the bookcloth on these pieces so you can fold the edges over. You want to trim the corner leaving about ¼ inch of material at the very corner. If you trim too close you won’t have enough material to cover the corner and the bookboard will poke through.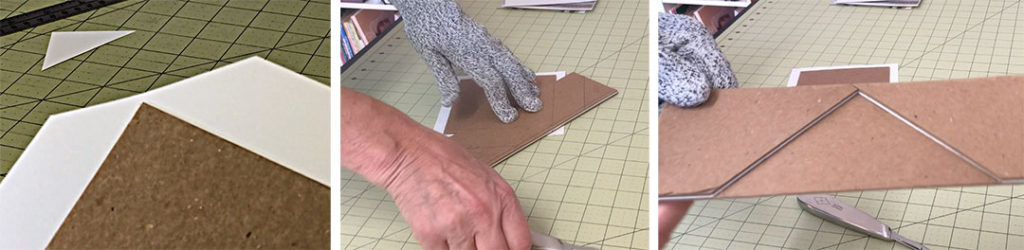
I do this all the time so I’ve made a little jig out of scrap pieces of bookboard that I can cut against. I just set it over the corner and trim against it and it gives me the perfect cut every time. If you’re making and covering a lot of books you might consider making yourself one. It saves a lot of time and makes cutting the corners easy.
Glue Down all the Edges of the Bookcloth
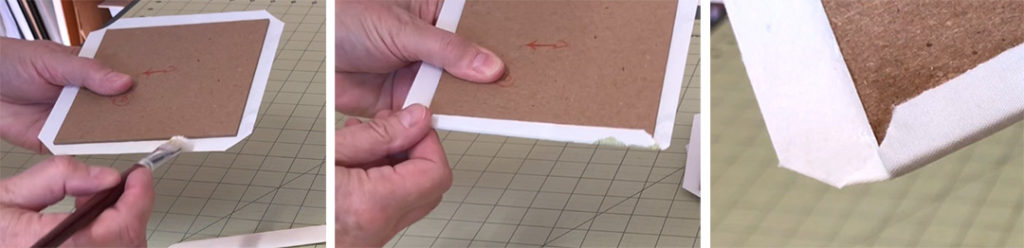
Once you have all of the corners trimmed you will glue down the edges of the bookboard. Use regular PVA glue for this.
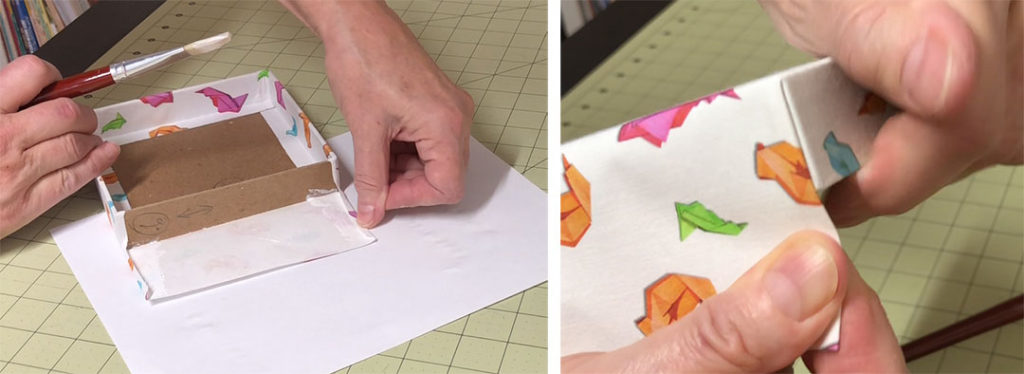
So, start by gluing down two opposing edges. Be sure to get coverage at the corners. This is the time to take care of the excess at the corner by folding it in to cover the corner, using your fingers and a bone folder.
 You can see a close-up view of how to make perfect corners in my brief video here:
Once you have the two opposing sides and the related corners glued down, then glue down the remaining two edges. These two edges are quite easy because you’ve already taken care of the trickier corners. Be sure to get a bit of glue on the corner area that has been folded over.
 Use your bone folder to smooth all of this down, paying particular attention to flattening the corner areas.
Follow this same process for the remaining four sides and place each one under a weight as you finish it.
Start Gluing the Bookboard to the Base
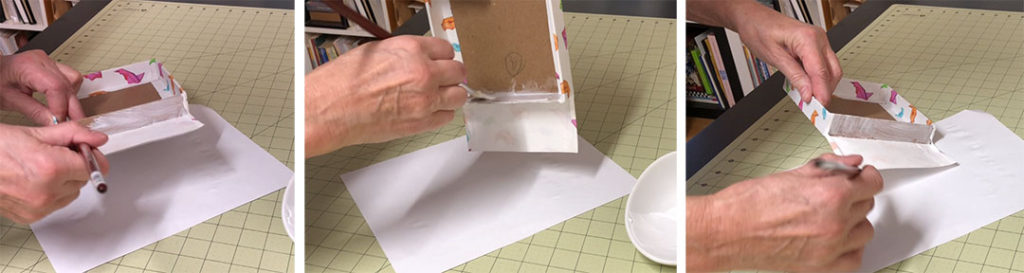
The next step will be to glue the covered bookboard pieces to the back of your paper base. If your images have a specific direction to them, be careful that you glue them onto the base accordingly. It’s easy to get turned around about the direction they go, so think twice before you glue each one in place.
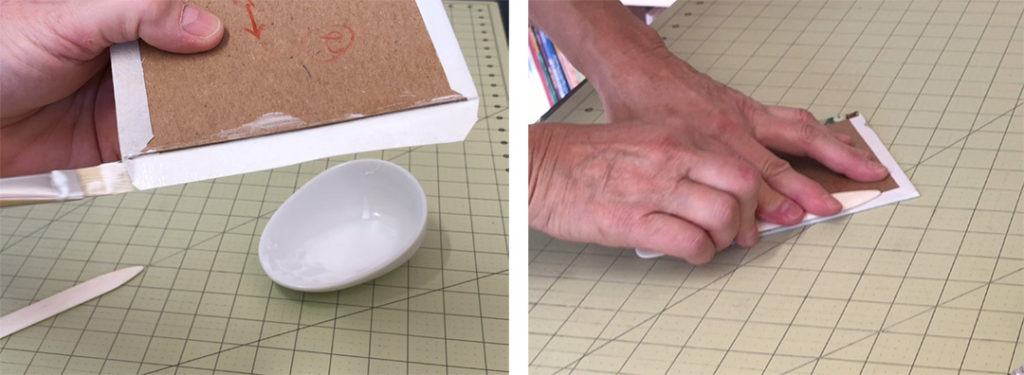
 Start with the board that goes in the middle section, as every other board will butt up against this one. Cover the back of the piece with regular PVA glue and place it on the center square of the base. Orientation for this piece doesn’t matter. It’s the bottom of the box and it can be turned in any direction.
 Press this piece down firmly from both sides using your fingers and a bone folder. When using the bone folder place a piece of paper in between as a barrier so you don’t damage the bookcloth. Place this under a weight while you apply glue to the next panel.
Continue with the Other Four Pieces of Bookboard
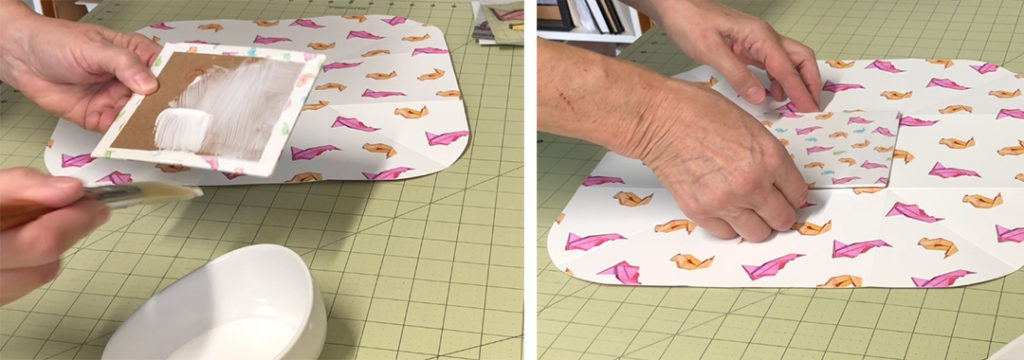
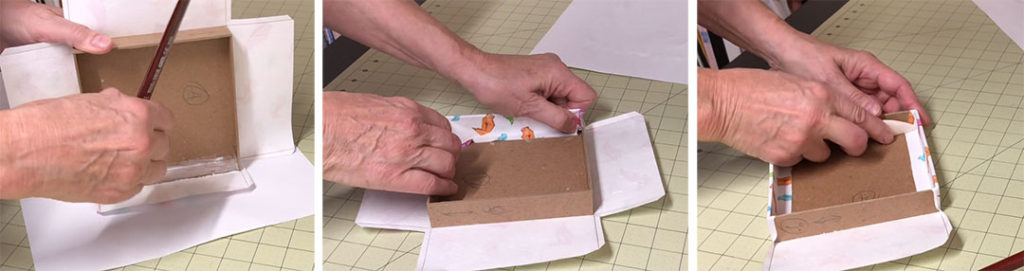
Choose the next panel and apply glue to the entire back. Butt this panel up to the edge of the center panel. Be sure to check the orientation first! Press this panel down firmly and put that section under weight while you work on the next panel. Continue this process with the rest of the panels.
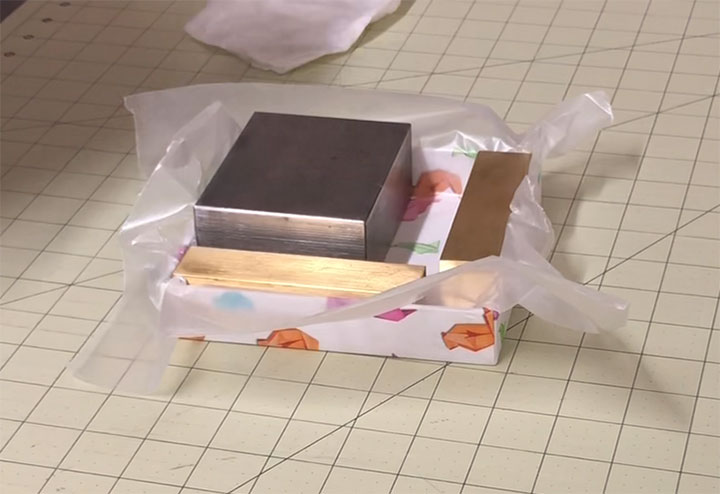
 Once you have all five panels glued into place put a heavy weight over the entire piece and allow it to dry thoroughly. That finishes the basic base. Next you’ll build the lid.
Gather Your Materials for the Lid
Gather together all of the bookboard pieces for the lid. If you’re using the worksheets these are pieces # 4, 5 and 6.
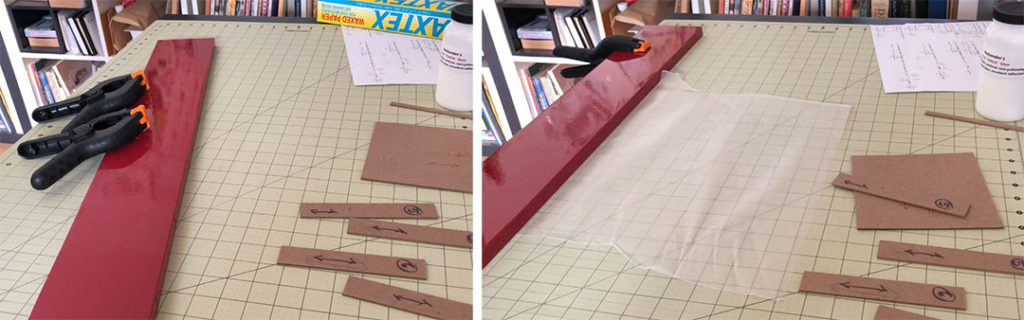 One other useful thing that you might want to rig up is a backstop to work against. Any straight piece of board and a couple of clamps will work for this. It gives you something firm to push against when you are gluing the pieces of the lid together. I also put down a piece of waxed paper because the gluing process can get a little messy.
Start with Two Opposing Edges
Start with piece 4 and one of the edges marked #6. These edge pieces should be the same length as the main lid piece. The direction of the grain on these edge pieces is very important. If you have the grain running the wrong way you risk having the edges of the lid deform and bow outward.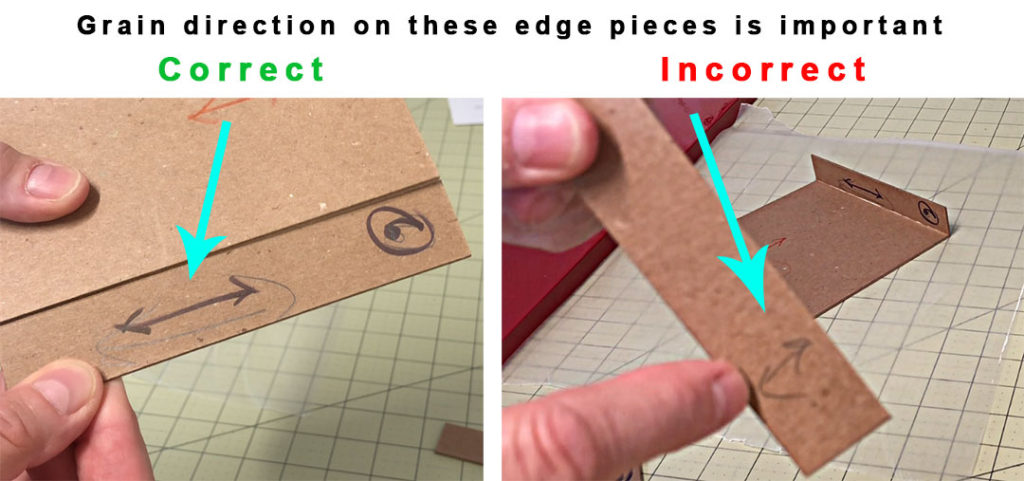
You can tell which way the grain runs in bookboard by lightly bending it. If it bends easily, that is the direction of the grain. You want these edges to be stiff when you try to bend them. In the image below, the grain is running the wrong way!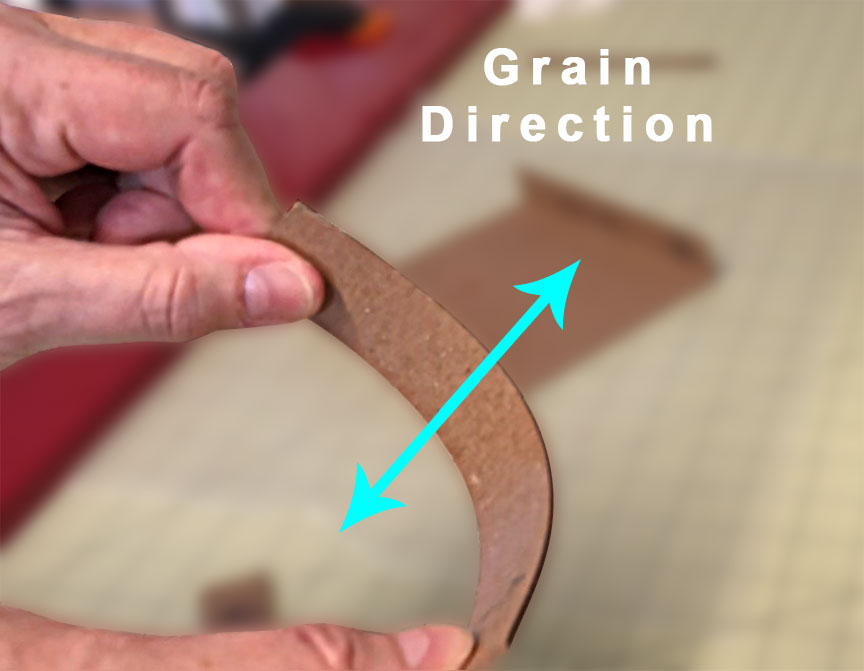
Use Thick PVA Glue, if Possible
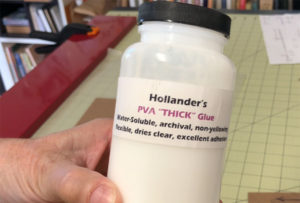
I use a thick PVA glue when gluing boxes together. The extra thickness makes it a little easier to get the correct bead of glue along the edges, and it sets up a little faster so you don’t have to hold the pieces together for so long. I get thick glue this from Hollanders but you can probably find other sources for it.
 If you don’t have this glue or can’t get it, regular PVA glue will still work. I’ve also heard that you can put PVA glue in the freezer for about a half hour or add 10% cornstarch or borax to thicken it up. I haven’t tried either of these techniques but it might be worth experimenting to see what works.
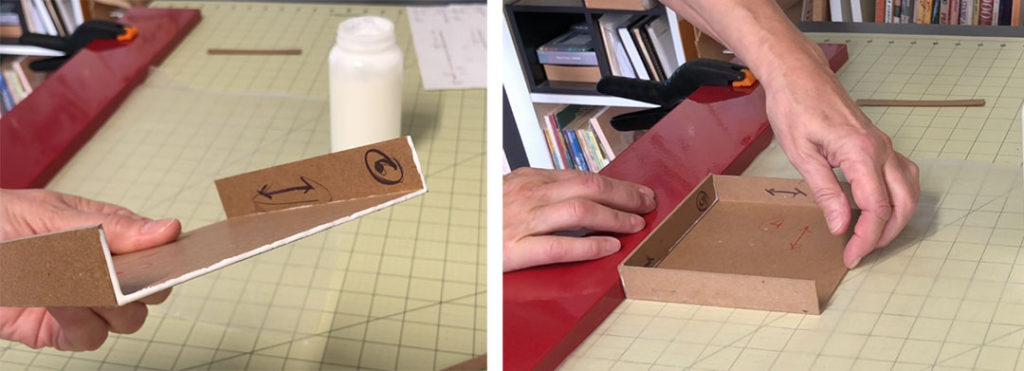
Use a scrap piece of bookboard to dab glue along one edge of the lid piece. The goal here is to get enough glue so that you get a nice tight seal, but not so much that you have glue gushing out everywhere.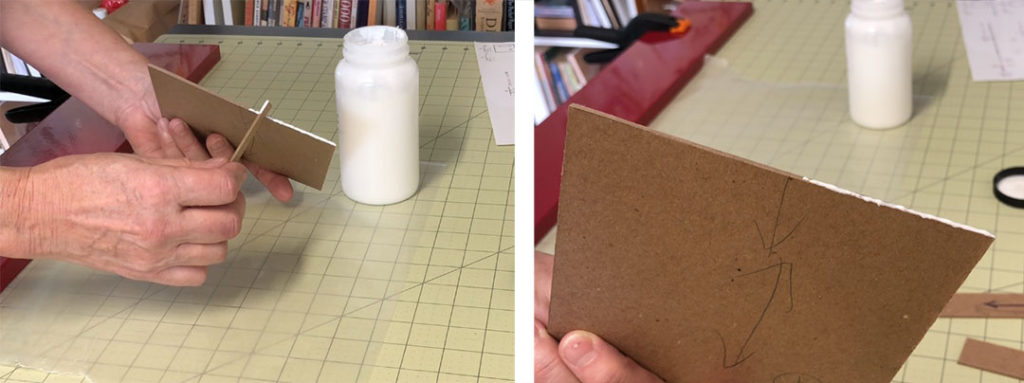
Once you have that edge covered with glue, place the #6 edge piece flat against your backstop and align the lid to it. Push these two pieces tightly together, using your backstop to push against, and hold them for a few seconds to create the seal. Use another piece of scrap cardboard to clean out any excess glue in the corner joint.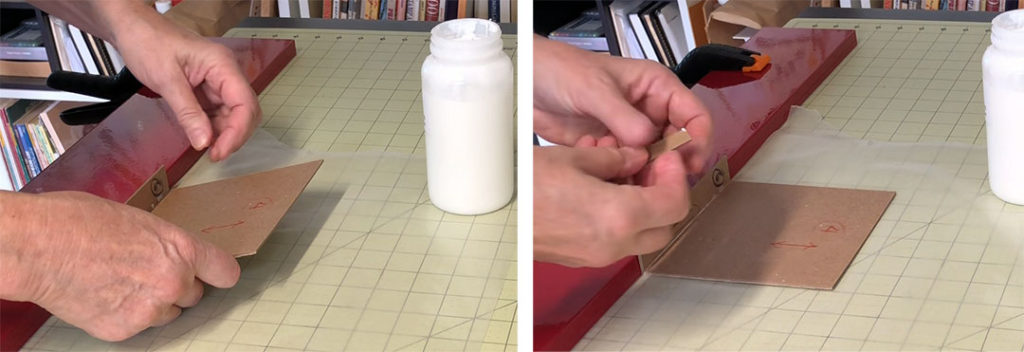
Clean Up the Seams
Carefully pull this combo off of the waxed paper – some glue will have leaked out so it will stick a little. Wipe the seam with your finger to smooth down any excess glue that has leaked out. The presence of the excess glue itself doesn’t really matter as it will be covered up, but you don’t want it to dry lumpy.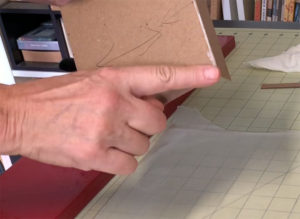
Follow this same process for the opposing side, using the other #6 edge piece. Don’t worry yet about whether or not the two sides are perfectly perpendicular to the lid. This will get resolved once you add the other two sides.
Attach the Other Two Sides
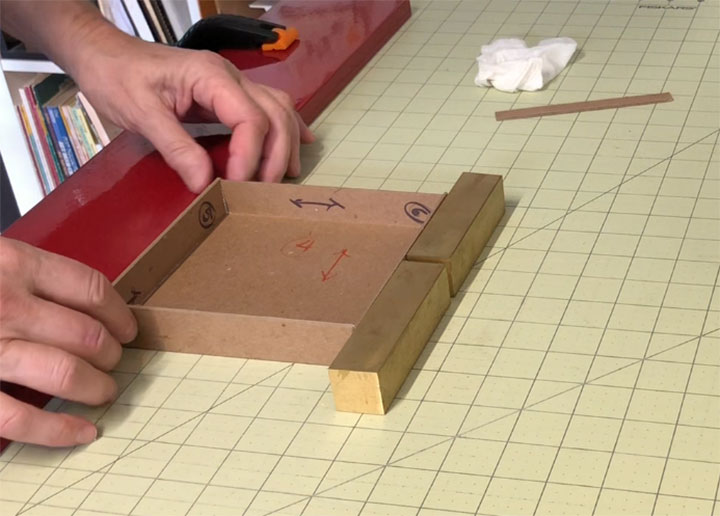
The next step is to attach the other two sides. This time, in addition to applying glue to the long edge of the lid, you’ll also apply it to the two short edges of the #6 panels that you’ve just attached. If you’ve measured your panels correctly, the #5 panels should be just a bit longer than the lid, covering those two small edges of the #6 panels.
Place one of the longer #5 panels against your backstop and attach the lid piece to it, pushing firmly against the backstop to adhere the lid to the new edge piece. Make any minor adjustments to the two #6 sides to make sure they align with the new side. This should help make all of the sides align correctly so they become perfectly perpendicular to the lid.
Clean up the seams, inside and out, just as you did with the previous sides.
Follow this same process with the last side piece.
Weight and Dry
Once I’ve cleaned all of the excess glue from the edges I will often put weights against those last sides, holding the lid tight to the backstop.
Let this dry thoroughly. I suggest letting it dry overnight. You want this to be nice and solid before you begin covering it.
Gather the Lid Coverings
So, once it’s dry gather your last two pieces, which would be the bookcloth for covering the lid and the small piece that will go inside once it’s all wrapped.
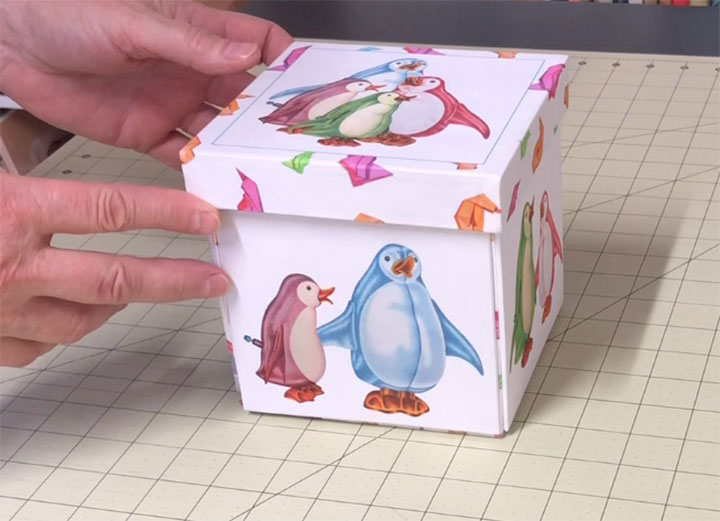
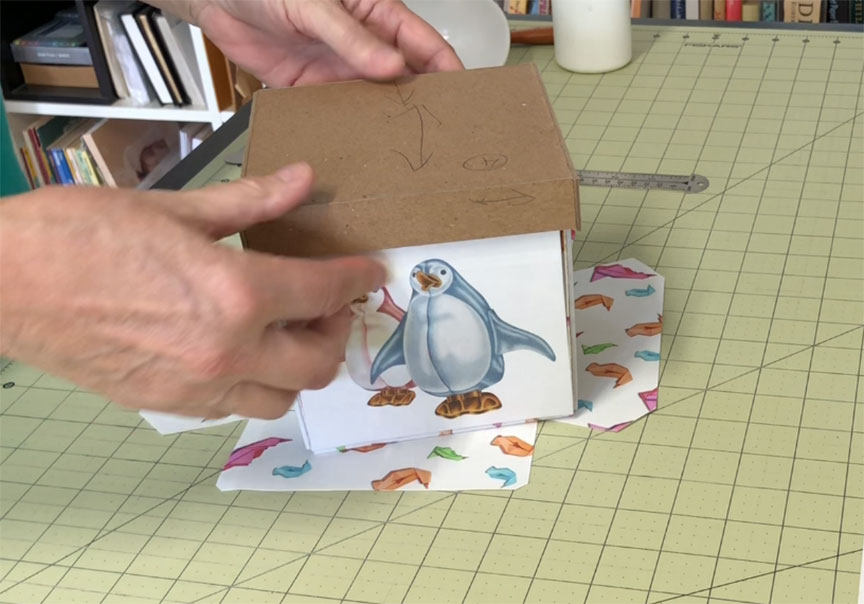 Before you start on this though, it’s a good idea to make sure the lid fits. It’s okay if it’s a little bit loose, but if it’s tight at this stage, it will definitely be too tight once the whole thing has been covered.
Trim the Bookcloth
You’ll want to trim the bookcloth for the lid before you begin gluing it. Here is the template that you’ll want to follow: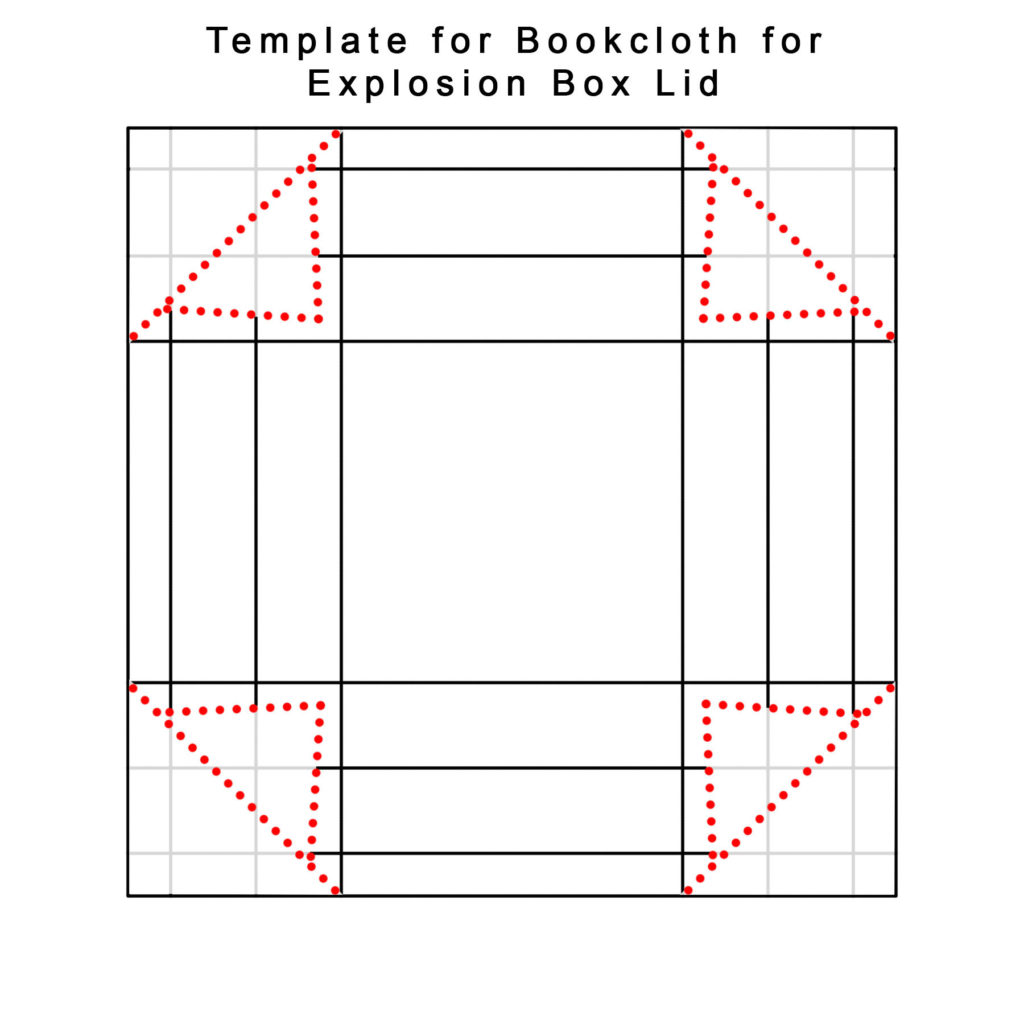
You can download a printable version here:
Trim the corners at a 45 degree angle and then cut this V shape into each corner.
 You want to leave a little margin on each side of the V, and don’t cut all the way to the corner of the lid or you won’t be able to completely cover the bookboard at the corners.
Mark the Guidelines on the Bookcloth
I mark the guides on the back of the bookcloth so I’ll know exactly where to place the lid once I have it covered with glue. If I’m doing more than one box I’ll often make a template from regular bond paper and then just trace around this onto the bookcloth.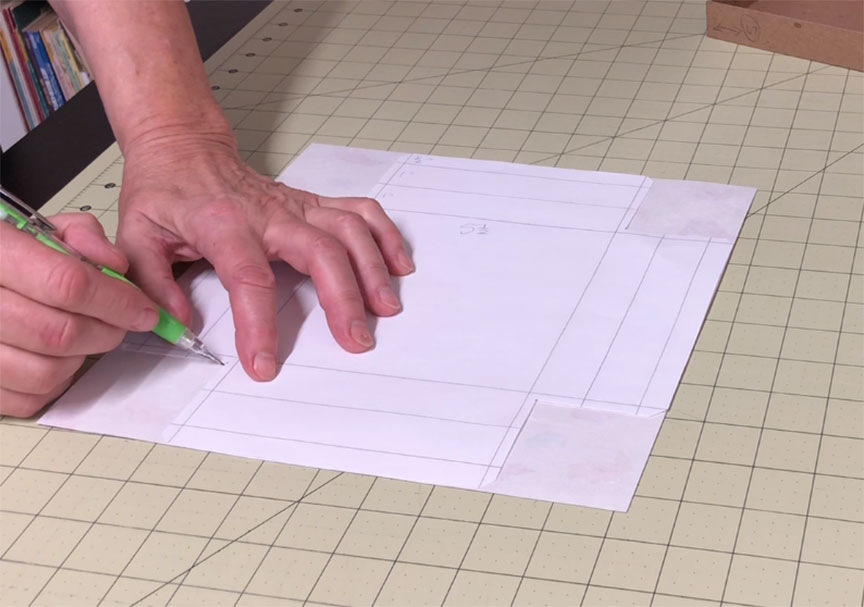
Cut the bookcloth according to your drawn guidelines. The last thing I do to prepare this bookcloth is to score along the lines by the small margins. Some of these margins will fold all the way over and scoring them makes this a little easier and neater looking.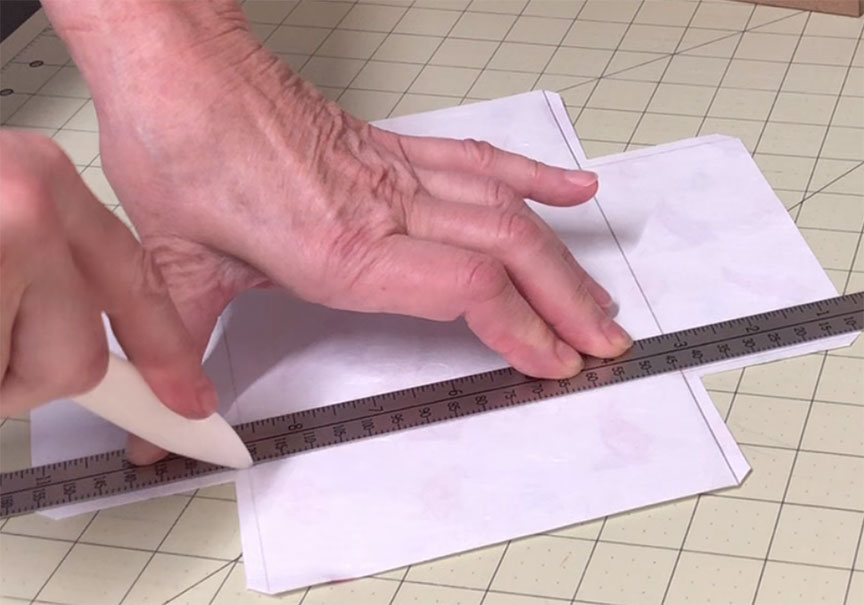
Start by Gluing the Main Lid Surface
Once you have the guides drawn and scored you can gather your gluing supplies. You can glue these final pieces with regular PVA glue.
Start by applying glue to the main surface of the lid. You don’t have to be particularly neat about this as you will be gluing the other sides in a minute. Carefully line this up on your bookcloth according to the guidelines you previously drew and press it firmly down.
 Turn the lid over and burnish the bookcloth down with a bone folder to make sure it’s completely adhered. Place a barrier paper between the bookcloth and the bone folder just to make sure you don’t damage the surface of the bookcloth.
Then Glue the Edges
Next, apply glue to one of the edges. Fold the bookcloth up and press it firmly to the side. Then apply glue to the inside of the edge bookboard, as well as the leading edge of the bookcloth and the little flaps on either side. Press all of this to the inside of the lid, paying particular attention to pushing the bookcloth carefully down into the corners. Try to do this as smoothly as possible.
 Use your bone folder to push the bookcloth into the corners and smooth it down along the edges. Be sure to glue the small flaps to the other edges. This overlap will help ensure that all of the bookboard is covered. Repeat this process on the opposing side.
Glue Down the Last Two Flaps
Now you’ll finish off the outside of the lid by gluing down the last two flaps. The small tabs on these flaps will be treated differently than the previous ones.
 These tabs you’ll want to fold in and glue to the flaps themselves. This will give you a nice clean edge when you fold the flaps over and is the reason that you scored these lines earlier on.
So, start by dabbing some glue on those tabs and folding them over. You won’t be able to fold them over all the way down to the corner yet, because of the little bit of excess you left there, but push them together as far down as possible.
 Once you have these tabs more-or-less glued down apply glue to both sides of the bookboard along that edge. Apply a bit of glue to the tops of those tabs you just glued down, to make sure they get glued to the bookboard. Also apply glue along the leading edge of the bookcloth.
 Fold the bookcloth up and over the edge, pressing it down firmly all along the way. Use your bone folder to smooth all the edges and to press the bookcloth into the corner.
Apply the Liner to the Inside of the Lid
One more step and you’re done with the basic box. The last thing to do is to apply the inner lining to the lid. The liner should fit loosely within the lid with about 1/8 inch of space on each side. It should cover all of the edges of the bookcloth.
 Place the liner paper upside down on a piece of scrap paper and cover that side with PVA glue. Center it inside the lid and press it down firmly, paying special attention to the edges.
Weight and Dry
Place some waxed paper inside and add some weights. Allow this to dry thoroughly.
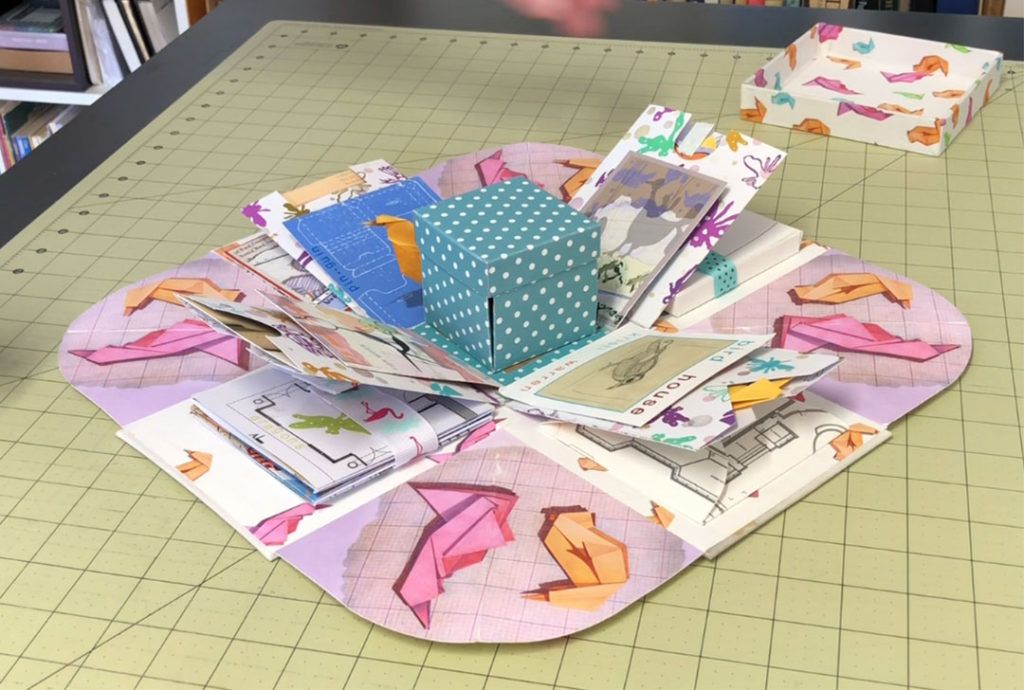
 That finishes the basic explosion box. The next step is to add elements to the inside. Visit the Part 2 tutorial to see how to make a variety of interesting inserts for the interior of the box, including the popular Squash Book and Waterfall Card.